Auto trim clips are the small, plastic fasteners that hold your car's interior and exterior panels together. They’re the critical, behind-the-scenes hardware that stops rattles, secures door cards, and gives your car's cabin that clean, finished look.
The Unsung Heroes of Your Car's Interior
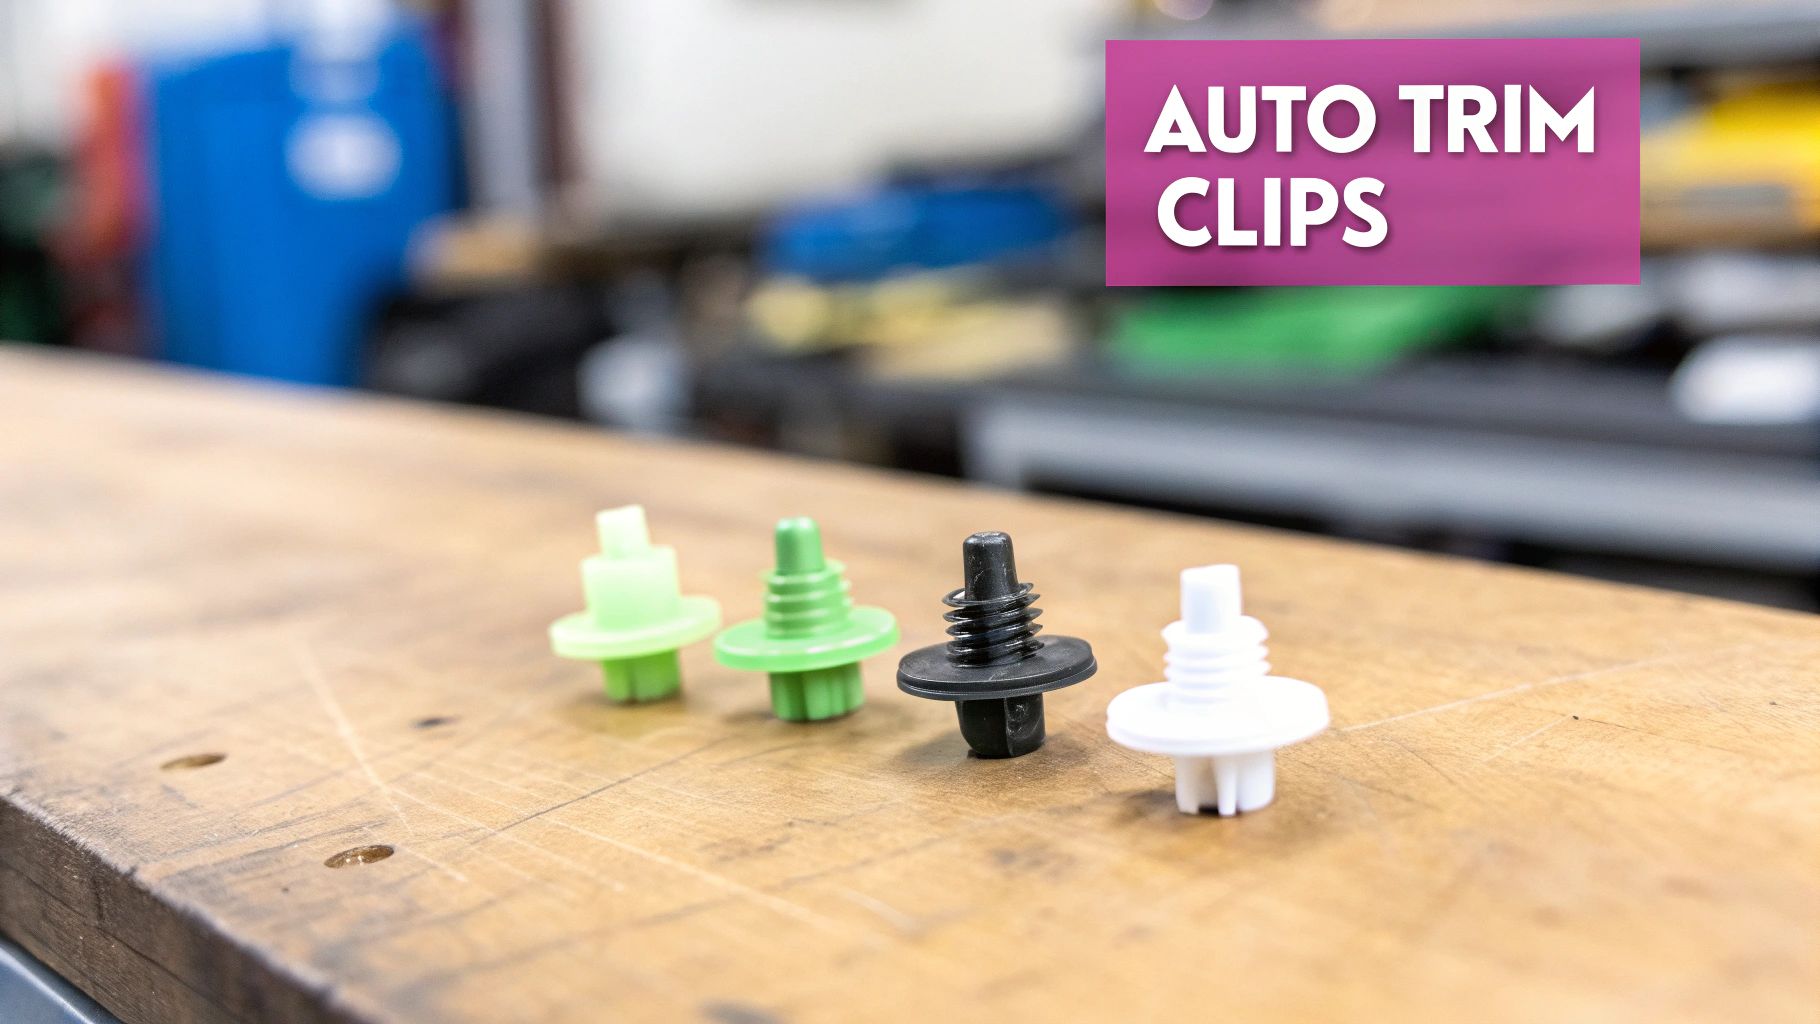
Ever wondered what keeps all the pieces of your car's interior from falling apart? It’s not just glue and screws. The real magic lies in an assortment of cleverly designed auto trim clips. These small but essential fasteners are what hold everything from door panels and dashboard pieces to headliners and trunk linings in place.
Their job is to form a solid, secure bond between a trim piece and the car’s metal body. Without them, you’d be dealing with constant buzzing, rattling, and panels that eventually just come loose. In fact, industry data shows that up to 70% of cabin noise complaints unrelated to the engine or road are linked to loose interior trim. A good clip means a snug, quiet fit that’s built to last.
More Than Just Plastic Fasteners
As car design has changed, these little clips have become more important than ever. Automakers are always looking for ways to cut weight to boost fuel economy and increase the range of electric vehicles. This has pushed the industry away from old-school metal fasteners toward lightweight and durable plastic alternatives.
This shift comes with some big wins:
- Weight Reduction: Plastic clips are a fraction of the weight of their metal counterparts, which adds up to real weight savings across the entire vehicle.
- Corrosion Resistance: Plastic doesn't rust. This is a huge advantage for clips tucked away inside doors and other areas exposed to moisture.
- Vibration Damping: The natural flexibility of plastic helps absorb small vibrations, making the cabin quieter and the ride more comfortable.
The market for these parts is surprisingly huge. The automotive plastic clips market is valued at USD 1.2 billion and is growing fast, with a projected compound annual growth rate (CAGR) of 6.8% through 2032.
Common Types of Auto Trim Clips
Not all clips are made the same. They're engineered in countless shapes and sizes, each for a very specific job. For example, a push-in retainer for a door card has fins that flare out behind the panel to lock it in place, while a "fir tree" clip for a fender liner has a ribbed design for a super-tight, permanent grip.
Practical Example: If you've got a loose piece of trim on your door panel, a broken auto trim clip is almost always the cause. Popping in a new one—a part that costs pennies—can make the panel factory-tight again and get rid of that annoying rattle instantly.
To help you get your bearings, here's a quick reference guide to some of the most common clip types and where you’ll typically find them.
Common Auto Trim Clips and Where to Find Them
| Clip Type | Primary Use | Common Locations |
|---|---|---|
| Push-Type Retainer | Securing panels and splash shields | Door panels, fender liners, bumpers, engine bay covers |
| "Fir Tree" Clip | Permanent or semi-permanent fastening | Fender flares, weatherstripping, carpeting, headliners |
| Molding Clip | Attaching exterior chrome or plastic trim | Window moldings, rocker panels, body side moldings |
| Panel Clip | General-purpose interior panel attachment | Door cards, dashboard components, center consoles |
Knowing the basics can make any interior or exterior repair job much less intimidating. It's worth noting that automotive clips are a specialized subset of a broader category; you can find all sorts of different types of push-fit fasteners and connector sets used across countless industries. But for car work, understanding these main types will give you a solid head start.
How to Find the Exact Trim Clip for Your Car
Trying to find the right auto trim clip can feel like searching for a needle in a haystack. With thousands of different clips out there, it's incredibly easy to grab the wrong one. In fact, a recent survey found that almost 40% of DIY automotive repairs get held up because of incorrect replacement parts. That’s a headache you can definitely avoid.
The trick is to be methodical. The most reliable way to find a perfect match starts with the old clip, even if it’s in pieces. Before you just rip a panel off, grab a non-marring pry tool and gently work the old clip out. The more of it you can save, the easier your search will be.
Start with What You Have
Your first move is to play detective with the original fastener. Even a broken clip is packed with clues that will help you narrow your search from an ocean of options down to just a handful.
Here’s what you need to zero in on:
- Head Style: Take a look at the top. Is it flat, perfectly round, or does it have that classic "fir tree" shape?
- Stem Design: Check out the part that pushes into the hole. Does it have fins, ridges, or is it just a smooth shaft?
- Dimensions: This is where precision matters. Break out a digital caliper and measure the head diameter, the total stem length, and the diameter of the stem itself (the part that fits into the hole).
Don't skip the measurements. Being off by a single millimeter can be the difference between a clip that snaps in tight and one that just rattles around every time you hit a pothole.
A Practical Example: Finding a Door Panel Clip
Let's walk through a real-world scenario. Say you're fixing a loose interior door panel on a 2018 Ford F-150—a super common job. You carefully pry the panel back and find a busted white nylon clip.
First, you'd measure the old clip's key dimensions. Let's say the head diameter comes out to 20mm, the stem is 18mm long, and it's designed for a 9mm hole. With these three numbers, your search just got a whole lot easier.
You can now search online for "Ford F-150 door panel clip 9mm hole" or just bring the broken part to an auto parts store. With those specs, any employee can quickly find the exact match, making sure you walk out with the right part on your first try.
OEM vs. Aftermarket Clips
As you search, you’ll run into two main types of clips: OEM (Original Equipment Manufacturer) and aftermarket.
OEM clips are the real deal—identical to what the factory installed. They guarantee a perfect fit but usually come with a higher price tag, and you often have to buy them one at a time.
Aftermarket clips, on the other hand, are made by other companies. Quality can be a mixed bag out there, but our advantage is that we source high-quality, precision-engineered clips that match the fit and durability of OEM parts without the dealership price. You can typically buy them in multi-packs, which saves you money and leaves you with spares for the next project. For most repairs, a good aftermarket auto trim clip is the smartest way to go, giving you the best bang for your buck.
The Right Way to Remove and Install Auto Trim Clips
Replacing a trim clip seems like a tiny job, but get it wrong, and you can quickly turn a simple fix into a much bigger headache. I've seen it countless times—someone grabs a metal screwdriver, tries to pop off a panel, and ends up with a deep scratch in the paint or a cracked piece of plastic. In fact, studies of DIY car repairs show that over 30% of cosmetic damage happens during trim removal. It’s a completely avoidable mistake if you just have the right approach.
The secret isn’t brute force. It's about having the right tools and using the right technique. Before you even touch the car, get yourself a set of non-marring plastic pry tools. They're specifically designed to be softer than your car's trim, so you can apply plenty of pressure without leaving a single mark.
Getting Ready for a Flawless Repair
First things first, set up your workspace. Good lighting is non-negotiable; you need to see exactly where those clips are hiding. I also like to lay down a soft blanket or an old towel right below the panel I’m working on. It’s saved me from scratching a panel more than once and catches any clips that inevitably try to escape.
With your space prepped, take a second to inspect the trim piece itself. Gently run your fingers along the edges to feel for the little bumps or indentations where the clips are likely located. This gives you a mental map of where you need to apply pressure.
Pro Tip: Don't underestimate the weather. Plastic gets incredibly brittle when it’s cold, making it way more likely to snap. If you're working in a chilly garage, grab a hairdryer on a low setting and gently warm up the panel. It sounds simple, but this little step can save you from a world of frustration.
This diagram lays out the basic discovery process, which is all about finding the right clip before you start pulling things apart.
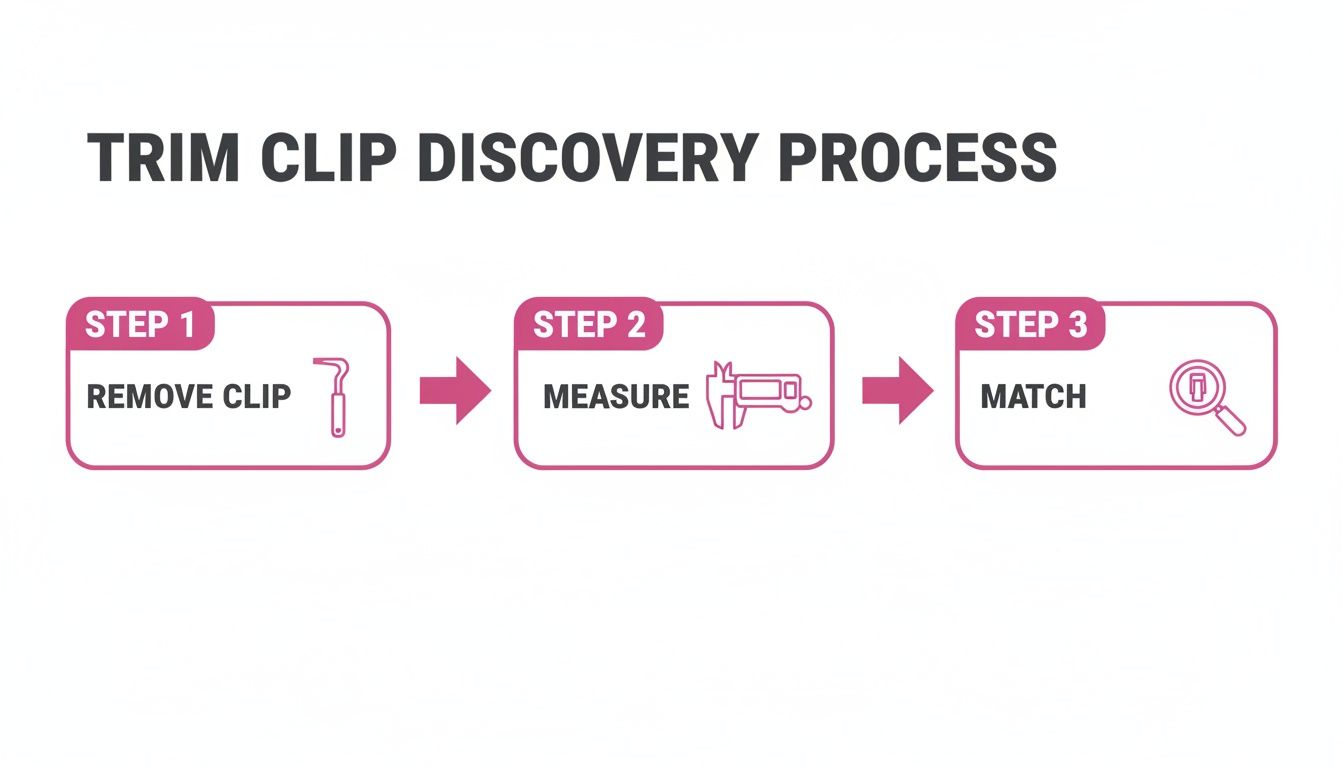
Following a methodical process like this ensures you have the correct replacement parts on hand and are ready for a smooth installation.
Making the Swap: Removal and Installation
Okay, grab your pry tool. Find a small gap where you can gently slide it under the panel's edge, right near where you think the first clip is. Work the tool in slowly and apply steady, even pressure. You’ll feel a little give, and then a "pop" as the clip releases. Resist the urge to just rip the panel off—that’s how you break things.
Once the first clip is free, just move along to the next one and do it again. Work your way around the entire panel until it comes off cleanly.
Here’s a real-world scenario that pops up all the time:
The Challenge: You're replacing the clips on a trunk liner. The panel is off, but the base of a broken clip is stuck in the metal frame.
- What to Do: Don't try to pry it out from the front. Instead, grab a pair of needle-nose pliers and see if you can get behind the mounting hole. Squeeze the little locking tabs on the back of the broken clip together and push it forward, out of the hole.
- Why It Works: This releases the clip's tension without damaging the mounting hole or chipping the paint around it.
With all the old clips and broken bits out of the way, you're ready to install the new ones. Give the area around the mounting holes a quick wipe with a microfiber cloth to get rid of any dust or debris.
Putting the new clips in is usually the easy part. Just line up the new clip with the hole in the car's frame and press it in firmly. You should hear a nice, solid "click" when it seats correctly. After that, line up the trim panel with your new clips and give it a firm tap with the palm of your hand right over each clip location. You’ll feel it lock into place, sitting flush and secure.
The Big Switch: Why Plastic Clips Replaced Metal Fasteners
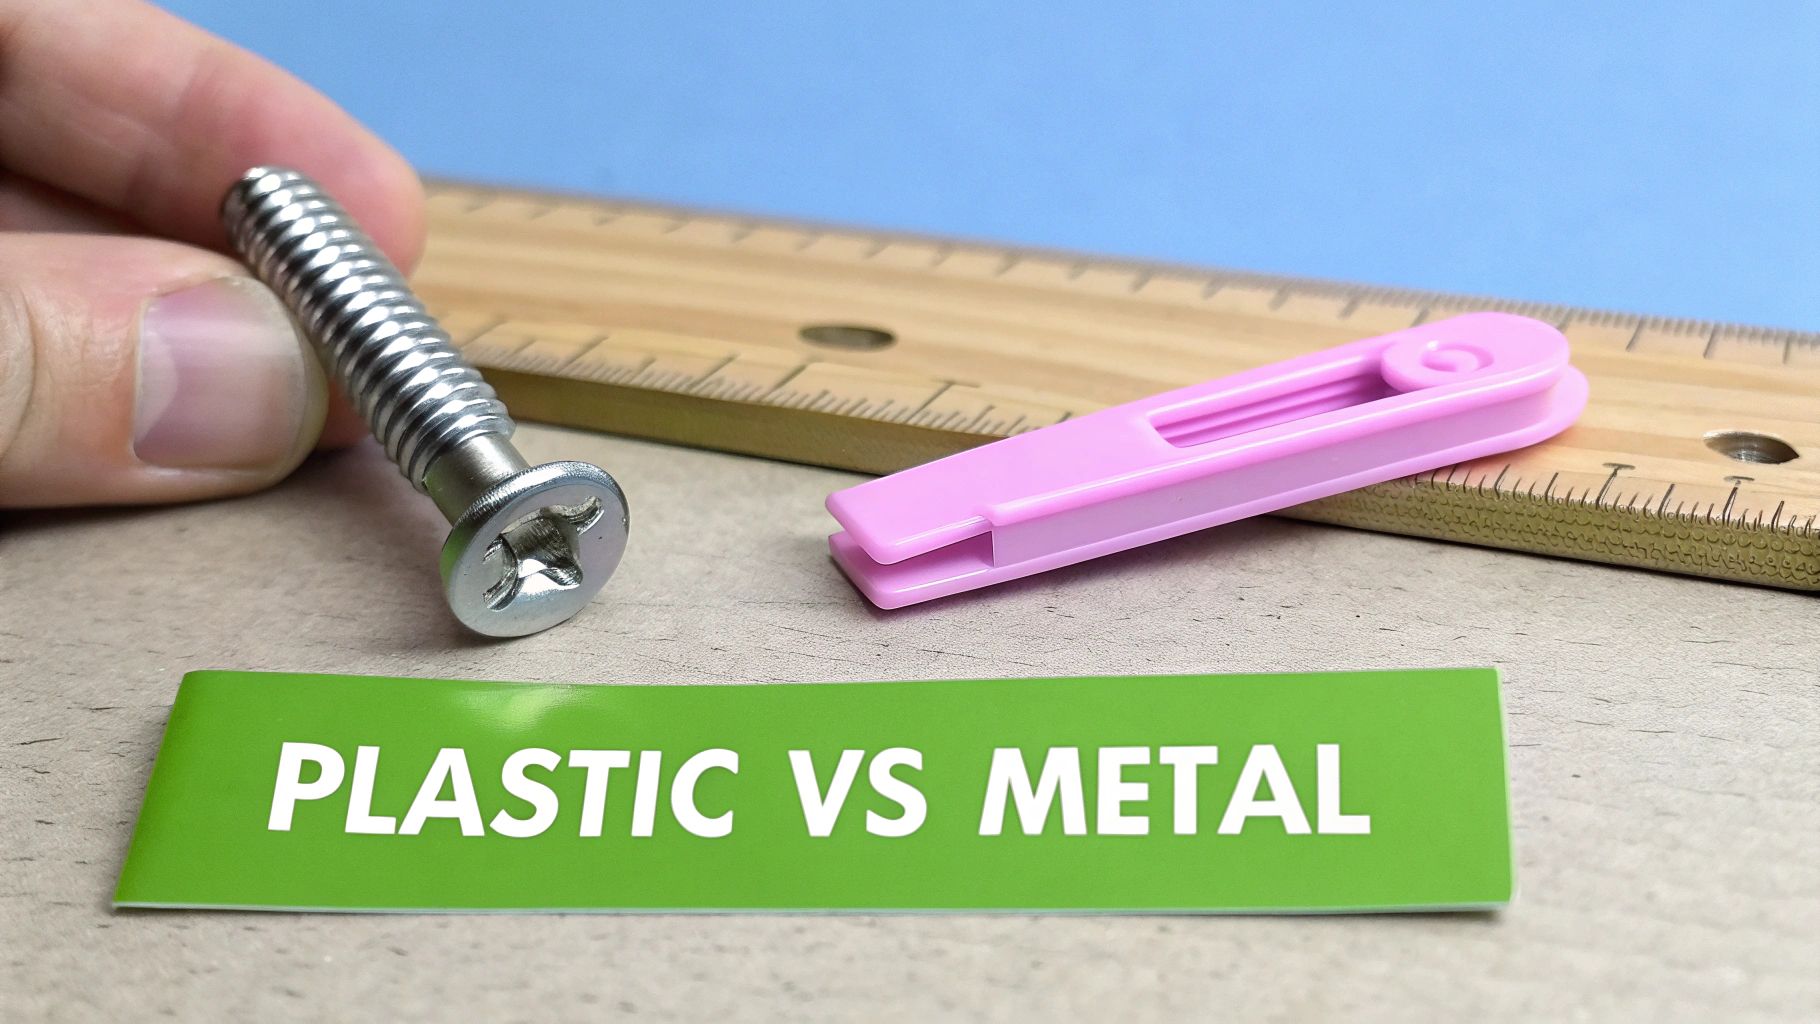
If you’ve ever pulled apart a classic car, you know the drill: metal screws, heavy bolts, and solid fasteners holding everything down. But try popping the door panel off a modern car, and you’ll find a completely different world—one dominated by lightweight plastic.
This wasn't just a cost-cutting move. The industry's move toward auto trim clips made from engineered plastics was a deliberate engineering decision, driven by some of the biggest trends shaping how cars are built today. Manufacturers are always chasing better efficiency, and that means every single component, no matter how small, gets a hard look.
It's All About the Weight
The number one reason for the switch is weight reduction. It might not seem like much, but swapping out thousands of metal fasteners for plastic ones can slash the weight of a vehicle's fastening systems by 40% to 60%.
That adds up fast. For gasoline cars, less weight means better fuel economy. For electric vehicles, it's even more critical—it means longer range. This one change has a ripple effect, allowing for lighter support structures and improving the car's overall performance. If you want to see this evolution up close, check out something like a comprehensive body fastener kit, which usually contains a mix of both types for different jobs.
One of the best side effects of using plastic clips is a quieter ride. Their natural flexibility helps absorb and dampen tiny vibrations that metal fasteners would just transfer straight into the cabin. The result? Fewer of those annoying buzzes and rattles.
More Than Just a Lighter Option
But weight is only part of the story. Plastic brings a handful of other key advantages to the table, making it a better choice for securing trim panels and other components. These benefits make a real difference in the long-term comfort and durability of your vehicle.
Here’s what else makes them so useful:
- No More Rust: Metal screws and bolts can rust and seize up, especially in damp spots like door interiors or fender liners. Plastic clips, on the other hand, are totally immune to corrosion. This means you can actually get them out without breaking them years later.
- Faster Assembly: These clips are designed for speed. On the assembly line, their snap-fit design means they can be installed in a flash, often without any tools. That’s a massive win for manufacturing efficiency.
- Smarter Designs: You can mold plastic into almost any complex shape you can imagine. This lets engineers create custom clips that do more than one job at once, like holding a wiring harness in place while also securing a panel.
The growth of this market shows just how important these little parts have become. The automotive plastic fasteners market is expected to grow from USD 2.06 billion to a massive USD 4.90 billion by 2035. It's clear the industry is all-in on these components. At the end of the day, the plastic clip isn't just a cheaper part—it’s a smarter one.
Common Mistakes to Avoid During Your Repair

I've learned over the years that the best way to get a DIY repair right is to study how others got it wrong. A simple job like replacing auto trim clips can quickly turn into a headache if you're not paying attention, causing damage that's far worse than the original problem. The goal here is to work smart, not just muscle through it.
One of the most common blunders I see is people reaching for whatever's handy instead of the right tool. Trying to pry off a panel with a flathead screwdriver is a classic rookie move, and it's a surefire way to gouge your plastic trim or scratch your paint. Suddenly, your small fix has become a much bigger cosmetic problem.
Using the Wrong Tools and Techniques
The line between a clean, professional-looking repair and a damaged panel often boils down to one word: leverage. A proper non-marring pry tool is designed to distribute pressure evenly. It’s also made from a plastic that’s softer than your car's trim, which is exactly what you want to prevent scratches and gouges.
Another mistake is applying brute force in a single spot. You should never just yank on a panel until it gives. Instead, think of it as a methodical process.
- Don't Do This: Wedge a screwdriver under a corner and pull until you hear a sickening crack.
- Do This Instead: Slide a plastic pry tool near a clip, apply firm and steady pressure until it pops free, and then move on to the next one. This patient approach is how you get a panel off cleanly and without drama.
Mismatched Clips and Poor Preparation
Using the wrong replacement clip is another trap people fall into. It might look "close enough" at a glance, but a tiny difference in size or shape can mean it never seats properly. The result is a panel that buzzes, vibrates, and eventually works itself loose all over again.
Always match your new auto trim clips to the old ones precisely. Measure the head, stem, and hole diameter to ensure a perfect fit that will hold securely for years to come.
Finally, don't skip the prep work. It's tempting to just pop the new clip in and be done, but take 30 seconds to clean the area first. Wipe down the mounting hole and the panel itself. Any lingering dirt, dust, or bits from the old broken clip can prevent the new one from locking in securely, defeating the whole purpose of the repair.
This kind of attention to detail is what separates the pros from the amateurs. It’s also what drives the massive global automotive fasteners market, which was valued at USD 31.41 billion in 2023. By digging into the automotive fasteners market growth, it becomes clear that getting the small things right matters. Avoiding these common mistakes ensures your DIY repair meets that same high standard.
Got Questions About Auto Trim Clips? We've Got Answers
Let's dive into some of the questions that pop up most often when you're tackling a trim repair. Getting these details sorted out is what separates a frustrating afternoon from a clean, professional-looking job you can be proud of.
Can I Get Away with Reusing Old Trim Clips?
Honestly, you really shouldn't. Think of most auto trim clips, especially those common push-in "fir tree" types, as single-use fasteners. They're designed with flexible fins that collapse to go into a hole and then expand to lock in place. Once you pry them out, those fins are almost always weakened, bent, or damaged.
Tempting as it is to just pop an old one back in, a compromised clip is the number one cause of a loose or rattling panel. In fact, some studies show that nearly 25% of DIYers who reuse fasteners report new rattles after a repair. Clips are cheap; a secure, factory-tight fit is priceless. Always start fresh.
What Tools Do I Absolutely Need to Replace Trim Clips?
Working on interior panels without the right tools is a recipe for disaster—scratched paint, cracked plastic, and a whole lot of regret. The most critical tool in your arsenal is a good non-marring plastic trim removal kit. These are specifically shaped to give you leverage without gouging your car's delicate surfaces.
A few other items will make your life a whole lot easier:
- Clip Pliers: These specialized pliers are designed to get underneath a clip's head and pop it out cleanly, which is a lifesaver for stubborn ones.
- Needle-Nose Pliers: Perfect for fishing out the broken-off stems of old clips that get stuck in the mounting holes.
- A Soft Towel or Blanket: Always a good idea to lay one down on the door sill or seat below where you're working. It’ll catch a dropped tool or prevent a panel from getting scuffed if it slips.
So, Where's the Best Place to Buy Replacement Clips?
You’ve got a few great options, and the best one really depends on your situation.
If you need a very specific, hard-to-find clip and want a guaranteed OEM (Original Equipment Manufacturer) match, your local car dealership's parts counter is the way to go. It's often the priciest route, but it's a sure thing.
For the best bang for your buck, online retailers and specialty auto fastener sites are fantastic. They offer a massive selection, and you can often buy assortment kits that cover a whole range of common sizes for your vehicle's make.
Here's a real-world scenario: Imagine you're pulling the door panel off your Honda Civic. You’ll probably encounter three or four different clip styles. Instead of tracking each one down individually at the dealer, you can buy a "Honda Trim Clip Assortment" kit online that has all of them, saving you a ton of hassle and cash.
And of course, for those times you need a clip right now, you can't beat your local auto parts store. The best part is you can bring your old, broken clip with you and match it up on the spot to make sure you're walking out with the perfect replacement.