If you're serious about getting results on Instagram, getting your video formatting right isn't just a nice touch—it's essential. The platform's algorithm is all-in on video, which means the technical nitty-gritty of your content directly impacts how many people see it. Think of it as the first, most critical step to success.
So, why the heavy focus on video specs? It all comes down to keeping users engaged. Instagram’s AI recommendation engine is now responsible for pushing over 50% of all content people see. These video suggestions have already led to a 24% jump in the time users spend on the platform. In short, Instagram rewards creators who upload perfectly formatted, high-quality videos because that's what keeps people scrolling.
The Numbers Don't Lie
The data paints a pretty clear picture. On average, video posts on Instagram see 21.2% more engagement than static images. This preference is so strong that video now makes up 60% of the total time people spend on the app. If you're a creator or a marketer, that’s a massive signal telling you where to put your energy. For a deeper dive, you can check out more of these Instagram marketing statistics at Cropink.com.
Let's look at a practical example. Imagine a coffee shop launching a new seasonal latte.
- Bad Formatting: They upload a standard horizontal (16:9) video of the barista making the drink to Reels. It shows up with huge black bars at the top and bottom, looks sloppy, and takes up way less screen space. Most users, accustomed to full-screen content, will just scroll right by.
- Good Formatting: They post a vertical (9:16) version instead. It fills the entire screen, grabbing your attention instantly with a close-up of the latte art. This immersive feel is exactly what the algorithm is designed to promote.
Reels are Your Golden Ticket
This is especially true for Reels, which is by far Instagram's fastest-growing feature. Reels boast an average reach rate of 30.81%—nearly double that of any other post type. When you format your Reel correctly, you're not just posting content; you're playing by the rules that Instagram's algorithm uses to decide what gets seen and what goes viral.
Mastering Instagram's technical video requirements isn't just about making things look good anymore. It's a strategic move to get the platform's powerful AI on your side, pushing your content out to a bigger, more receptive audience.
Mastering Instagram Video Specs for Every Format
Trying to get your video specs right for Instagram can feel like a moving target. With Feed posts, Reels, and Stories all demanding different things, it's easy to get lost in the technical weeds. But nailing these details is what separates a sharp, professional-looking video from one that’s blurry, awkwardly cropped, or just completely ignored by the algorithm.
Think of it like this: your content is the star of the show, but the technical format is the stage it performs on. If the stage is wrong, the performance falls flat. Let’s break down the must-know specs for each placement so you can stop guessing and start uploading with confidence.
This infographic really drives home why getting your video formatting right is so critical for performance.
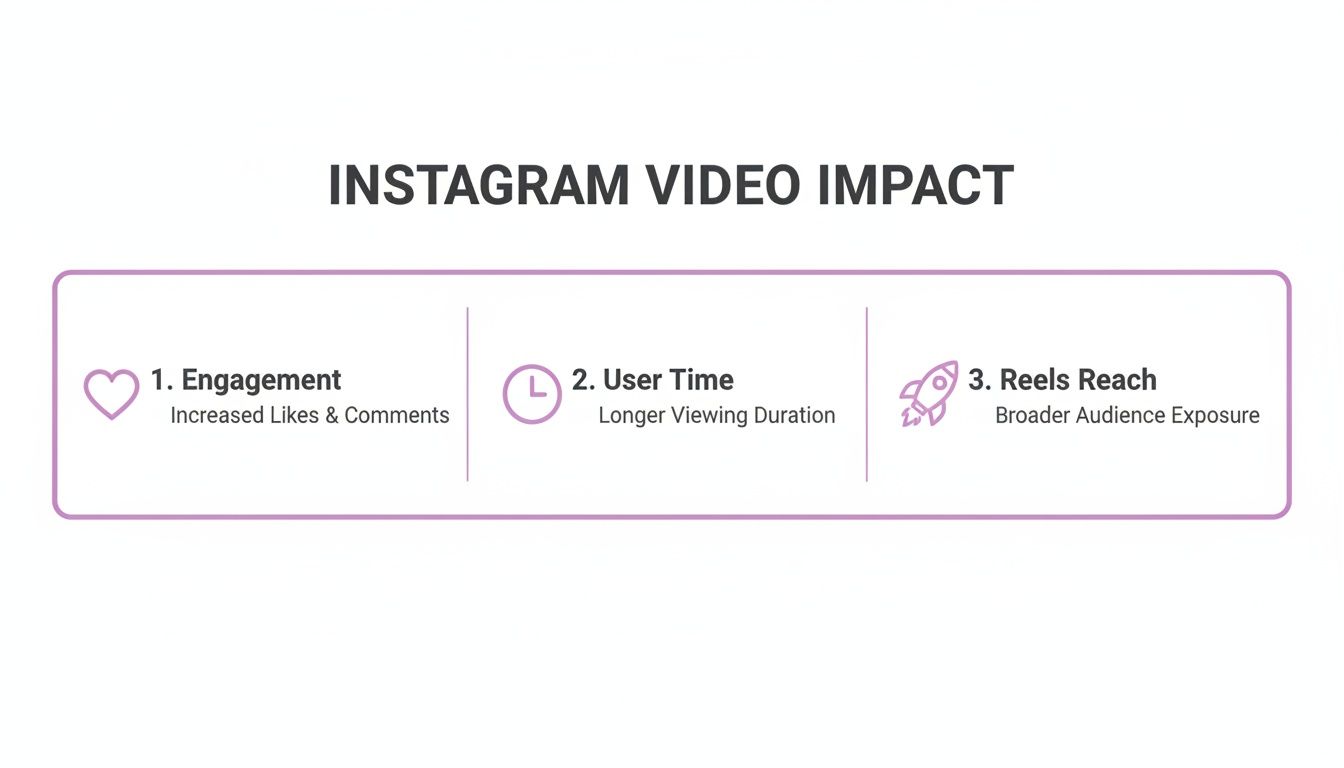
As you can see, properly optimized video isn't just a vanity metric; it directly boosts engagement and reach, making it a powerful strategic tool.
Feed Videos: The Battle for Screen Real Estate
For your main Instagram Feed, the name of the game is grabbing as much screen space as you can to stop that endless scroll. While you can technically post a square (1:1) or even a landscape (1.91:1) video, the real winner is the vertical 4:5 aspect ratio. Why? It simply fills more of the phone's screen, making your content more immersive and much harder to just flick past.
For a practical example, imagine you're a fitness coach posting a workout clip. In a square format, you might have to choose between showing proper form for a squat or your face explaining the movement. But with a 4:5 frame at 1080 x 1350 pixels, you have enough vertical room to show both, creating a much more compelling and complete picture for the viewer.
For the best results, export your Feed videos as an MP4 file with the H.264 codec and a frame rate of 30 fps. This combination is Instagram's preferred language, ensuring your video looks crisp and plays without a hitch.
Reels and Stories: The Full-Screen Experience
When it comes to Reels and Stories, there's no room for compromise. These formats are built for a full-screen, vertical experience, which means the 9:16 aspect ratio is non-negotiable. If you try to upload anything else, you'll get those dreaded black bars on the top and bottom, which is an instant signal to viewers that this content wasn't made for them.
You’re aiming for a high-impact, mobile-first look. The magic numbers here are 1080 x 1920 pixels at 30 fps. To keep things looking sharp after Instagram applies its own compression, shoot for a bitrate somewhere between 4-8 Mbps. This ensures your video fills the entire screen and looks fantastic.
Pro Tip: Sticking to the 9:16 format for Reels and Stories does more than just look good. It tells both your audience and the Instagram algorithm that you've created content specifically for the platform, which can seriously boost its potential for engagement and reach.
Instagram Video Format Cheat Sheet
To make this all a bit easier to remember, I've put together a quick cheat sheet with the key technical specs. Keep this handy, and you'll be exporting your projects perfectly every time. And if you ever get stuck on resizing a video, our guide on how to convert video aspect ratio can walk you through it.
| Specification | Instagram Feed | Instagram Reels | Instagram Stories |
|---|---|---|---|
| Aspect Ratio | 4:5 (Vertical) | 9:16 (Vertical) | 9:16 (Vertical) |
| Resolution | 1080 x 1350 px | 1080 x 1920 px | 1080 x 1920 px |
| File Format | MP4 | MP4 | MP4 |
| Video Codec | H.264 | H.264 | H.264 |
| Frame Rate | 30 fps | 30 fps | 30 fps |
| Bitrate | 3.5 – 5 Mbps | 4 – 8 Mbps | 4 – 8 Mbps |
| Audio | AAC | AAC | AAC |
Bookmark this table or take a screenshot! Having these numbers on hand will save you a ton of time and help you maintain a high standard of quality across all your Instagram video content.
Finding the Optimal Length for Your Instagram Videos
Beyond the technical stuff like aspect ratios and codecs, the length of your video is one of your most powerful strategic tools. Instagram lets you post longer videos these days, but let's be real—user behavior screams that shorter, punchier clips almost always win the engagement game. The trick is to match your video's duration to what you're actually trying to accomplish.
Think about it like this: are you trying to stop someone mid-scroll, or are you aiming to teach them something and build a real connection? Your answer determines whether you're making a quick 15-second Reel or a more detailed 90-second tutorial. Each goal has its own "sweet spot" for video length.
The Sweet Spot for Peak Engagement
If your main goal is to rack up likes, comments, and shares, the data is pretty clear. A ton of marketing research, including feedback from 71% of marketers, shows that short-form videos between 30 seconds and 2 minutes get the best results.
Digging even deeper, videos that are at least 26 seconds long tend to get the highest engagement. Many social media managers have found that exactly 30 seconds is a powerful target for hitting top performance on Instagram.
This length is perfect for things like:
- Product showcases: A practical example is a 30-second Reel showing a skincare product's texture and application, set to trending audio.
- Behind-the-scenes clips: Giving your audience a fast, authentic peek into your world.
- Quick tips or hacks: Delivering immediate value that people can use right away.
A 30-second video gives you just enough runway to tell a mini-story but is short enough to hold onto that fleeting attention span of someone scrolling their feed. It’s built for quick consumption and high interaction.
Aiming for Retention and Education
But what if your goal is different? If you care more about retention—keeping people watching—than just getting a quick like, the ideal length changes. For more in-depth educational content, videos between 1 and 2 minutes long have shown an average retention rate of around 56%. This gives you enough time to actually explain a concept, share a more detailed story, or walk through a tutorial without your audience dropping off.
This approach is a game-changer when your goal is to build authority and trust. A viewer who sticks around for 90 seconds is showing a much deeper level of interest than someone who just double-taps and moves on.
This longer format is a great fit for:
- Mini-tutorials: A chef showing a simple plating technique in a 90-second Reel.
- Customer testimonials: A client sharing a brief but powerful success story.
- Explainer videos: A SaaS company breaking down how their platform solves a specific problem.
At the end of the day, formatting videos for Instagram isn't just about pixels; it's about pacing. Before you hit record, ask yourself one simple question: is this video for a quick "wow" or a deeper "how"? Answering that will point you to the perfect length every time. For a deeper dive on this, you might want to check out our complete guide on Instagram Reel length.
Fine-Tuning Your Video for Maximum Engagement
Got the technical specs nailed down? Great. Now, let's talk about the details that transform a technically correct video into one that people actually stop and watch. These are the touches that separate the good from the great, turning passive scrollers into an active audience. It’s less about pixels and more about creating an experience that pulls people in.
Don’t Skip the Captions
This one is huge. If you take away only one thing, let it be this: a staggering 85% of videos on social media are watched with the sound off. Let that sink in. If your video’s message depends on audio, you’re missing out on the vast majority of your audience right from the start.
Adding clear, easy-to-read subtitles makes your content work for everyone, everywhere. Whether someone is in a noisy café, a quiet office, or is part of the deaf and hard-of-hearing community, captions make your video accessible and engaging. It's not just an accessibility feature; it's a strategic move that keeps viewers hooked.
If you're focusing on Stories, we've got a detailed breakdown on how to add captions to Instagram Stories.
Practical Example: A travel vlogger whose Reels had beautiful scenery but flat engagement saw their average watch time shoot up by 40% after adding dynamic, animated captions. The captions highlighted key moments and locations, allowing people to follow the story without plugging in headphones.
Your Thumbnail Is Your First Impression
Think of your video's thumbnail (or cover image) as its book cover. It’s what makes someone decide to either click play or keep on scrolling. When your video pops up on the Explore page or sits on your profile grid, a compelling cover is your best shot at earning that click.
Never let Instagram pick a random, blurry frame for you. It's a missed opportunity. Instead, you need to design a custom cover that’s:
- High-Quality: No pixelation. Keep it crisp and clear.
- Intriguing: For instance, a cooking Reel's thumbnail could be a mouth-watering shot of the final dish, making people want to see how it's made.
- On-Brand: Stick to your consistent fonts, colors, and logos to build brand recognition.
- Readable: If you add text, make it bold and big enough to be read on a tiny phone screen.
This simple step takes your video from looking like an afterthought to a polished, professional piece of content.
Polish Your Audio
Even though most people watch on silent, the quality of your audio is non-negotiable for the viewers who do turn the sound on. Nothing screams "amateur" faster than audio filled with distracting background noise, echoes, or a constant stream of "ums" and "ahs." It's an instant turn-off.
Using a tool to clean up your audio and remove filler words makes you sound more confident and authoritative. It results in a tighter, more professional video that respects your audience's time and attention. Clean audio is a powerful signal of quality.
By mastering these finer points—captions, covers, and clean audio—you elevate your content from just being on Instagram to truly performing on it. For another pro-level tactic, think about incorporating video and animation into carousels to really grab attention and drive results.
Common Video Formatting Mistakes and How to Fix Them
Even the most seasoned creators can trip up on small formatting details that end up tanking a video's performance. Getting these things right is non-negotiable when you’re formatting videos for Instagram. Let's walk through some of the most common pitfalls I see and, more importantly, how to sidestep them.
Blurry Videos After Uploading
It's one of the most frustrating things: your video looks crystal clear on your computer, but the second it hits Instagram, it turns into a pixelated mess. This almost always comes down to one thing: Instagram's aggressive compression. The platform automatically shrinks every video to save server space and help content load faster, but this process can butcher your video quality.
The usual suspects are a resolution that's too high or a mismatched bitrate. It sounds backward, but uploading a massive 4K video often gives you a worse final product because Instagram has to compress it so heavily to fit its standards.
The Fix:
- Export at 1080p: Always export your videos at 1080 pixels wide. This hits the sweet spot between quality and file size, giving Instagram's compression algorithm less work to do. For a vertical 4:5 Feed video, your dimensions should be 1080×1350 pixels.
- Nail the Bitrate: For a standard feed post, a bitrate of around 3,500 kbps (3.5 Mbps) works best. It's high enough to maintain visual quality but low enough to avoid triggering that heavy-handed compression.
The Dreaded Black Bars
Another classic mistake is forcing a horizontal (16:9) video into a vertical space like Reels or Stories. This creates those ugly black bars at the top and bottom, which shrinks your content and screams, "I didn't make this for you."
This is a bigger deal than you might think. Mobile users are conditioned to a full-screen, vertical experience—in fact, 94% of mobile users hold their phones vertically when browsing. When your video doesn't fill the screen, it feels out of place and engagement plummets.
The Fix:
- Shoot or Edit for Vertical: The solution is simple but crucial. Your content for Reels and Stories needs to be in a 9:16 aspect ratio. Period. This ensures your video takes up the whole screen, making it far more immersive and likely to hold a viewer's attention.
- Repurpose, Don't Just Repost: If you're working with existing horizontal footage, don't just upload it and hope for the best. Take a few extra minutes to crop it into a vertical frame, making sure the most important action is centered and visible.
By avoiding these two common traps—uploading oversized files and ignoring vertical formatting—you ensure your videos look polished and professional. This signals quality to both your audience and the Instagram algorithm, giving your content a much better chance to perform.
Got More Questions About Instagram Video Specs?
Even after you've got the basics down, a few tricky questions about formatting videos for Instagram always seem to pop up. Let's clear up some of the most common ones I hear from creators.
What's the absolute best video file format for Instagram?
Stick with MP4. It's the gold standard for a reason, offering the perfect sweet spot between high quality and manageable file size, which is exactly what you need for smooth mobile playback.
To really nail it, make sure your MP4 file is using an H.264 codec for the video and AAC for the audio. Think of this as the magic formula. It ensures your video looks and sounds great on just about any device after it goes through Instagram's compression machine.
Can I get away with posting a horizontal video to Reels or Stories?
Technically, yes, you can upload a horizontal (16:9) video. But should you? Absolutely not. It’s one of the biggest mistakes you can make.
Reels and Stories are built for a full-screen, vertical (9:16) world. A whopping 94% of people hold their phones vertically, and your content needs to match that behavior. Posting a horizontal clip leaves you with those huge, ugly black bars that scream "I didn't bother to format this." It looks lazy and instantly kills engagement.
For instance, imagine dropping a widescreen movie trailer into a Story. It shrinks down, feels disconnected, and gets lost on the screen. But if you take a moment to create a 9:16 cut, it becomes an immersive, powerful preview that commands attention.
Why does my video look so blurry after I upload it to Instagram?
This is a classic problem, and it almost always comes down to Instagram's compression. With over 2.4 billion monthly active users, they have to compress every single video to keep the platform running smoothly. If your video looks terrible after uploading, your original export settings were likely not what Instagram wanted.
To avoid that dreaded quality drop, give Instagram exactly what it's looking for. Export your video at 1080p resolution, shoot for around 30 fps, and keep the bitrate in check (a good range is 4-8 Mbps for Reels). It might feel counterintuitive, but uploading a 4K video often backfires, triggering even harsher compression. Sticking to 1080p is the safer, more reliable path to a sharp-looking final video.
Stop wasting hours on manual editing and start creating high-impact social clips in minutes. With Swiftia, you can automatically transform long videos into perfectly formatted, ready-to-post Reels and Shorts. Try it for free and see how much faster you can grow your audience. Learn more at Swiftia's website.