Changing a video's aspect ratio is all about resizing its frame to look great on different platforms. This usually means choosing between cropping in on the action, padding the frame with black bars, or using built-in presets in your editing software for specific formats like 16:9 widescreen for YouTube or 9:16 vertical for TikTok.
Getting this right is the difference between a video that looks polished and one that feels out of place.
Why Your Video Aspect Ratio Is a Big Deal
Before you dive into editing, let's talk about why this matters so much. The aspect ratio is the literal shape of your video—it’s the first thing your audience sees. A mismatch can instantly make your content look amateurish, with ugly black bars or, worse, key parts of your shot getting chopped off.
Imagine trying to force a beautiful, wide-angle landscape shot into a tall, skinny phone screen. It just doesn't work. The visual disconnect is jarring, and it’s a surefire way to make someone scroll right past your content.
A Quick Guide to Platform-Specific Aspect Ratios
The "one video fits all" approach is a thing of the past. Each platform has its own native viewing experience, and you've got to play by its rules. Here’s a cheat sheet to help you match your video to the right platform for maximum impact.
| Aspect Ratio | Common Resolutions | Where to Use It | Insider Tip |
|---|---|---|---|
| 16:9 (Widescreen) | 1920×1080 (1080p), 3840×2160 (4K) | YouTube, Vimeo, TV, Website Banners | The gold standard for cinematic, high-production content. Perfect for anything viewed on a desktop or TV screen. |
| 9:16 (Vertical) | 1080×1920 | TikTok, Instagram Reels, YouTube Shorts | This is the king of mobile. It fills the entire phone screen for a totally immersive experience that stops the scroll. |
| 1:1 (Square) | 1080×1080 | Instagram Feed, Facebook Feed | A super versatile format that grabs a ton of screen space in social feeds without making the viewer turn their phone sideways. |
| 4:5 (Portrait) | 1080×1350 | Instagram Feed, Facebook Ads | A great in-between format. It takes up more vertical space in the feed than a 1:1 square video, which helps it stand out. |
This is just a starting point, of course. Always double-check the latest specs for the platform you're targeting, as things can and do change.
A Quick Tip from the Trenches: Don't just slap a 16:9 video into a 9:16 project and hit export. According to research from Buffer, vertical videos on Instagram Stories drive a 157% increase in website traffic compared to square videos. When people see a poorly formatted video, they subconsciously assume the content isn't worth their time.
How We Got Here: From Old TVs to Modern Phones
This whole conversation is driven by how we watch stuff. Back in the early 2000s, everything was formatted for the boxy 4:3 TVs we all had. Fast forward to today, and the game has completely changed.
Global screen resolution stats show that the modern 16:9 widescreen format, especially at a 1920×1080 resolution, is now the most common display size in the world, holding a 9.35% market share.
This evolution means you have to be strategic. If you want to take a great widescreen YouTube video and make it work for Instagram, you can't just shrink it down. You need to reframe it thoughtfully. Getting a solid grip on the basics of what video resolution and aspect ratios mean is a huge help.
Choosing the Right Resizing Method for Your Content
So, you need to change your video's aspect ratio. This isn't just a technical tweak; it's a creative decision that shapes how your audience sees your story. When you're trying to fit a widescreen video into a vertical frame, you've got a few ways to tackle it. Each one changes the final look and feel, so picking the right one is key to keeping your message clear and your quality high.
The most straightforward approach is cropping. This means you essentially zoom into your original shot until it fills the new frame. It's a fantastic choice when your main subject is right in the middle, and losing the edges of the frame won't cut out anything important.
Then there's padding. You've probably seen this—it's when black bars are added to the sides (pillarboxing) or top and bottom (letterboxing) of the video. The big win here is that you preserve the entire original frame. Nothing gets lost. The trade-off? You lose that immersive, full-screen look that users on platforms like TikTok and Instagram Reels have come to expect.
And the last option? Stretching. This one is simple: it distorts your video, pulling it to fit the new dimensions. Honestly, this is almost never the way to go. It makes everything look warped and unprofessional, which can instantly turn viewers off.
A Practical Scenario: Cropping vs. Padding
Let's walk through a real-world example. Say you've got a 16:9 interview filmed for YouTube. The speaker is a little off-center, with some company branding and important text on a screen next to them. Now, you need to chop it up into a 9:16 clip for Instagram Reels.
-
If you crop: You could zoom in on the speaker and place them in the center of the vertical frame. This is great if their expressions and what they're saying are the only things that matter. But you'll lose the branding and the on-screen text entirely, which might strip away critical context.
-
If you pad: You could drop the original 16:9 video into the 9:16 frame, which leaves you with black space above and below. This keeps every single element—the speaker, the brand logo, the text—exactly as it was. The downside is that it just doesn't feel like a native Reel. It looks like a repurposed YouTube video.
If you're ever stuck, this decision tree is a great visual guide to help you pick the best ratio for your platform.
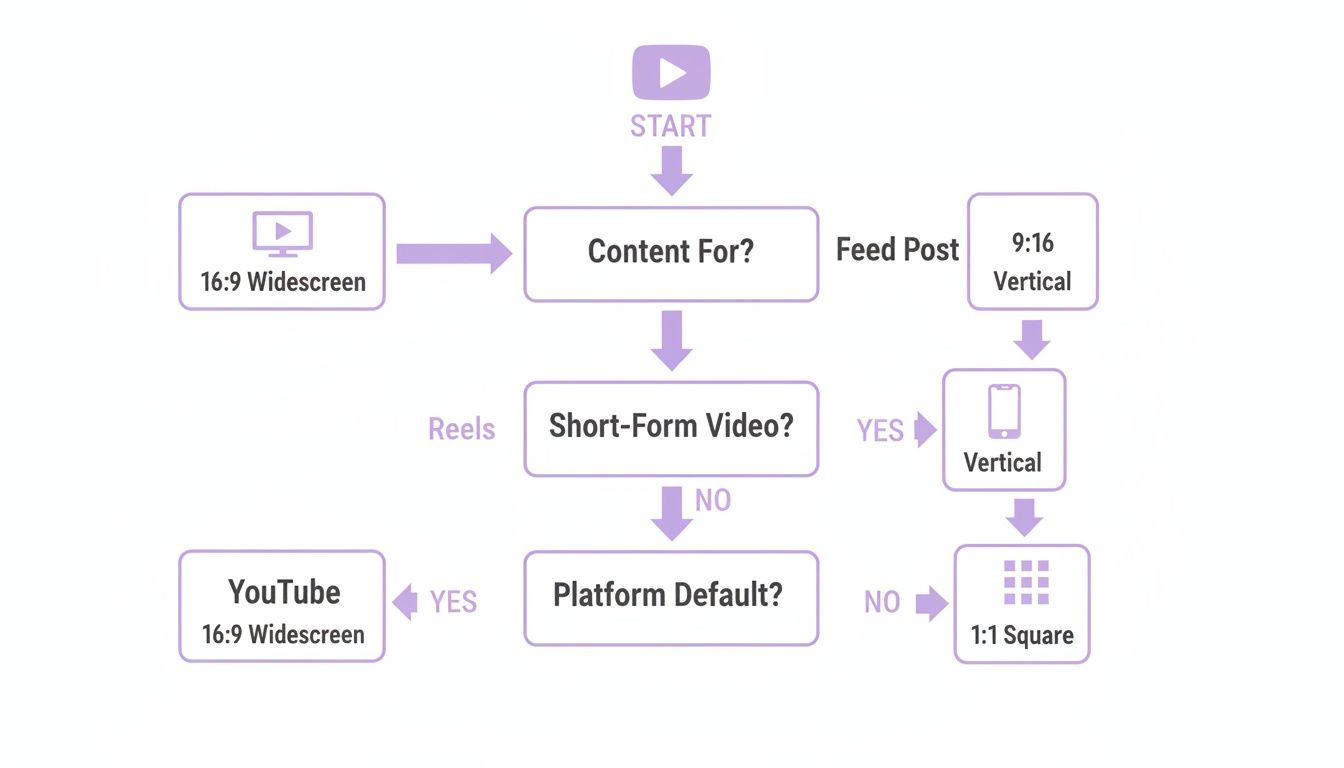
This flowchart gives you a quick path. Are you posting to a widescreen platform like YouTube? Or a vertical-first one like Reels? It helps steer you in the right direction from the get-go.
Making the Final Call
Ultimately, your choice comes down to what's most important in your shot. Is the person the absolute star, or does the background scenery play a crucial role?
You're always trying to find that sweet spot between visual appeal and keeping your information intact. A study on social media engagement found that vertical videos on some platforms can see up to 40% higher completion rates than horizontal ones. That's the power of making your content look like it belongs.
For platforms like YouTube Shorts, where a full-screen experience is everything, cropping is usually the best bet. If you're tackling that specifically, our guide on how to effortlessly resize a video for YouTube Shorts has you covered.
On the other hand, if you're creating a technical tutorial where viewers need to see every corner of the screen, padding might be the only way to avoid cutting off something vital.
A Pro’s Guide to Reframing in Adobe Premiere Pro
For anyone serious about video editing, Adobe Premiere Pro is often the tool of choice, and for good reason. It gives you an incredible amount of control over every single detail, especially when you need to change a video's aspect ratio. While it can look a little intimidating, once you get the hang of its reframing tools, you'll be able to produce polished, professional-looking results much faster.
The hands-on approach puts you in the director's chair. By playing with the Scale and Position settings in the Effect Controls panel, you get to decide exactly how your widescreen footage will look in a new vertical or square format. This is perfect for those shots where you need to make specific creative decisions, like following a subtle camera pan or zeroing in on a key detail in the background.
First, Set Up Your New Sequence
Before you even think about reframing, you have to build the right foundation: a sequence with your target dimensions. Please don't just drag your 16:9 clip onto the timeline and hope it works out. It won’t.
Instead, create a brand new sequence and punch in the frame size yourself. For a standard vertical video for TikTok or Instagram Reels, you’ll set this to 1080×1920. This way, your project is built correctly from the start, which helps you avoid a world of headaches when it's time to export.
With your vertical sequence ready, go ahead and drop in your 16:9 clip. You'll see it looking small, sandwiched between big black bars. That’s exactly what you want—it’s your blank canvas.
Everything you need from here on out is right there in the Premiere Pro interface, primarily in the Effect Controls panel.
This is where you'll see your adjustments in real-time, giving you immediate feedback as you tweak the framing.
The Magic of Auto Reframe
Let's be honest: manually adding keyframes to track a moving subject across the screen is incredibly boring and time-consuming. This is where Premiere Pro's Auto Reframe feature feels like a miracle. It uses AI to analyze your footage, figure out what the important part of the action is, and then automatically generates the keyframes to keep that subject perfectly centered in the new frame.
This feature is a huge time-saver. In fact, some editors have found that automated tools like this can slash the time spent on these kinds of repetitive tasks by up to 80%. That frees you up to spend more time on what actually matters—the storytelling.
Auto Reframe isn't just a nifty shortcut; it's a real strategic tool. It empowers a single editor to churn out content for multiple platforms in a fraction of the time, effectively doubling or tripling their output without needing to work twice as hard.
Reframing a Product Demo: A Real-World Example
Let's say you've got a 16:9 product demo for a new smartphone. The original shot is wide, showing a presenter holding the phone and pointing to its features. To make this work for a 9:16 Instagram Reel, the phone and the presenter's hands need to be the star of the show.
Here’s how you could tackle it:
-
The Manual Way: You’d start by scaling up the clip to fill the vertical frame. Then, you would have to painstakingly go through the video, adding keyframes to the Position property to manually follow the presenter’s hands as they move the phone around. It’s precise, but it can take ages.
-
The Auto Reframe Way: Simply right-click your clip and choose 'Auto Reframe Sequence'. Premiere Pro does its thing, analyzing the motion and locking onto the phone. The result is a smooth, professionally reframed clip that’s ready in seconds, not hours.
Even though Auto Reframe is incredibly powerful, it’s not always flawless. It's always a good idea to give the result a quick watch and tweak a few of the generated keyframes. Think of it as a very skilled assistant—it does 95% of the heavy lifting, giving you a fantastic starting point that just needs a quick final polish.
Mastering Aspect Ratios in DaVinci Resolve
For creators who demand professional-grade control without the subscription fees, DaVinci Resolve is a genuine powerhouse. It’s an all-in-one suite for editing, color correction, and visual effects, offering a ton of flexibility when you need to change a video's aspect ratio.
While it has a steeper learning curve than some editors, its precision is what draws in the pros. This isn't just about clicking a button; it's about making deliberate, creative choices that dictate how every single shot is framed.
Setting Up a Custom Timeline
Everything you do in Resolve is built on the timeline. Before you even think about importing your footage, you need to tell the software what kind of video you're making. Think of it like a blueprint for a house—you wouldn't start building without one, and you shouldn't start a video project without setting your timeline dimensions first.
The first move is always to create a new timeline and dial in its resolution manually. Let’s say you’re aiming for a perfect square video to catch eyes on an Instagram feed.
- First, head to File > New Timeline.
- In the pop-up window, make sure to uncheck "Use Project Settings." This gives you manual control.
- Under the Format tab, set the Timeline Resolution to 1080 x 1080.
Just like that, you’ve created a square canvas. Now, when you drop your original widescreen 16:9 footage onto it, the clip will appear with black bars, perfectly prepped for you to work your magic.
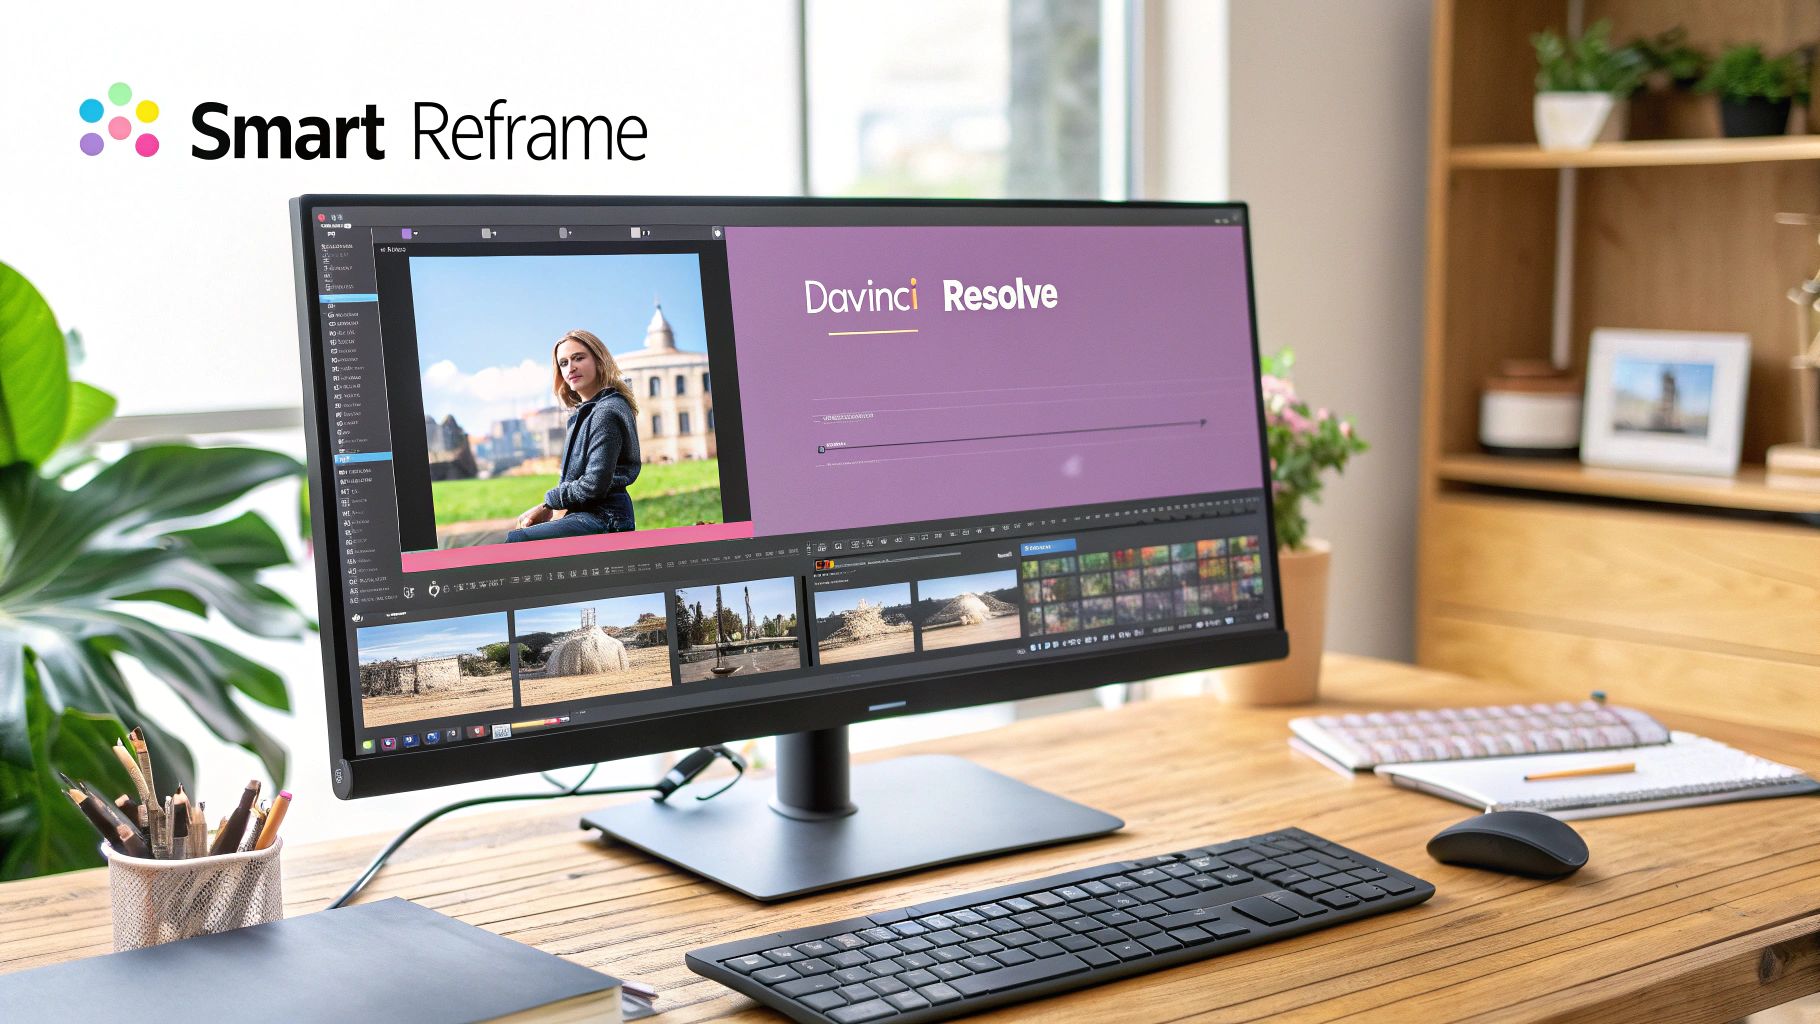
The interface gives you a clear view of the timeline, media pool, and inspector panels—the three core components you'll be living in while reframing your shots.
Using Transform Tools and Smart Reframe
With your clip sitting on the new square timeline, your next stop is the Inspector panel. Once you select the clip, you’ll see the Transform controls for Zoom and Position. These are your bread-and-butter tools for scaling up the video to fill the square frame and shifting it left, right, up, or down to keep your subject perfectly centered.
But manually keyframing these position changes across a long, dynamic clip is a recipe for a headache. This is where Resolve’s Smart Reframe tool becomes a lifesaver. It leans on an AI engine to analyze your footage and automatically pan and scan to follow the most important action in the frame.
While going frame-by-frame gives you ultimate precision, automated tools like Smart Reframe can slash your editing time. Industry reports suggest AI-assisted features can cut down the time spent on repetitive reframing tasks by over 50%. That's time you can pour back into the more creative parts of your project.
Real-World Example: Turning a 4K Landscape Shot Vertical
Let's walk through a common scenario. You’ve got a stunning 4K landscape video (3840×2160) of a person hiking along a dramatic mountain ridge. The wide shot is breathtaking on a big screen, but on a phone for TikTok, the hiker would be just a tiny, lost speck.
Here’s how you’d tackle this in Resolve:
- Create a Vertical Timeline: First, set up a new timeline with a 1080×1920 resolution to match the 9:16 vertical format.
- Import Your 4K Clip: The beauty of starting with 4K footage is that you have a massive amount of resolution to play with. You can crop in aggressively without sacrificing much, if any, quality.
- Deploy Smart Reframe: Select your clip, find Smart Reframe in the Inspector, and set the Reframe option to Auto. Resolve’s AI will do the heavy lifting, analyzing the motion and generating keyframes to track the hiker.
- Fine-Tune Your Framing: Watch it back. The AI is good, but it's not always perfect. If you spot a moment where the framing feels a little off, just jump into the Transform controls and add your own keyframes to nudge the position. This final polish ensures the hiker is always the star of your compelling vertical story.
Let AI Do the Heavy Lifting: Automating Video Resizing
Let's be honest, manually reframing every single video clip for every platform is a massive time sink. When you need to turn one video into ten, the manual approach just doesn't scale. This is where modern AI tools have become a game-changer. Instead of spending hours setting keyframes, AI-powered reframing analyzes your footage and does the hard work for you.
It's pretty smart. The tech can pinpoint the most important part of your shot—like a speaker's face or a product demo—and automatically create perfectly framed versions for vertical, square, or landscape formats. It's an incredibly efficient way to multiply your content without multiplying your workload.
From One Video to Dozens of Clips, Instantly
The real win here is speed and scale. Imagine you just finished a one-hour, 16:9 webinar. With an automated tool, you can instantly chop that recording into dozens of engaging short clips. The AI finds the best moments, reframes them for a 9:16 TikTok or a 1:1 LinkedIn post, and can even add dynamic captions to grab attention.
This is a huge leap forward from traditional editing software. While tools like Premiere Pro have some great AI features, a dedicated repurposing platform is built specifically for this workflow, offering a faster and more focused experience. You don’t need to navigate a complex interface designed for feature films; instead, you get a tool that does one job exceptionally well: turning one long video into many short ones. If you want to go deeper on this, we've got a whole guide on AI video editing and repurposing.
Why Vertical Video Makes Automation a Necessity
The explosion of mobile video has made the 9:16 vertical aspect ratio an absolute must. The numbers don't lie. Uploads of vertical HD (1080×1920) videos shot up by 51% in just the last year. Platforms like Instagram Reels and YouTube Shorts are designed for vertical-first experiences, and properly formatted videos can see completion rates jump by up to 40%.
In many markets, smartphones account for 70% of all video views. If your video has black bars because it wasn't resized, those bars can eat up 40% of the screen real estate—a huge turn-off for viewers. You can find more data on this over at Wistia's blog on video marketing statistics.
The bottom line is simple: automation isn't just a nice-to-have anymore; it's essential. By automating how you change a video's aspect ratio, you can keep up with platform demands and ensure your content always looks professional and native, no matter where it's being watched.
Common Questions About Changing Video Aspect Ratios
Even with the best tools in hand, tweaking a video's aspect ratio can bring up some tricky situations. Let's tackle some of the most common questions creators run into when resizing their videos.
Will Changing the Aspect Ratio Lower My Video Quality?
It really depends on how you do it.
If you add padding (those black bars), your original video’s quality is completely preserved. You aren't actually touching the source pixels, just adding empty space around them. Cropping, on the other hand, means you’re zooming into a smaller part of the frame. This can definitely soften the image if your starting file doesn't have enough resolution to spare.
The best defense is a good offense: always shoot in the highest resolution possible, like 4K. This gives you a massive canvas of pixel data to work with, so even a heavily cropped vertical clip will still look crisp and sharp. And a word of advice? Avoid stretching at all costs. It always distorts the image and just looks unprofessional.
The main thing to remember is that resolution and aspect ratio are linked but not the same. Keeping your quality high is less about the new shape and more about having enough pixels to make the change without things getting blurry.
What Is the Best Aspect Ratio for Social Media?
There’s no magic number here—the "best" ratio is whatever looks native on the platform you're posting to. You want your content to feel like it belongs.
- 9:16 vertical is non-negotiable for TikTok, Instagram Reels, and YouTube Shorts. It's the full-screen experience users expect.
- 1:1 (square) and 4:5 (portrait) are your go-to options for feed posts on Instagram and Facebook. They take up more screen real estate and perform really well.
- 16:9 widescreen is still the undisputed king for traditional YouTube videos, LinkedIn content, and posts on X (formerly Twitter).
It’s a good habit to double-check the latest platform guidelines before you export, since these specs can and do change. If you're trying to figure out the exact pixel dimensions for a specific ratio, a good aspect ratio calculator can save you a lot of guesswork.
Can I Easily Change a Video Aspect Ratio on My Phone?
Absolutely. The whole mobile editing app world is basically built for this.
Apps like CapCut, VN Video Editor, and InShot have presets for every major social platform ready to go. You just import your clip, tap the "TikTok 9:16" or "Instagram 1:1" button, and then use simple pinch-and-zoom gestures to get your subject framed perfectly. It makes creating properly formatted content on the fly incredibly easy.
Manually resizing videos one by one is a huge bottleneck. With Swiftia, you can automate the entire process. Our AI-powered platform turns long-form content into dozens of perfectly framed, ready-to-post clips for every social channel, helping you create more content in less time. See how it works at https://swiftia.io.