When you need to change a video's aspect ratio, you're essentially resizing it to fit a different screen. This usually means either cropping parts of the frame or padding the empty space with black bars. The first step is always picking your target—like the classic 16:9 for YouTube or the vertical 9:16 for TikTok—and then using your preferred video editor or a dedicated tool to get the job done.
Why Aspect Ratio Is Your Most Important Video Metric
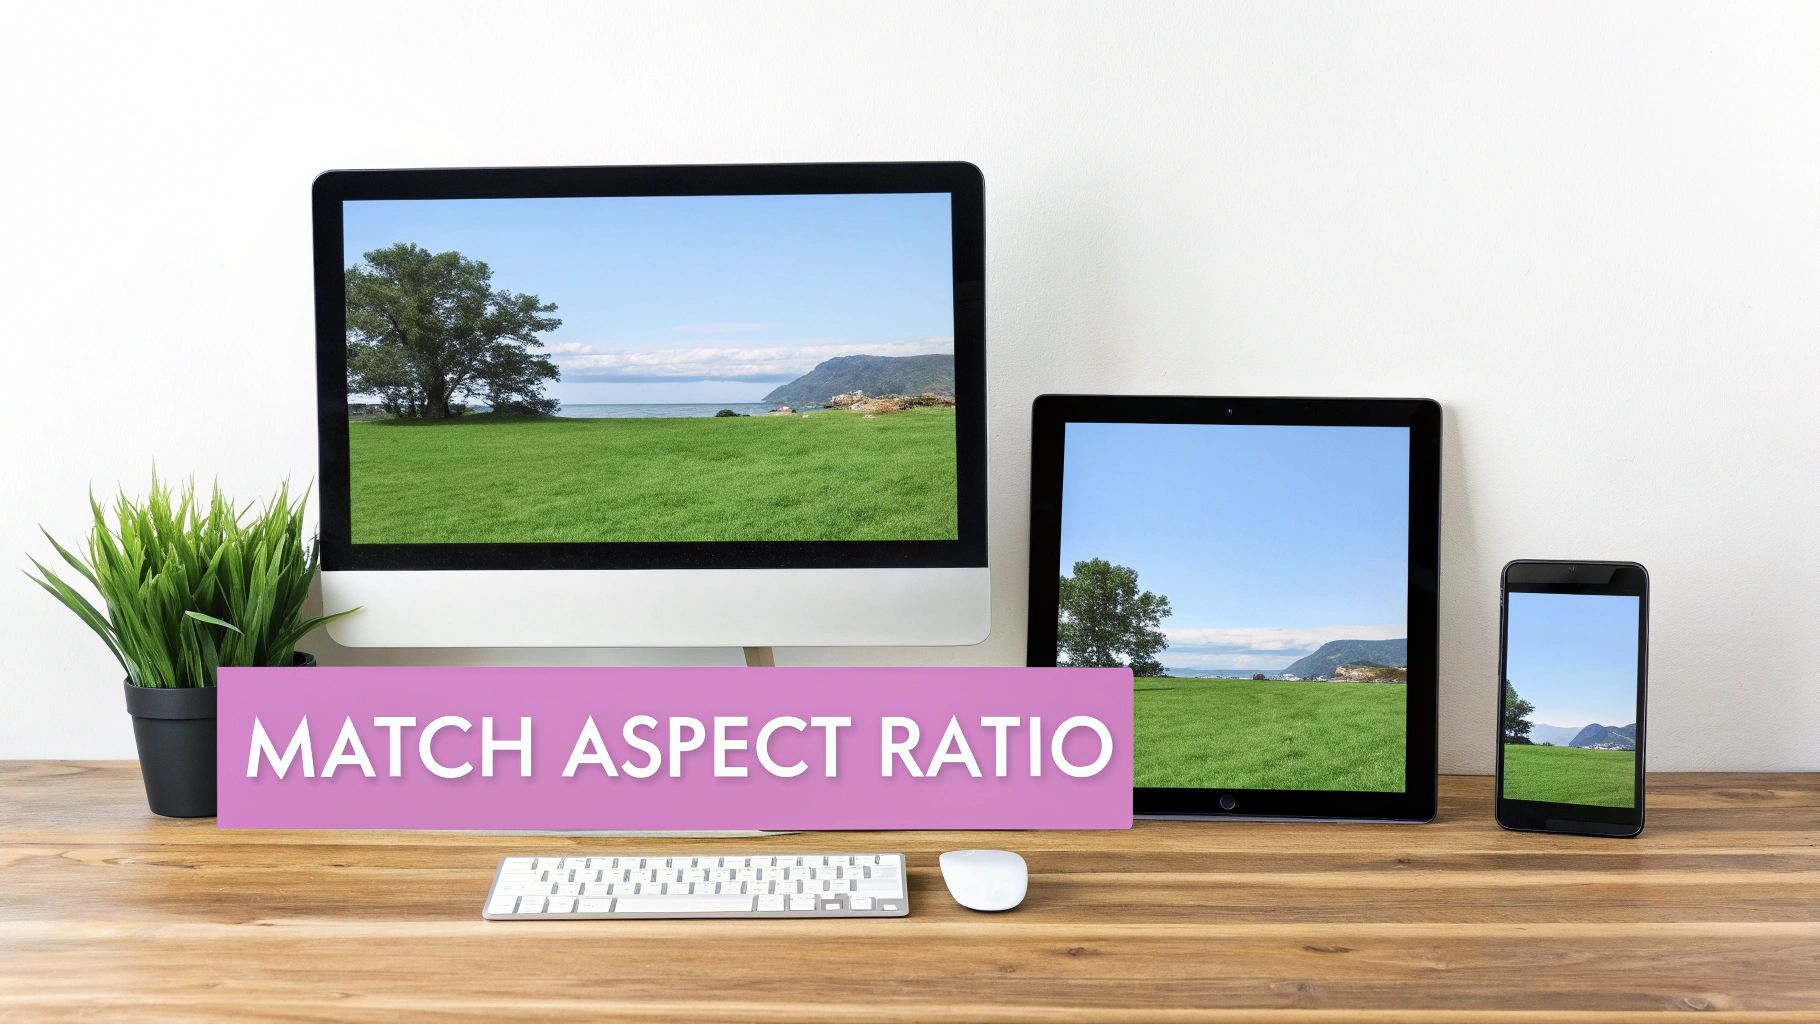
We live in a world of endless screen sizes, from massive widescreen TVs to the phone in your pocket. Because of this, the old "one-size-fits-all" approach to video just doesn't work anymore. If you're creating content, you absolutely have to get comfortable with converting aspect ratios.
Think about it: have you ever seen a widescreen 16:9 video crammed into a vertical 9:16 Instagram Story? It looks tiny, flanked by huge black bars, and it instantly screams low-effort. It’s the digital equivalent of wearing a suit that’s three sizes too big.
But this isn't just about looks; it's about engagement. Viewers are scrolling through feeds at lightning speed, and if your video doesn't immediately fill their screen and grab their attention, they're gone. A poorly formatted video is an invitation to keep scrolling.
The Shift to Vertical Viewing
The market stats back this up. The global video converter market was valued at a whopping $1.2 billion in 2023 and is on track to hit $3.5 billion by 2030. That's not a niche industry; it's a direct response to the explosion of different devices we all use.
While the traditional 1920×1080 (16:9) resolution still holds a solid 8.43% of the screen market share, vertical mobile resolutions have already pushed past a combined 10%. The trend is undeniable: vertical isn't just a fad, it's how a huge chunk of your audience expects to watch content.
For anyone serious about creating for platforms like TikTok or Instagram Reels, this isn't optional. This creator's guide to vertical video dimensions is a great resource that breaks down why nailing these ratios is so critical for making an impact.
Matching Ratios to Platforms
To get the most out of every video you post, you have to play by the platform's rules. Each social network is built for a specific viewing experience, and matching your aspect ratio to that standard is the first step to looking professional and maximizing your reach. If you're curious about why TikTok is so strict about this, our deep dive into the proper https://swiftia.io/tik-tok-aspect-ratio/ explains it all.
To make things easier, here's a quick cheat sheet for matching the most common formats to the right platforms.
Matching Aspect Ratios to the Right Platforms
This table is your go-to reference for figuring out which aspect ratio works best for the platform you’re targeting.
| Aspect Ratio | Resolution (Example) | Primary Platforms | Best Use Case |
|---|---|---|---|
| 16:9 | 1920×1080 | YouTube, Vimeo, Facebook (feed), TV | Standard for most long-form video, tutorials, vlogs. |
| 9:16 | 1080×1920 | TikTok, Instagram Reels, YouTube Shorts, Stories | Full-screen vertical video for mobile-first content. |
| 1:1 | 1080×1080 | Instagram (feed), Facebook (feed), LinkedIn | Square videos that work well in a scrolling feed. |
| 4:5 | 1080×1350 | Instagram (feed), Facebook (feed) | "Portrait" video that takes up more vertical space in feeds. |
| 2.35:1 | 1920×817 | Cinema, YouTube (for a cinematic look) | Widescreen, cinematic content like film trailers. |
Using this as a guide will help you avoid those awkward black bars and ensure your video looks great, no matter where your audience is watching.
Cropping vs. Padding: Your First Big Decision
Before you even think about opening an editor, you've got a fundamental choice to make. How are you going to handle the aspect ratio change? It really boils down to two main strategies: cropping your video or padding it. This decision is going to completely shape the look and feel of your final cut, so it's worth taking a moment to understand the trade-offs.
The Case for Cropping
Cropping is exactly what it sounds like—you’re trimming the edges of the video frame to force it into the new shape. It’s like taking a pair of scissors to a photograph. The huge upside here is that your video fills the entire screen of the new format. For platforms like TikTok or Instagram Reels, this creates a much more immersive, native-looking experience that viewers expect.
But there’s a serious catch: you're permanently throwing away parts of your original shot. If your subject isn't perfectly centered, or if crucial action happens near the edges of the frame, cropping can completely ruin the scene. This method works best when your subject stays put in the middle of the shot and the background is more or less disposable.
The Padding Alternative
The other route you can take is padding, which you might know as "letterboxing" (for horizontal videos on a vertical screen) or "pillarboxing" (for vertical videos on a horizontal screen). Instead of cutting anything, you simply place your original video inside the new frame and fill the leftover space, usually with black bars.
The main advantage of padding is that you preserve 100% of your original footage. Every single pixel is still there, and the director's original composition is completely intact. This is the go-to choice for cinematic work or any shot where the details around the edges are important. The downside? It can feel a bit disconnected on mobile, since the video itself is smaller and doesn't command the whole screen.
It's not just an aesthetic choice; it affects engagement. Research from social media analytics firms has shown that vertically cropped videos can boost view-through rates by as much as 33% compared to their letterboxed counterparts on mobile. That’s a massive difference in audience retention right there.
A Real-World Example: Podcast to TikTok
Let's make this practical. Say you're chopping up a 16:9 widescreen podcast interview to create a 9:16 vertical clip for TikTok.
In the original shot, you have two hosts sitting next to each other.
-
Cropping Strategy: You could create a dynamic, "reframed" edit. When Host A is talking, you crop in tightly on just their face. When Host B replies, you cut to a new shot that's cropped just on them. This feels incredibly native to the platform and keeps the energy high.
-
Padding Strategy: You would keep both hosts in the frame at all times. They’d appear smaller, of course, with black bars (or maybe branded graphics) filling the space above and below them. You’d choose this if seeing them interact is key, but you’d lose that full-screen, in-your-face feel that performs so well on social.
So, what's the right move? It always comes back to your content and your goal. If you want punchy, focused clips for social media, cropping is usually the winner. If you need to protect the artistic integrity of the original shot, padding is your safest bet. You just have to decide what matters more: a native viewing experience or the complete original context.
Getting Hands-On: Manual Aspect Ratio Conversion with Editing Software
For creators who need absolute, pixel-perfect control over their final product, nothing beats getting your hands dirty and converting aspect ratios manually. Firing up professional software like Adobe Premiere Pro, Apple's Final Cut Pro, or Blackmagic's DaVinci Resolve gives you the power to make the kind of precise, creative decisions that automated tools just can't replicate.
Going the manual route isn't just about flipping a switch; it's about thoughtfully recomposing your shot for an entirely new canvas. The first move is always to set up your project or sequence to match your target. For instance, if you're making a TikTok clip, you'd start with a 1080×1920 (a 9:16 ratio) sequence. This creates the frame you'll be working within.
From there, you have two main paths you can take: cropping or padding.
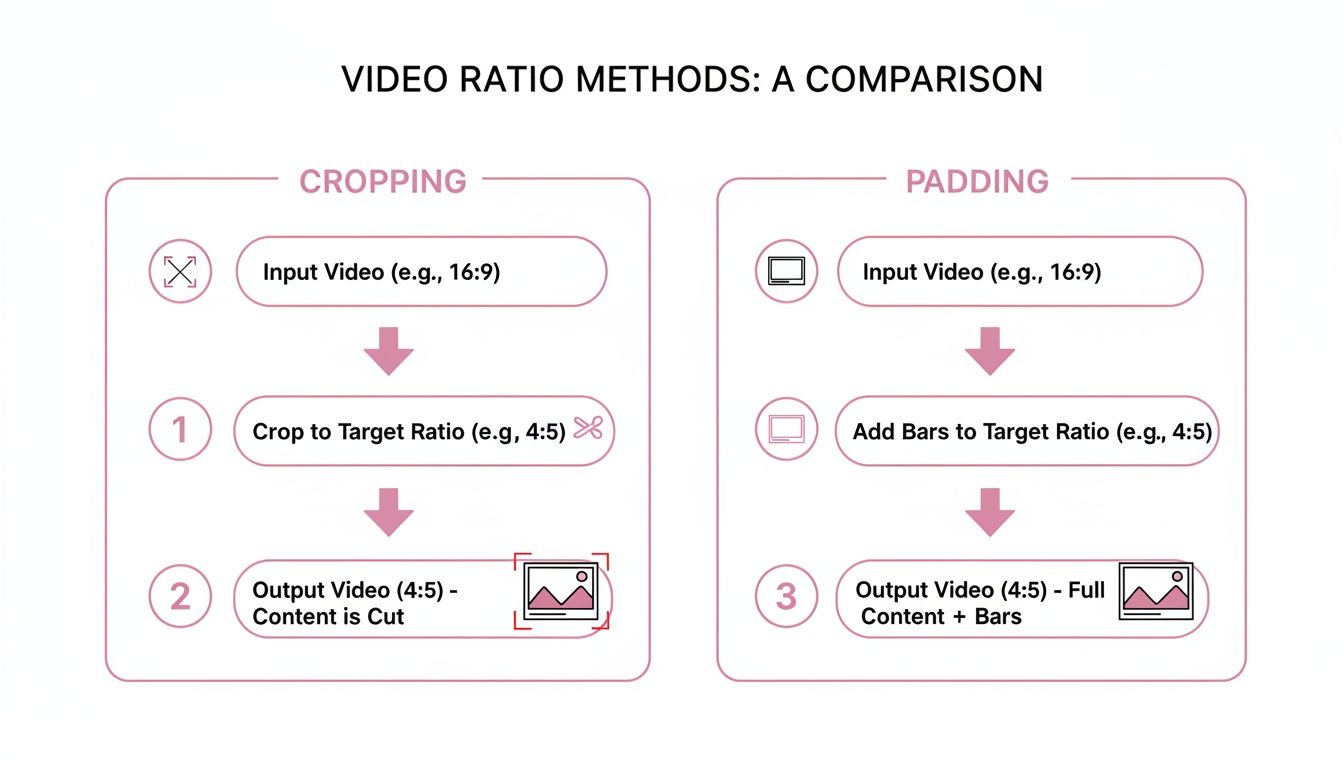
As you can see, cropping delivers that immersive, full-screen look by sacrificing parts of the original image. On the other hand, padding (or "letterboxing") keeps every pixel of your original shot intact but adds bars to fill the empty space.
Let the Software Do the Heavy Lifting: Smart Reframing Tools
Luckily, modern editors have some incredibly smart features to speed things up. In Premiere Pro, the Auto Reframe effect is a total game-changer. It analyzes your footage, figures out what the main subject is—say, a person talking or a car driving—and then automatically adds keyframes to keep that subject perfectly centered in the new vertical frame.
DaVinci Resolve has a nearly identical feature called Smart Reframe. These tools can save you hours of painstaking manual work, especially on longer videos, by handling the basic motion tracking for you. The best part? You still have full control to jump in and tweak the keyframes if the AI doesn’t get it quite right. If you find yourself constantly repurposing content, it's worth checking out a specialized video editor for social media built around these concepts.
For the Coders and Power Users: The FFmpeg Approach
If you're comfortable working in a command-line environment, then FFmpeg is your ultimate weapon. This powerful, open-source tool lets you manipulate and convert video right from your terminal, giving you surgical control over every single parameter. Sure, it has a steep learning curve, but for scripting, batch processing, and automation, it’s simply unmatched.
A common headache when going from a wide 16:9 video to a tall 9:16 is what to do with all that empty space. Instead of just slapping on boring black bars, a much slicker technique is to use a scaled-up, blurred version of the video itself as the background.
This little trick makes the final product feel polished and professionally produced.
Here's what that looks like in a real-world FFmpeg command. This line of code takes a 16:9 input video (input.mp4), converts it to a 9:16 output (output.mp4), and adds that stylish blurred background effect we just talked about.
ffmpeg -i input.mp4 -filter_complex "[0:v]split=2[v1][v2];[v1]crop=ih*9/16:ih[bg];[bg]scale=1080:1920,boxblur=20[bg_blurred];[v2]scale=1080:-1[fg];[bg_blurred][fg]overlay=(W-w)/2:(H-h)/2" -c:a copy output.mp4
I know, that snippet looks intimidating at first glance. But it’s really just a series of commands chained together. It splits the video into two copies, crops and blurs one for the background, scales the other for the foreground, and then perfectly overlays them. This is exactly the kind of granular control that makes developers and high-volume content creators swear by FFmpeg for their video pipelines.
Using Online and AI-Powered Converters
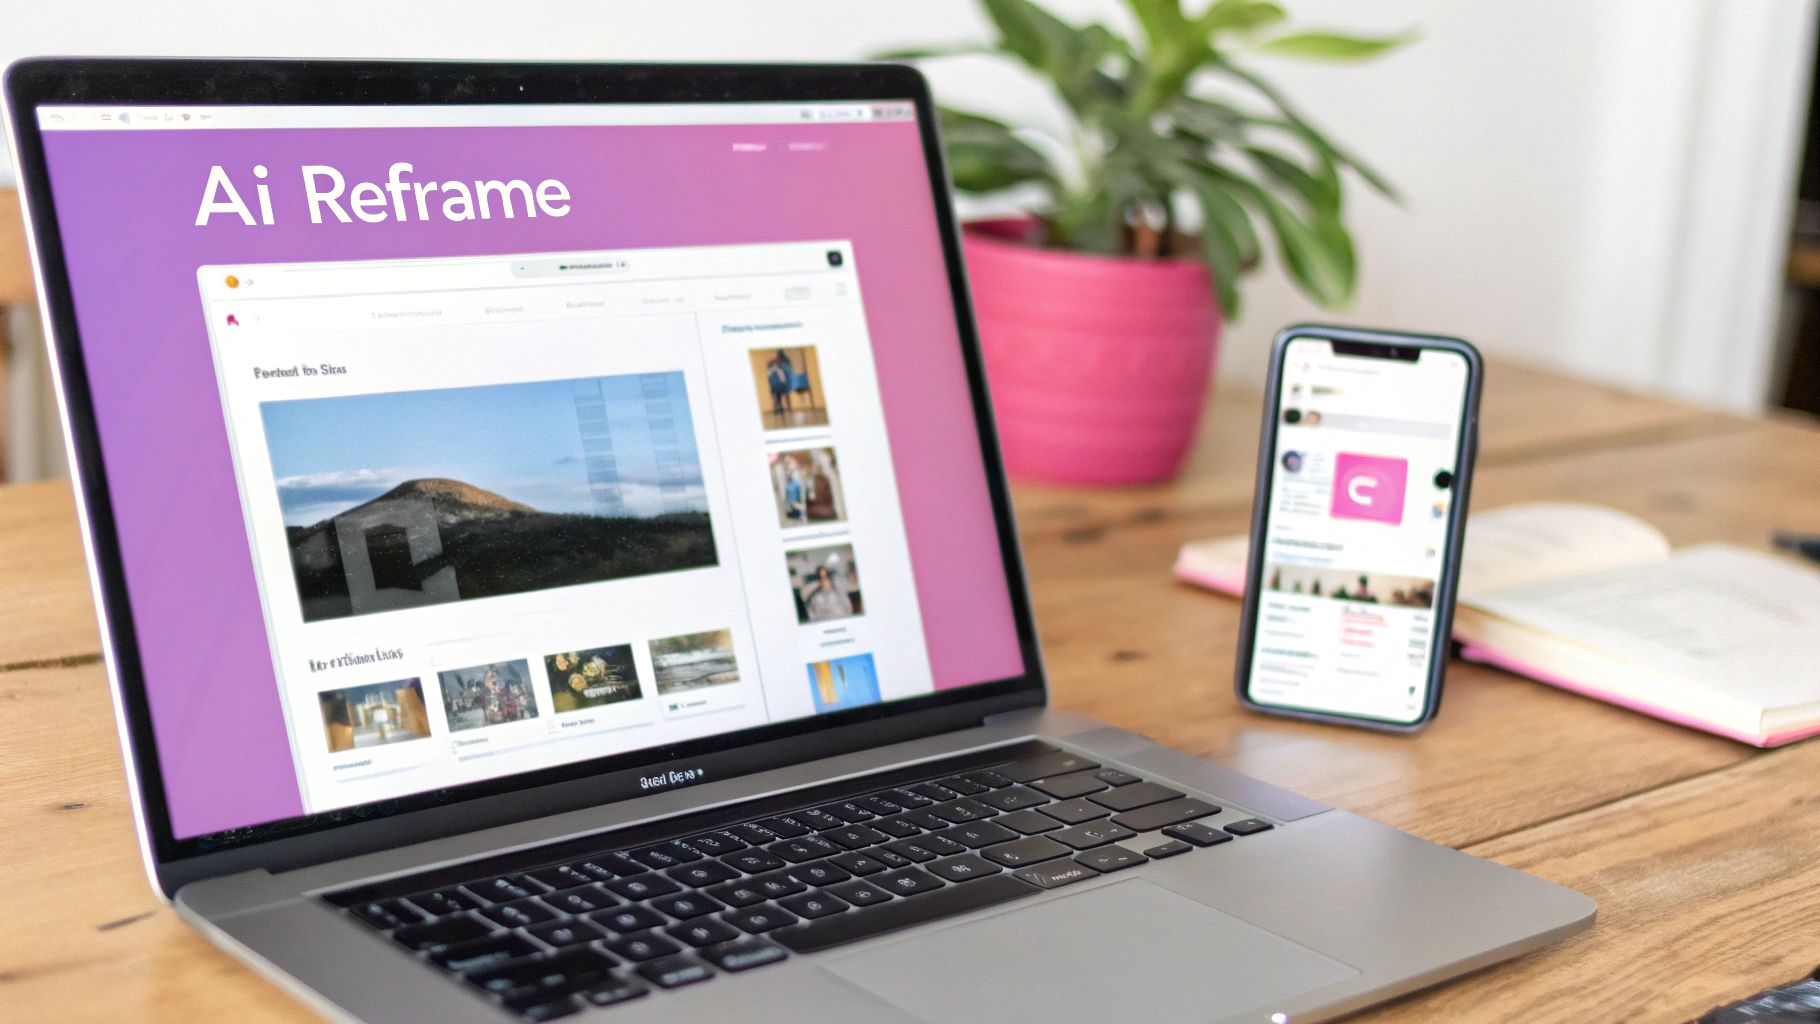
While manual editing in a professional suite gives you ultimate control, it’s a massive time commitment. That’s especially true when you're trying to slice and dice one master video for half a dozen different social platforms. For a quick one-off job, a web-based video converter seems like the perfect shortcut. You just upload your file, pick a new aspect ratio, and hit download.
But that convenience often comes at a cost. Many of the free tools out there have some serious limitations that just don't fly for professional work.
- Watermarks: A big, distracting logo gets slapped right on top of your final video.
- File Size Limits: They often cap uploads, making them useless for high-resolution or longer videos.
- Lower Quality: To keep things fast and free, these services often compress your video heavily, leading to a noticeable drop in sharpness.
These tools are totally fine for a simple, non-critical task here and there, but they lack the muscle and polish needed for a consistent content pipeline.
The Rise of Intelligent Reframing
This is where AI-powered converters really change the game. Instead of just blindly cropping the middle of your video, these platforms actually analyze the content to figure out what’s important in the frame. It's a huge leap beyond the static, awkward crops you get from basic online tools.
AI-driven reframing doesn't just change the dimensions; it recomposes the entire shot. It intelligently identifies the main subject—whether it's a person speaking or a product in motion—and makes sure it stays perfectly centered, even as it moves. The result is a dynamic, professional-looking clip that feels like it was shot for that format from the start, all without hours of tedious manual keyframing.
Practical Example: Imagine you're turning a widescreen webinar into a series of TikToks. An AI tool can automatically detect each time a new speaker appears and create a separate, perfectly framed vertical clip for each segment. This automates what would otherwise be an incredibly boring editing job, freeing you up to think about strategy instead of just busywork.
The need for intelligent reframing is directly tied to what viewers expect on each platform. Research confirms that vertical HD (1080×1920) uploads shot up by 51% year-over-year. Posting a video with the wrong aspect ratio—with giant black bars or a clumsy crop—can absolutely kill engagement, which can otherwise hit rates as high as 58% for well-produced short clips. You can dig into more data on video trends to see just how critical this is.
AI Converters vs. The Old Guard
When you put AI-powered platforms head-to-head with traditional online converters, the difference is night and day. A standard tool might just chop out the center of your video and call it done, but an intelligent system offers a clear advantage through its advanced capabilities.
| Feature | Standard Online Converter | AI-Powered Platform |
|---|---|---|
| Reframing | Basic center-crop or padding. | Intelligent subject tracking keeps the action in frame automatically. |
| Workflow | One-off conversions. | Optimized for batch processing and repurposing at scale. |
| Quality | Often limited to 720p or 1080p with heavy compression. | Supports 4K resolution and maintains high visual fidelity. |
| Customization | Minimal options, often with watermarks. | Extensive branding options and watermark-free exports. |
The real win here is efficiency. An AI platform automates the single most time-consuming part of converting aspect ratios: the reframing. This allows content teams to pump out dozens of platform-native clips from a single piece of long-form content, dramatically boosting their output and reach.
Putting Your Video Conversion on Autopilot with an API
When you're dealing with video at scale, manual conversion just doesn't cut it. For businesses, marketing agencies, and developers juggling a constant stream of content, it quickly becomes a massive time-sink. This is exactly where a video API comes in, letting you build automated resizing right into your existing workflows.
Practical Example: A user on your media platform uploads a long, 16:9 webinar. Instead of an editor spending hours chopping it up, an API call is triggered the moment the upload finishes. That single command could spit out a dozen perfectly framed 9:16 clips for Instagram Reels or TikTok, all ready to go without a single person lifting a finger. That's the real power of automating this process.
For any company running a high-volume video pipeline, this kind of efficiency isn't just a nice-to-have; it's the only way to keep up.
How Does API-Driven Conversion Actually Work?
At its heart, a video API is pretty straightforward. You send it a set of instructions, typically in a simple format like JSON, and its servers do all the heavy lifting. You're basically just telling the API where your video is and what you want to do with it—no local software, no render queues, no fuss.
This hands-off approach is a game-changer for:
- Social media management tools that need to format client videos for every platform automatically.
- E-learning platforms that want to generate mobile-friendly versions of course lectures on the fly.
- Digital Asset Management (DAM) systems that have to create different video formats for marketing and sales teams.
The biggest win here is the massive drop in labor costs and the speed at which you can get content out the door. Content agencies producing around 50 short-form videos a week can save 20-30 hours of manual editing time by automating this step. That's time their creators can spend on what really matters: strategy and storytelling.
A Quick Look at an API Request
The instructions you send to an API are incredibly specific. You define the source file, the new aspect ratio you need, and any other bells and whistles. It's a developer-friendly way to manage the entire conversion pipeline without ever needing to open an editing suite.
Here’s a simplified idea of what a JSON request to a video repurposing API might look like. In this case, we're telling it to take a source video and turn it into a vertical 9:16 clip for TikTok.
{
  "input_url": "https://your-cdn.com/source-webinar.mp4",
  "output_format": "mp4",
  "tasks": [
    {
      "operation": "resize",
      "target_aspect_ratio": "9:16",
      "resolution": "1080x1920",
      "reframing_mode": "auto_detect_speaker"
    }
  ]
}
Notice we're doing more than just resizing. The reframing_mode tells the API to use its AI to find and track the speaker, keeping them centered in the new vertical frame. It’s a complex editing task that this one simple request handles in seconds.
To get a deeper understanding of how this all works, you can explore the benefits of using an API for video repurposing. By plugging in a tool like this, you can build a powerful, scalable, and fully automated video workflow that can handle any platform's demands.
Getting That Flawless Conversion, Every Time
Knowing the mechanics of changing an aspect ratio is half the battle. The other half—the part that separates the pros from the amateurs—is nailing the fine details. A few simple checks can transform a video from a clunky afterthought into a polished, purpose-built piece of content. Think of it as your pre-flight checklist before hitting that final export button.
One of the most common missteps is using a one-size-fits-all export setting. It's easy to think rendering in 4K is always best, but that's not how social platforms work. Instagram or TikTok, for example, will hit your beautiful, high-bitrate file with heavy compression anyway. Often, a well-optimized 1080p video ends up looking cleaner than a 4K file that’s been crushed by the platform's algorithm.
Watch Out for the Safe Zones
A critical detail that often gets missed is the platform’s "safe zones." These are the screen areas where the app overlays its own interface—think usernames, captions, like buttons, and comment fields.
Nothing screams "rookie mistake" more than having your key text or logo hidden behind a UI element. It makes your content look sloppy and, more importantly, can completely obscure your message.
Practical Example: Create transparent PNG overlays of each platform’s UI. Just drop the appropriate one onto your timeline as the top layer in your video editor. This gives you a constant visual guide, making it foolproof to keep your important elements clear and visible.
While 16:9 is still the undisputed king for platforms like YouTube, the momentum behind 9:16 for mobile is impossible to ignore. It’s no surprise when you see that digital video ad spending is projected to hit a staggering $214.76 billion worldwide by 2025, with a massive slice of that pie served on vertical screens. Interestingly, 57% of online ads now incorporate AI-generated videos, many of which are specifically repurposed for these formats.
The Final Quality Control Pass
Before you commit to a final export, a quick quality control pass is essential. It only takes a minute but can save you from a world of headache and easily avoidable mistakes.
Here's what I always check:
- Is the audio still in sync? Heavy rendering or frame rate changes can sometimes nudge audio out of alignment. A quick watch-through is the only way to catch that distracting lag between seeing someone speak and hearing them.
- What's the frame rate situation? Is your video a Constant Frame Rate (CFR) or Variable Frame Rate (VFR)? Most editing software and social platforms much prefer CFR. VFR, which often comes from screen recordings or phones, can cause weird playback and sync problems down the line.
- Are the dimensions exactly right? Give those export settings one last look to make sure they match the platform's recommended specs perfectly. For a constantly updated cheat sheet, these platform-specific video size and aspect ratio guidelines are a lifesaver.
Common Conversion Problems and Solutions
Even with the best preparation, things can go wrong. This quick table covers some of the most common hiccups I've seen and how to fix them.
| Problem | Potential Cause | Solution |
|---|---|---|
| Black Bars Appear Unexpectedly | Mismatched aspect ratios between the source video and the export settings. | Double-check your project and sequence settings. Use cropping or padding intentionally to control the final look. |
| Video Looks Stretched or Squashed | Incorrect pixel aspect ratio (PAR) settings, or forcing a resolution without maintaining the aspect ratio. | Ensure your PAR is set correctly (usually "Square Pixels"). Lock the aspect ratio when resizing or calculate dimensions manually. |
| Audio is Out of Sync | Often caused by converting a Variable Frame Rate (VFR) video without first standardizing it. | Use a tool like FFmpeg or HandBrake to convert the source video to a Constant Frame Rate (CFR) before editing or converting. |
| Poor Quality After Upload | The platform's compression algorithm is struggling with a file that has a very high bitrate or unsupported codec. | Export using platform-recommended settings (codec, bitrate, resolution). An optimized 1080p file often looks better than a poorly compressed 4K file. |
Running through these checks helps ensure that every video you put out there looks sharp, professional, and purpose-built for its platform, no matter the aspect ratio.