Knowing how to take clips from a YouTube video isn't just a technical trick; it's a core skill for anyone serious about repurposing content today. You've got a few solid options, from using YouTube's own 'Clip' feature for quick sharing, to downloading the video for a more polished edit on your desktop, or even using a snappy online tool when you're in a hurry.
Why Clipping YouTube Videos Is a Modern Superpower
In a world running on short, punchy videos, the ability to pull highlights from longer content has become a genuine strategic advantage. Creators and marketers are waking up to the fact that their long-form videos are sitting on a goldmine of shareable moments just waiting to be unleashed on TikTok, Instagram Reels, and YouTube Shorts.

This one skill opens up huge possibilities for repurposing. Instead of constantly grinding to create brand-new content for every single platform, you can just pull the best bits from videos you’ve already made. It’s a massive time-saver, and it gives your best work a second life, connecting with totally new audiences on the platforms they actually use. For a deeper dive into this strategy, check out our guide on creating effective https://swiftia.io/short-form-content/.
The Power of Bite-Sized Content
The meteoric rise of short-form video tells the whole story. YouTube Shorts are now pulling in a staggering 70 billion daily views—a mind-boggling leap from just 30 billion back in 2021. This isn't just a vanity metric. It matters because channels that upload Shorts see an average subscriber growth rate that is over 150% higher than those that only post long-form content. These clips are achieving an impressive engagement rate, often outperforming content on competing platforms.
Practical Example: A podcaster uploads a 90-minute interview. By clipping five 60-second "hot takes" from the conversation for YouTube Shorts and Instagram Reels, they not only promote the full episode but also create standalone content that reaches thousands of new viewers who might never have discovered the original podcast.
This guide will walk you through all the different ways to get this done. We’ll start with YouTube’s own simple feature for quick shares and move on to more robust desktop and online workflows. To really get the most out of this, you’ll want to master YouTube video clipping methods to unlock their full strategic potential. By the time you're done here, you'll know exactly which workflow fits your needs, and you'll be ready to turn your existing video library into an endless source of fresh content.
Using YouTube's Built-In Clip Feature for Quick Sharing
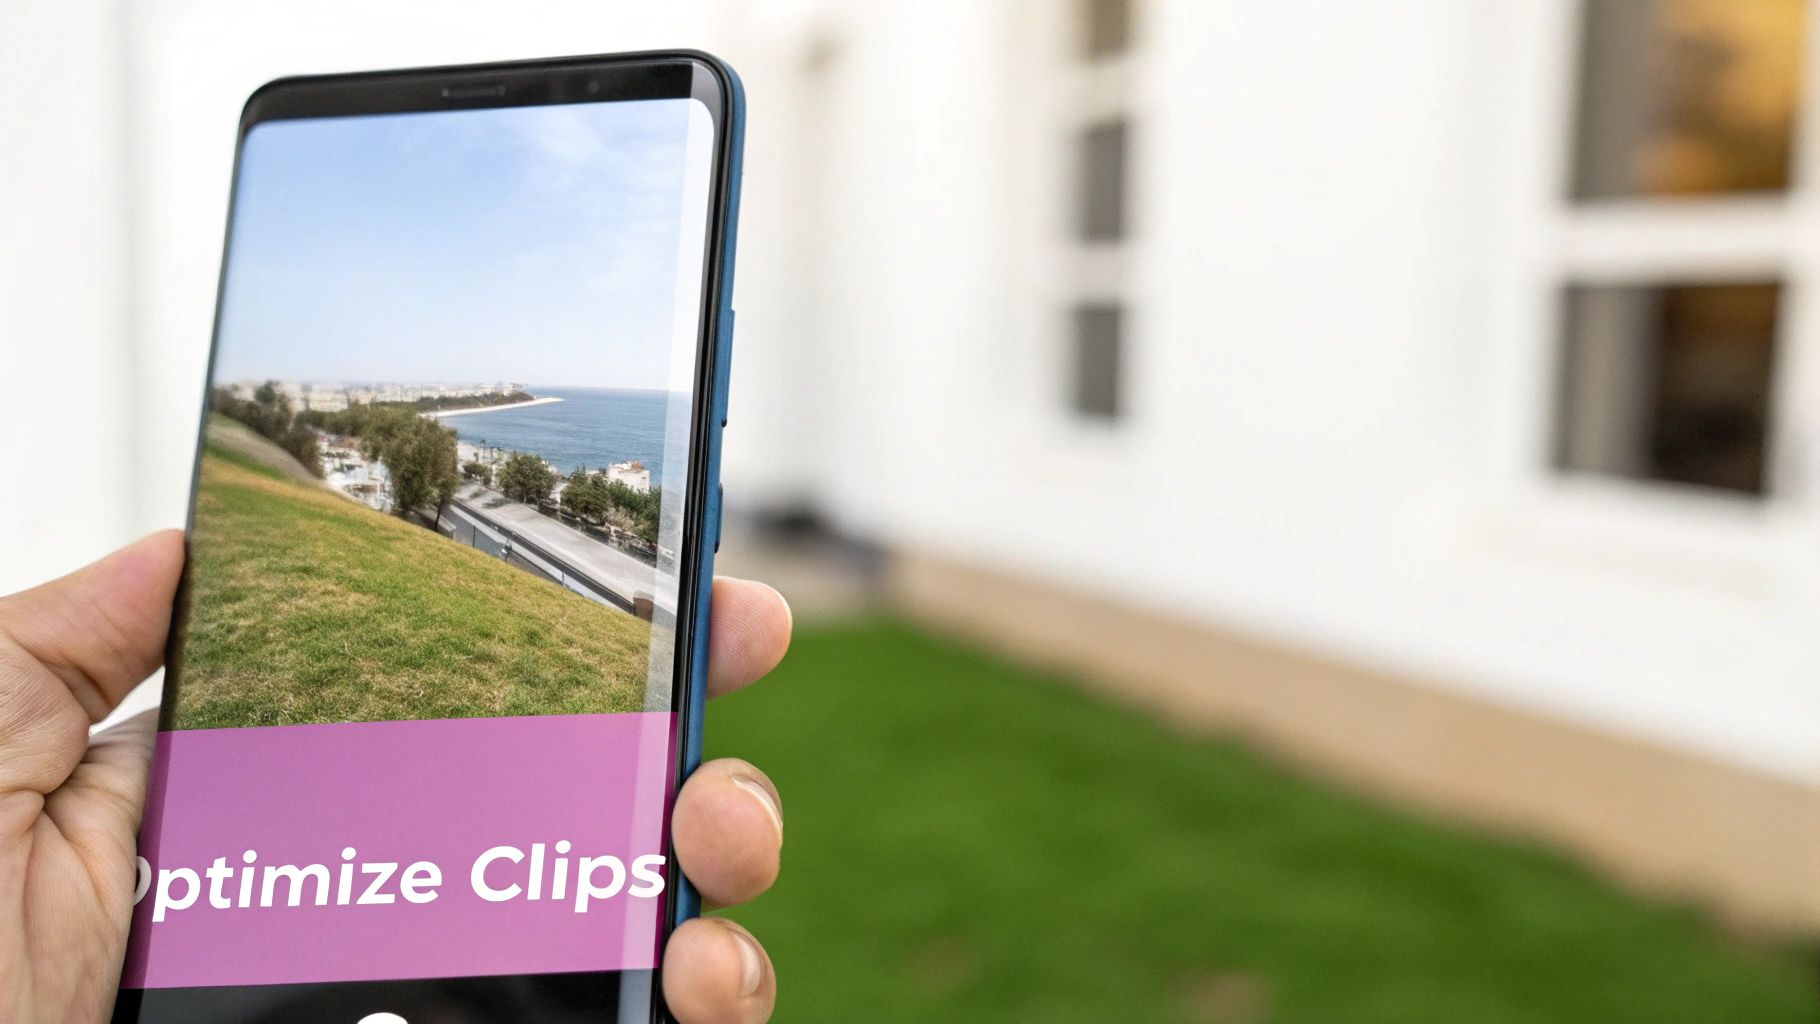
Sometimes you just need to share a specific moment from a video right now. You don't want to download anything or fire up a video editor. For those quick-hit moments, YouTube's own "Clip" feature is your best friend. It’s designed for instant, on-the-fly sharing straight from the video page.
This is perfect for grabbing a short, impactful segment. Let's say you're watching a long marketing webinar and the speaker drops an amazing 30-second insight about a new SEO tactic. Instead of sending your team a link and saying, "skip to the 45-minute mark," you can create a clip and send them a direct link to that exact gold nugget.
How to Create a YouTube Clip
The whole process is incredibly straightforward and takes just a few clicks.
First, look for the scissors icon labeled Clip right under the video player, mixed in with the 'Like' and 'Share' buttons.
Clicking that opens a small editing box. From there:
- Drag the blue slider to highlight the exact part of the video you want. You can select any segment between 5 and 60 seconds.
- Give your clip a title. This shows up with the shared link, so make it descriptive.
- Hit "Share clip" to get your unique URL, ready to paste into an email, Slack, or social media post.
It’s as simple as that. You’ve just isolated the most important part of a video without any hassle.
Understanding the Limitations
Now, while the Clip feature is brilliant for its speed, it’s important to know what it can't do.
The biggest catch is that you don't actually get a video file. The feature only generates a shareable link that points back to the original YouTube video. You can't download an MP4 to re-upload on platforms like TikTok or Instagram Reels.
Another thing to keep in mind is that this feature isn't always available. It's entirely up to the creator to enable it. If they've turned clipping off for their video, that little scissors icon just won't be there.
So, while it’s a fantastic tool for quick sharing, it isn't a universal solution. For creating actual video files you can repurpose, you’ll need to explore the other methods we’ll cover next.
Mastering Desktop Workflows for High-Quality Clips
When you absolutely need a high-quality, downloadable video file for serious editing, a desktop workflow is the only way to go. This approach gives you complete control over the final product, letting you craft polished, standalone clips ready for any platform—without the handcuffs of online-only tools.
Think about it. Say you just wrapped up a two-hour podcast interview and uploaded it to YouTube. Your next move is to pull three powerful, 60-second moments to blast out on LinkedIn, Instagram, and Twitter. A desktop workflow is built for exactly this scenario. It starts with downloading the full video and then using some fantastic free software to slice it up with precision.
Choosing Your Desktop Editing Software
You really don't need to shell out a bunch of cash to get professional results. A few free, yet surprisingly powerful, options can handle this task perfectly.
- DaVinci Resolve: This is what the pros use. Its free version is unbelievably robust, packed with advanced editing and color correction features that are overkill for just trimming, but it’s nice to have that power.
- Shotcut: A great open-source option that’s much more approachable for beginners. It still has all the essential trimming and exporting tools you'll need to get the job done right.
Both of these tools let you import your downloaded video, make your cuts, and export in pretty much any format you can think of. If you're struggling to choose, we've got a detailed comparison of the best video editing software for social media that can help you decide.
The Process: From Download to Polished Clip
Once the full video file is on your computer, the rest is pretty straightforward. You'll import it into your editor of choice, like DaVinci Resolve. From there, just scrub through the timeline to find the exact start and end points for the highlight you want to isolate. A quick trim to cut away everything else, and you're left with just that golden nugget.
This is where knowing a bit about engagement really pays off. For instance, data from Google shows that Shorts viewers are twice as likely to subscribe to a creator's channel compared to viewers of long-form content. Clipping your highlights to create engaging Shorts isn't just a guess—it's a strategic move. Just look at YouTube Shorts, which now generate over 70 billion daily views, proving there's a massive appetite for repurposed clips. You can find more of these insights in the latest YouTube engagement statistics on analyzify.com.
The real magic of a desktop workflow is precision. You aren't stuck with a 60-second limit, and you have frame-by-frame control to make sure your clip starts and stops exactly where the action is.
Exporting for Universal Compatibility
After you've trimmed your clip down to perfection, the final step is exporting. To make sure your video plays flawlessly everywhere, your safest bet is to export it as an MP4. It's the universal standard for web video, hitting that perfect balance between great quality and a file size that won't take forever to upload.
During export, you also get to control the resolution and aspect ratio. If you're making an Instagram Reel or a TikTok, you'd export in a vertical 9:16 format. For a post on LinkedIn or X (formerly Twitter), a square 1:1 or a classic 16:9 might perform better. This level of control is precisely why the desktop workflow remains the go-to method for creators who refuse to compromise on quality and flexibility.
Grab Clips Fast with Online Tools
Sometimes you just need a downloadable clip, and you need it now. You don't want to install software or fire up a heavy-duty video editor. This is where web-based clipper tools really shine. They're built for one thing: getting a clip from a YouTube video into your hands with minimal fuss.
Think of them as the perfect middle ground—more powerful than YouTube's simple "share" clipper, but way less complicated than a full desktop editing suite.
Practical Example: You’re a social media manager and you spot the perfect 20-second customer quote buried inside a 45-minute webinar. You need that soundbite for an Instagram Story, like, yesterday. Instead of downloading the whole massive file and waiting for it to process, an online clipper lets you paste the URL, select the 20-second segment, and download just what you need in under two minutes.
The process is almost always the same, no matter which tool you use:
- You paste the YouTube video link.
- A timeline appears, and you drag handles to set the start and end times.
- You hit "Download," and it spits out an MP4 file.
It's that simple.
How to Pick a Good Online Clipper
Because these tools are so handy, there are a ton of them out there—and not all are created equal. You’ll want to stick with reputable services. Many of the shadier sites are a minefield of pop-up ads and have questionable privacy policies. A good tool will have a clean interface and be upfront about what it offers, like the video resolutions or file formats you can export.
Some of the more advanced platforms are even starting to extract key moments from video using AI, which can save you the hassle of scrubbing through a long video to find the good parts yourself. Swiftia, for example, automates this entire process by identifying the most engaging parts of your video and generating ready-to-post clips, complete with captions. This is a significant step up from basic online clippers that require you to find the timestamps manually.
This really comes down to what you need the clip for. Are you just sharing a quick moment, or do you need a high-quality file for a bigger project?
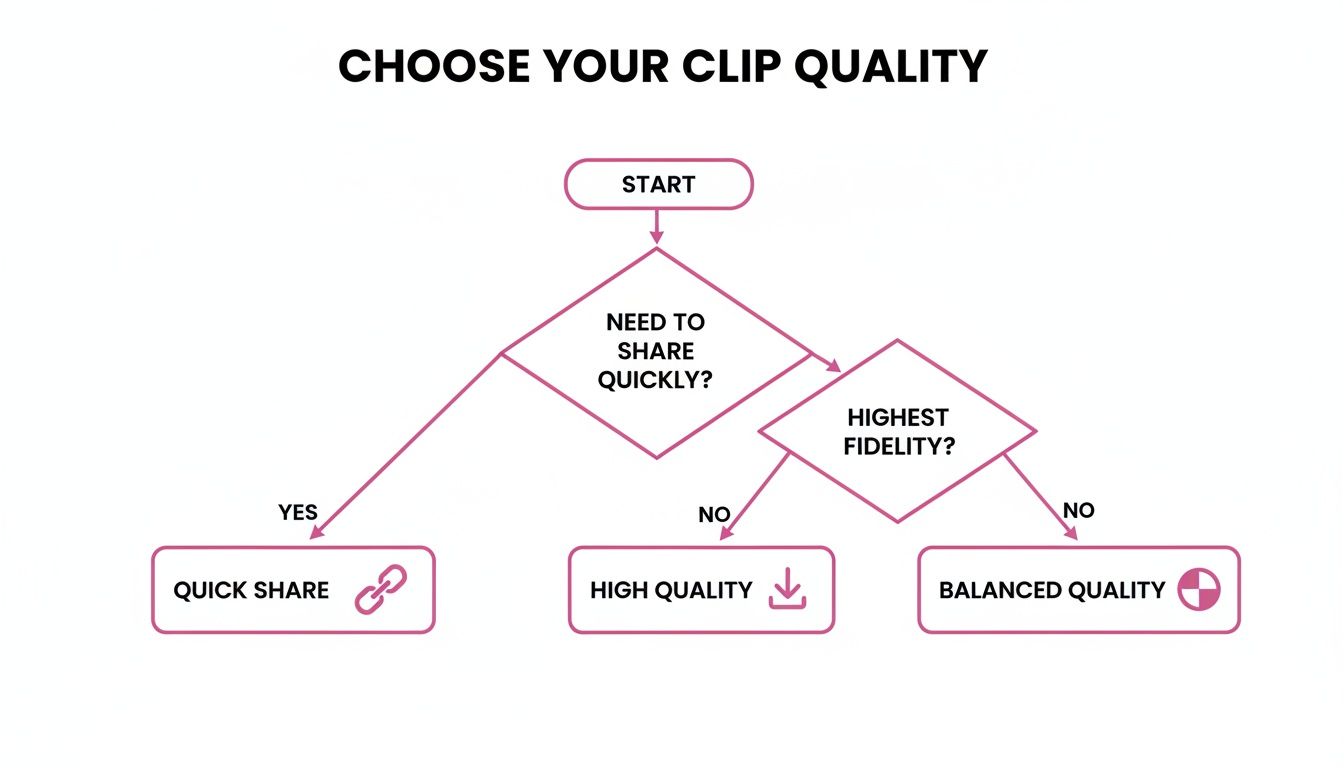
As the chart shows, it's a trade-off between speed and control. Online clippers give you that downloadable file, putting you firmly in the "control" camp without the usual time investment.
A Quick Look at the Pros and Cons
To help you decide if an online tool is the right fit, here's a quick comparison of the different methods we've discussed so far.
Comparison of YouTube Clipping Methods
| Method | Best For | Output | Pros | Cons |
|---|---|---|---|---|
| YouTube Native Clip | Quick sharing of a moment directly on YouTube or social media. | A shareable URL. | Extremely fast; no downloads needed; keeps viewers on YouTube. | Not a downloadable file; limited to 60 seconds; creator must have it enabled. |
| Online Clipper Tools | Quickly creating downloadable MP4 files for social media or simple edits. | A downloadable video file (e.g., MP4). | Easy to use; no software installation; faster than a full desktop workflow. | Can have ads; quality might be compressed; potential privacy concerns with sketchy sites. |
| Desktop Software | High-quality edits, combining multiple clips, or professional projects. | High-resolution video file in various formats. | Maximum control over quality and editing; works offline; full creative freedom. | Requires software installation; slower workflow; can be complex for beginners. |
Each method has its place. Your choice really depends on how much time you have and what you plan to do with the clip once you have it.
The biggest advantage of online tools is accessibility. You can make a clip from any computer with an internet browser, which is a lifesaver for remote teams or if you're working away from your main editing rig.
Given that the average viewer's attention span is now just 8 seconds, being able to quickly churn out short, punchy clips is a massive win for keeping your audience engaged.
A Quick Word of Caution: While online clippers make it technically easy to download content, remember that copyright is still a thing. Just because you can download a clip doesn't mean you have the legal right to use it however you want. Make sure your use case falls under Fair Use, or better yet, get permission from the creator.
Navigating Copyright and Fair Use Responsibly
Knowing how to clip a YouTube video is one thing, but doing it responsibly is a whole different ball game. Every time you repurpose content that isn't yours, you're wading into the waters of copyright law. It sounds intimidating, but it doesn't have to be. Getting a handle on the basics of copyright and Fair Use will give you the confidence to create amazing clips while respecting the original creator.
Think of copyright as the creator's legal ownership over their work. In a nutshell, you can't just grab someone's video, chop it up, and claim it as your own. But there's a crucial exception built into the law called Fair Use. This doctrine allows for the limited use of copyrighted material without getting permission, specifically for things like commentary, criticism, news reporting, or teaching.
What Qualifies as Fair Use?
Fair Use isn't a simple checklist; it's a flexible concept that depends on context. The single most important factor is whether your clip is transformative. Did you add a new layer of meaning or a fresh perspective?
Practical Example: A movie reviewer using brief scenes to break down the director's camera work is a perfect example of a transformative creation. They aren't just replaying the movie; they are using clips to educate their audience and build their own argument. In contrast, simply uploading the "best fight scenes" from a movie without any commentary is not transformative and likely violates copyright.
So, how do you make sure your clips stay on the right side of the line?
- Be brief and to the point. Only use the absolute minimum amount of the original video you need to illustrate your point. Don't include extra fluff.
- Add your own flavor. This is the core of being transformative. Don't just re-upload a funny moment. Add your own commentary, analysis, or educational spin that gives it new life.
- Always give credit where it's due. A clear, prominent shout-out to the original creator isn't just good manners—it shows you’re not trying to pass their hard work off as your own.
By adding your unique perspective, you're not just re-sharing; you're creating something new. This is the key to making Fair Use work for you, not against you.
Staying Safe and Respectful
YouTube's automated systems are always on the lookout for copyright infringement. In the first quarter of 2023 alone, YouTube removed over 6.48 million videos for policy violations, many of which were flagged automatically by its Content ID system. That tells you something important: short, properly credited clips with your own commentary are far less likely to get caught in an automated dragnet. For more on what's happening on the platform, check out the latest insights from Motion Play Studio's research.
While these guidelines can drastically reduce your risk, they aren't a get-out-of-jail-free card. If you're clipping content for purely commercial reasons without adding any transformative value, your safest bet is to get direct permission from the creator.
Of course, if you're just focused on clipping your own content, you've got nothing to worry about! A great place to start is our deep dive on how to download and edit videos from YouTube. By following these best practices, you can create clips that are both impactful and ethical.
Fine-Tuning Your Clips for Social Media
So you’ve got your clip. Great. But pulling a highlight from a YouTube video is just the first step. The real work begins when you prep it for the wild world of social media, and just dumping the same file everywhere is a surefire way to get ignored.
Each platform has its own vibe and its own rules. A one-size-fits-all approach doesn't just underperform; it makes your content look out of place.
Think about it: a massive 91% of social media users are on their phones. That means vertical video isn't just a trend; it's the main event. Posting a wide, horizontal clip into a vertical feed is like showing up to a party in the wrong dress code. It just feels off.
Format for the Feed: It’s Not Optional
To get any real traction, you have to tailor your clip's format to the platform where it will live. This is all about how it appears in someone's feed as they're scrolling.
- TikTok & Instagram Reels: Vertical video is the only way to go. You need a 9:16 aspect ratio to fill the entire phone screen. This creates a much more immersive and native feel that stops people from swiping past.
- LinkedIn & X (formerly Twitter): Here, a 1:1 square format tends to work best. In a feed crowded with text and static images, a square video commands more screen real estate and is simply harder to miss.
- Facebook: Facebook is a bit more forgiving, but tests consistently show that 4:5 vertical and 1:1 square clips outperform the old-school 16:9 landscape format.
The aspect ratio is your clip's first impression. Nailing it for each platform is the easiest win you can get. It tells the algorithm—and the viewer—that your content belongs there.
Design for Silent Scrolling
Here’s a hard truth: most people won't hear your video. In fact, an incredible 85% of videos on Facebook are watched with the sound off.
If your clip has any spoken dialogue, clear and easy-to-read subtitles are non-negotiable. They're the only way to hook someone scrolling silently on the bus, in a waiting room, or at their desk. Think of them as your silent salesperson.
Finally, don't forget the text. A sharp, compelling caption and a few relevant hashtags are what help new audiences find you. A perfectly formatted clip with great subtitles is a start, but a smart caption is what turns it into a magnet for discovery.
Got Questions About Clipping YouTube Videos? We've Got Answers
You've learned the methods, but a few questions might still be bouncing around in your head. Let's tackle some of the most common ones we hear from creators and marketers who are getting started with clipping.
Is It Actually Legal to Clip a YouTube Video?
This is the big one, and the answer is nuanced. While downloading videos does go against YouTube's terms of service, the way you use the clip is what really matters. Using short excerpts for commentary, criticism, news reporting, or education often falls under the legal doctrine of Fair Use.
The key is to be transformative. Don't just re-upload someone else's content.
To stay on the right side of the line, keep your clips short, add your own unique analysis or reaction, and always credit the original creator. If you're planning to use a clip for commercial purposes, your safest bet is always to get direct permission first.
What’s the Best Video Format for My Clips?
You can't go wrong with MP4 using the H.264 codec. Seriously, it's the gold standard for a reason.
This format gives you that perfect sweet spot between great video quality and a file size that won't take forever to upload. It's universally supported, meaning your clips will look sharp and play smoothly on every social media feed, in any editing program, and on whatever device your audience is using. With over 99% of browsers supporting H.264, it’s a reliable choice every time.
What If the Creator Turned Off the Clip Button? Can I Still Make a Clip?
Yes, you absolutely can. When a creator disables YouTube’s built-in "Clip" feature, it only affects that specific function on the YouTube page itself. It doesn't lock down the video entirely.
All the other methods we've covered—like using desktop software or online clipping tools—still work perfectly fine. These tools grab the video content directly from its URL, completely bypassing the native clip setting. So, you can still create your downloadable clips for repurposing, no problem.
Tired of manually hunting for the best moments in your long-form videos? Swiftia uses AI to automatically find viral-worthy highlights, adds eye-catching animated captions, and formats them for every social platform in minutes. Try Swiftia for free and see how much time you can save.