If you've ever tried to upload a massive video file to YouTube, you've probably hit a frustrating roadblock right at the start. The first and most critical hurdle is verifying your YouTube account with a phone number. This one simple step is the key to unlocking the platform's full potential for long-form content.
Breaking Through YouTube’s Initial Upload Limits

Before diving into compression tricks and upload methods, let's talk about why YouTube has these limits. It's not to make your life difficult. The default restrictions are a frontline defense against spam and malicious content, preventing bots from flooding the platform with junk.
By requiring a quick phone verification, YouTube confirms you're a real person, not an automated script. It’s a small step that helps keep the community safe.
For a brand-new, unverified account, the limitations are pretty tight:
- A hard cap of 15 minutes for video duration. Anything longer gets rejected on the spot.
- A restrictive file size limit. While YouTube doesn't list an exact GB number, the 15-minute rule effectively blocks any high-resolution or long-form video.
Verification Is Your Golden Ticket
The great news? Getting past these limits is incredibly easy. Once you verify, your account gets a massive upgrade.
Since 2017, verified channels can upload videos up to a whopping 128 GB or 12 hours long—whichever you hit first. This is a game-changer. Suddenly, you can upload feature-length documentaries, full conference recordings, or deep-dive gaming streams without a problem. For more on YouTube's features, you can find a wealth of information at seo.ai.
Verifying your account isn't optional; it's the essential first step. Think of it as graduating from a casual user to a serious creator. It’s a one-time thing that permanently expands what your channel can do.
The 2-Minute Verification Process
Getting verified is quick and painless. Just head over to youtube.com/verify on your desktop.
From there, you'll be asked to pick your country and choose how you want to get your verification code—either a text message or an automated call.
Let’s put this into a real-world scenario. Say you just wrapped up a 45-minute 4K video tutorial, and the final file is sitting at 30 GB. On a fresh, unverified account, that upload is dead on arrival. YouTube will immediately flag it for being over the 15-minute limit.
But after you pop in that six-digit code from your phone, your account is instantly verified. Now, try that 30 GB upload again. It will start processing without any "video is too long" errors. That simple action is all it takes to unlock the platform for your most ambitious projects.
To help you stay on track, we've put together a quick checklist.
Checklist for a Successful Large Video Upload
Follow these essential steps to prepare your large video for a smooth and successful upload to YouTube.
| Action | Why It Matters | Tool or Method |
|---|---|---|
| Verify YouTube Account | Unlocks uploads up to 128 GB / 12 hours. This is the most crucial step. | youtube.com/verify |
| Check Video Format | Ensures compatibility and avoids processing errors. MP4 is the gold standard. | Video editor export settings |
| Compress Smartly | Reduces file size without visible quality loss, speeding up the upload. | HandBrake, Adobe Media Encoder |
| Use a Stable Connection | A wired Ethernet connection is far more reliable than Wi-Fi for huge files. | Ethernet cable |
| Upload via Browser | The simplest method for most creators, offering a straightforward drag-and-drop interface. | YouTube Studio |
Following this checklist sets you up for success and helps you sidestep the common pitfalls that can turn a big upload into a big headache.
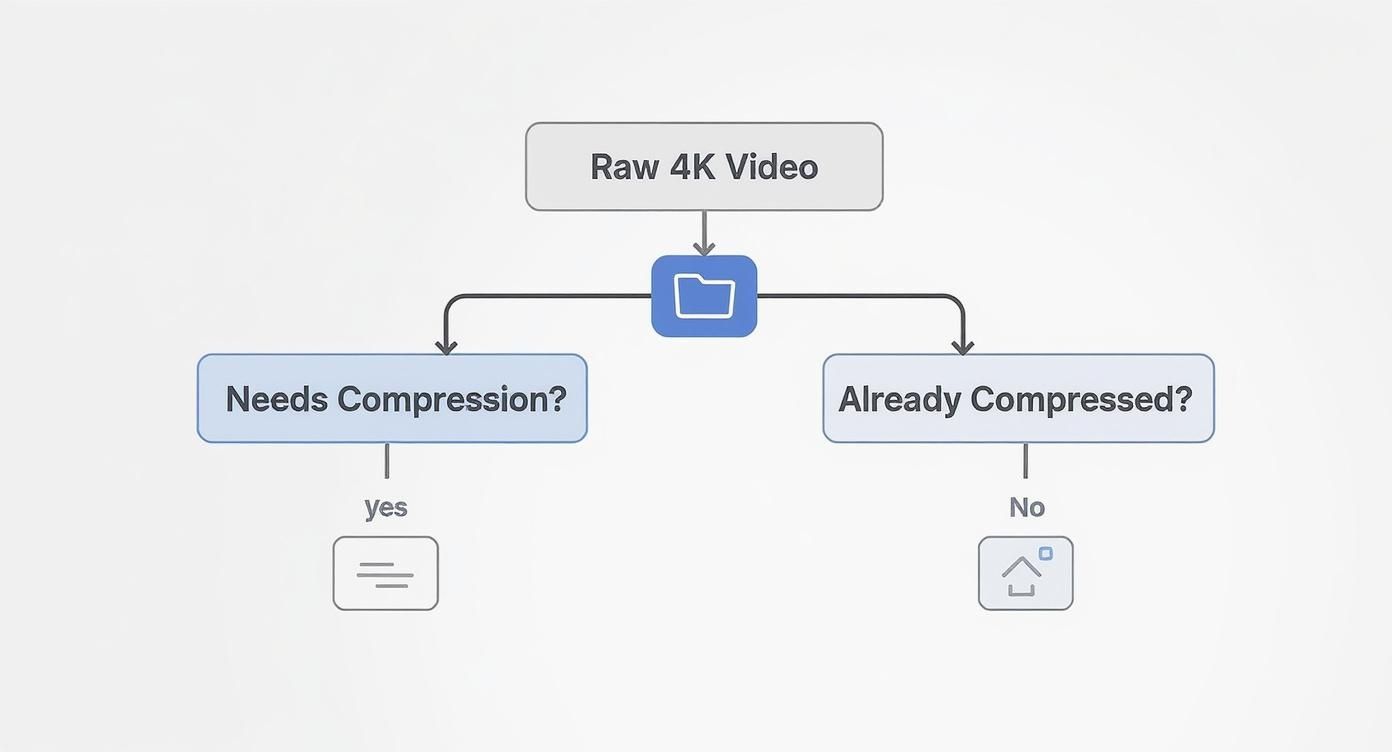
Getting Your Video File Ready for YouTube
Before you even think about the upload process itself, we need to talk about the video file. A raw 4K video, especially one that runs over an hour, can easily be a monster file—we're talking hundreds of gigabytes. Trying to push a file that big to YouTube is just asking for a headache, with painfully slow progress and a high chance it'll fail partway through.
The fix isn't just about making the file smaller; it's about doing it the right way. Good video compression is a delicate dance between shrinking your file size and keeping the picture looking sharp. When you nail it, your uploads are faster and more reliable, and your audience won't spot any difference in quality.
Why YouTube’s Preferred Format is Your Best Friend
YouTube has its own way of doing things. While it can handle a lot of different video formats, feeding it a file that's already in its preferred format makes the whole "processing" stage on their end go a lot smoother and faster. For us creators, that means sticking to a simple, proven recipe.
The absolute gold standard for YouTube uploads is the MP4 container format. Think of it as a digital box. Inside that box, YouTube wants to see two specific things:
- Video Codec: H.264 (also known as AVC) is the undisputed champion here. It's efficient, universally supported, and gives you great quality.
- Audio Codec: AAC (Advanced Audio Coding) is the perfect partner, delivering crisp audio without bloating your file size.
Sticking to this MP4/H.264/AAC combo is your first and most important step. It's the best way to ensure maximum compatibility and avoid that gut-wrenching "processing failed" error after your upload finally finishes.
A Practical Guide to Compressing a Massive Video
Let's run through a real-world scenario. You've just wrapped up a 90-minute 4K podcast episode. The final export from your editing software is a beautiful, but colossal, 100GB ProRes file. Uploading that directly could take an entire day, and one little internet hiccup could send you right back to square one.
This is where a free, powerful tool like HandBrake comes in. Our goal is to drastically cut down the file size without sacrificing the visual quality that matters.
My Pro Tip: The secret isn't just about shrinking the file. It's about pre-compressing it in a way that plays nicely with YouTube's own re-compression system. By doing this yourself, you get to control the final look of your video, not them.
I always recommend HandBrake because it gives you the granular control you need. Once you open your 100GB video in the app, here are the key settings to focus on:
- Format: Make sure MP4 File is selected.
- Video Encoder: Choose H.264 (x264). It's the most reliable choice for quality and compatibility.
- Framerate (FPS): Set this to "Same as source" to perfectly match your original video, which is usually 30 or 60 fps.
- Quality Setting: This is the magic button. Instead of messing with bitrates, use the Constant Quality (CQ) slider. For high-quality 4K video, a CQ value between 20 and 23 is the sweet spot. This setting tells the software to maintain a consistent visual quality, which is far more efficient than locking in a fixed bitrate.
Using these settings, that huge 100GB file will likely slim down to a much more manageable 20-40GB. That’s a 60-80% reduction in size with virtually no perceptible loss in quality once YouTube is done with it. Mastering this one step is a game-changer for anyone dealing with large video files.
What About Bitrate and Resolution?
While Constant Quality is my go-to method, sometimes you need to get more specific, especially if you're on a slower internet connection. This is where bitrate comes in—it's the amount of data used to encode each second of video.
Here are some solid starting points for bitrate when uploading to YouTube (for standard 24, 25, 30 fps video):
- 4K (2160p): 35-45 Mbps
- 1440p (2K): 16 Mbps
- 1080p: 8 Mbps
If your video has a ton of fast movement—think action sports or gaming footage—you'll be using a higher frame rate (like 60 fps) and should bump those bitrate numbers up a bit to keep things looking smooth.
It's important to remember the sheer scale of what YouTube is handling. An estimated 72% of daily uploads come from mobile devices, so their system is built for massive volume. As you can read over at MConverter.eu, this means their processing pipeline is highly automated. By giving it a clean, well-compressed file, you're setting your video up for a smooth and successful journey.
Choosing The Right Upload Method For Large Files
How you get your video to YouTube is just as critical as the file itself. If you've ever tried to upload a massive 60GB 4K project using the standard browser uploader, you probably know the feeling of dread when your internet hiccups at 95% complete. You’re often forced to start the entire, grueling process from scratch.
This is a universal frustration that costs creators countless hours. In fact, one recent survey showed that nearly 40% of users have had a large file upload fail because of a network interruption. To avoid joining them, you need to pick an upload method built for reliability.
The Standard Browser Uploader vs. YouTube Studio
Most people start with the simple drag-and-drop uploader on YouTube's homepage. It’s fine for short clips, but it's notoriously fragile when handling files that take hours to send. A flaky Wi-Fi signal or even just accidentally closing the browser tab can wipe out all your progress in an instant.
The YouTube Studio interface (studio.youtube.com) offers a slightly more stable environment. It's the command center for creators, giving you a proper dashboard for managing your uploads. But at its core, it still runs on the same browser technology, making it just as vulnerable to those same connection-based failures.
This workflow shows why compressing your video first is such a vital step—it makes any upload method you choose faster and far more reliable.
The Power of Resumable Uploads
The real game-changer for large files is a feature called resumable uploads. This is the technology that allows an upload to be paused—either on purpose or because of a network error—and then pick up right where it left off.
Imagine you're four hours into uploading a 75GB file and a brief internet outage hits. Without a resumable upload, you’re back to square one. With it, the process just pauses and automatically continues once you’re back online, saving you a massive headache.
Think of resumable upload technology as your best defense against lost time. It turns a fragile, all-or-nothing process into a resilient, manageable task.
A Look At More Reliable Upload Options
So, if YouTube's own browser tools don't have this built-in safety net, what are your options? Thankfully, there are several third-party solutions and clever workarounds designed for creators who regularly deal with huge video projects.
Here's a quick comparison of the most common methods to see which might be the best fit for your workflow.
Comparing YouTube Upload Methods
A look at the reliability, speed, and key features of different ways to upload your large video file.
| Upload Method | Ideal For | Reliability | Supports Resumable Uploads? |
|---|---|---|---|
| Browser Uploader | Small files, quick one-off uploads | Low | No |
| YouTube Studio | Managing multiple uploads with metadata | Low-Medium | No |
| Desktop App/API Tool | Large files, scheduled uploads, batch processing | High | Yes |
| Google Drive Transfer | Very large files, unstable local networks | High | Yes (via third-party tool) |
As you can see, for any serious work involving large files, moving away from the browser-based options is the most reliable path forward.
Here are a few of the most effective approaches to get that resumable functionality:
- Third-Party Desktop Apps: Dedicated desktop apps built for managing YouTube content are a great option. These tools usually connect to your channel via YouTube's API and pack in features like scheduling, batch uploads, and most importantly, resumable transfers.
- Google Drive as a Staging Area: First, upload your huge video to Google Drive. Then, you can use a third-party application or a custom script to transfer the file directly from Drive to YouTube. Cloud-to-cloud transfers are far more stable and aren't affected by your local network's mood swings.
- Splitting the Video: For truly massive files, like a 10-hour livestream archive, sometimes the best strategy is to break it into smaller, more manageable chunks. You can learn the best ways to do this by checking out this guide on how to cut videos into parts to ensure viewers get a seamless experience when you publish them as a playlist.
For developers and advanced users who need a rock-solid, automated solution, the best bet is the YouTube Upload API for developers. It gives you programmatic access to everything you need: resumable uploads, robust error handling, and batch processing, making it the most dependable method for high-volume workflows.
How to Fix Common Large Video Upload Errors

Even with perfect preparation, a large video upload can hit a snag. Nothing is more frustrating than seeing an error message pop up after hours of waiting, but trust me, most of these issues are fixable. Instead of just canceling and starting over, a little methodical troubleshooting can save you a world of hurt.
Let's walk through the most common upload headaches, from uploads that are frozen in time to outright processing failures. Here’s a clear checklist for each problem.
The Dreaded "Upload Stuck at 99%"
We’ve all been there. You watch the progress bar agonizingly crawl to 99%… and then it just stops. You wait a few minutes, which turn into an hour, and still nothing. Before you slam your laptop shut, you need to understand what's really going on.
This is almost never an issue with your internet connection. At this point, your file is already safe and sound on YouTube's servers. That 99% mark usually signals the handoff from your upload to YouTube's internal processing queue. A long pause here simply means their systems are swamped.
Key Insight: A 99% stall is almost always a YouTube-side processing delay, not an upload failure on your end. Patience is your best friend here.
So, what should you do?
- Wait it out. Seriously. Give it at least 30-60 minutes, especially for a massive 4K file. This step can take a surprisingly long time.
- Check YouTube's status. Pop over to a site like Downdetector to see if other users are reporting issues. If YouTube is having a bad day, your only move is to wait.
- Don't close the tab! Keep that upload window open. Closing it is the one sure way to kill the entire process.
If you find this happening a lot, you can dig deeper and troubleshoot common upload errors with more advanced tips.
Solving the "Processing Failed" Message
Unlike a stuck upload, the "Processing Failed" error is a hard stop. It's a clear signal that something is wrong with the video file itself. YouTube received your file just fine, but it couldn't convert it for playback on the platform. Based on my experience and polls of other creators, codec and format problems are responsible for over 50% of these failures.
This error almost always points to one of two things: a corrupted file or an unsupported codec. Your file can get corrupted during the export from your video editor or even during a shaky file transfer.
Here's how to tackle it:
- Check your codec. Is your video in the recommended MP4 container with an H.264 video codec and AAC audio? Using an obscure format is the quickest way to get a "Processing Failed" error.
- Test the file locally. Try playing the video on your computer with a media player like VLC. If the file is corrupted, it will often stutter, freeze, or just refuse to open.
- Re-export and re-compress. If you suspect corruption, the most reliable fix is to go back into your editing software and export the project again. If you can't do that, running the file through a tool like HandBrake can sometimes fix minor issues by re-encoding it properly.
Dealing with the "Video Is Too Long" Error
This one seems straightforward, but it can be a head-scratcher if you know you've already verified your account. If you see this message, it's almost guaranteed to be an issue with your account's verification status, not the video itself.
First, the simple check: are you logged into the correct Google account? It’s an easy mistake to make, especially for creators managing multiple channels. You might have accidentally tried to upload from an unverified account.
If you're sure you're in the right account, head back to the youtube.com/verify page. Every now and then, YouTube will ask for re-verification for security reasons. By tackling these common errors with a clear plan, you can solve problems quickly and get back to what matters—sharing your content.
A Smarter Workflow for Long-Form Video
If you're creating long-form content like podcasts, webinars, or deep-dive tutorials, the upload process isn't just a final task. It's a key part of your entire creative cycle. Many creators focus on the single, high-stakes upload of their masterpiece, but there's a much more effective way to approach it: think about repurposing from the very beginning.
This simple shift in perspective changes everything. Instead of pouring all your effort into one two-hour video, you start treating that recording as a goldmine for dozens of smaller content pieces. This approach doesn't just give you more content to share; it makes your entire upload strategy more manageable and far less stressful.
Turn a Single Upload Into a Content Library
Let's walk through a real-world scenario. You've just wrapped a two-hour interview with an expert in your field. The raw file is massive, and the thought of a single, day-long upload is honestly a little terrifying. The old way would be to compress it, hit "upload," and hope for the best.
A better workflow begins while you're still editing. As you watch the footage, pinpoint the ten most powerful, shareable, or even controversial moments. Look for killer quotes, surprising statistics, or quick, clear explanations of complicated ideas.
Instead of seeing your long-form content as a single asset, view it as a container filled with high-value micro-assets. This mindset is the key to expanding your reach and ditching upload anxiety.
Each of these moments can be exported as its own short, vertical clip. Just like that, one recording session has given you a whole library of content that's perfectly sized for different platforms.
Build a More Resilient Content Machine
This repurposing model has some serious advantages over the all-or-nothing upload strategy. While long-form videos are fantastic for delivering deep value, short-form content is what drives a huge amount of discovery today. For perspective, YouTube Shorts alone now pull in over 70 billion daily views.
When you create clips, you're essentially building a promotional engine for your main video. Here’s what that looks like in practice:
- YouTube Shorts: Post your best 30-60 second clips to grab the attention of new viewers right inside the YouTube ecosystem.
- TikTok and Instagram Reels: Use compelling vertical clips to connect with different audiences and steer them back to your main YouTube channel.
- LinkedIn and Twitter: Share insightful soundbites or key takeaways to spark conversations with a more professional audience.
This multi-platform strategy means you're not banking everything on a single, flawless upload. If your main video upload is slow or hits an error, you still have a consistent stream of content going out, keeping your audience hooked and building momentum.
Speed Up Repurposing with Automation
Manually chopping up a long video into dozens of clips sounds like a ton of work, but modern tools can do most of the heavy lifting for you. Once you've identified the key moments, software can automatically add animated captions, reformat the video for different platforms, and export all your clips in one go.
This creates an incredibly efficient system. A single recording can fuel a full week's worth of promotional content across all your channels, with every piece designed to point viewers back to your main video. To see how this works, you can explore tools that can dramatically accelerate this process.
Ultimately, optimizing your workflow is about playing the long game. Instead of getting bogged down by the narrow challenge of how to upload large videos to YouTube, you build a system that makes every piece of content work harder. You’ll get more value from every minute you record, reduce the risk of a single upload failure, and build a powerful presence across platforms that consistently grows your audience.
Got Questions About Big Uploads?
Wrestling with massive video files can throw some real curveballs your way. Even if you've done everything by the book, you can still hit some strange roadblocks. Let's break down some of the most common questions that pop up when you're trying to upload large videos to YouTube.
Why Does My Brand-New 4K Video Look So Blurry?
It’s a heart-stopping moment: you've just uploaded a beautiful 4K video, but when you go to watch it, it looks like it was filmed on a potato. Don't panic—this is completely normal.
When a video first lands on YouTube's servers, they quickly push out a low-resolution version, maybe 360p or 480p, so it's viewable right away. The high-resolution versions, especially 1080p and 4K, take a whole lot longer to process. For a multi-hour 4K beast, you could be waiting several hours. The blurriness is just a temporary state while the HD processing is chugging away in the background.
Here's a pro tip I swear by: always upload your videos as "Unlisted" or "Private" first. Wait until you can see the "HD" and "4K" options in the player's little gear icon before making it public. This way, your audience's first impression is the crisp, high-quality version you intended.
Can I Just Let a Huge Video Upload Overnight?
Absolutely. In fact, it's one of the smartest things you can do. Kicking off a massive upload in YouTube Studio right before you head to bed is a time-tested strategy for managing huge files without it derailing your day.
Just start the upload process as usual, but instead of hitting "Publish," use the scheduling feature to set it for a future date and time. This lets the file transfer and process while you sleep, which is also when your home internet is likely faster and less congested. By morning, the heavy lifting is done, and you can focus on polishing the title, description, and thumbnail on a fully processed video.
Should I Split a Super Long Video Into Smaller Parts?
This is a classic "it depends" situation. On one hand, splitting a long video into a few smaller chunks makes each upload way faster and far less likely to fail if your internet connection hiccups. A shorter upload just has a better chance of making it through successfully. Some people even find it boosts total channel views if viewers binge-watch the series.
The downside? You risk fragmenting your audience's attention. A viewer might watch part one but never click through to part two, cutting their viewing session short.
Here's how I think about it:
- For a documentary or a continuous story: Keep it as a single file. You don't want to break the narrative flow and ruin the experience.
- For a long webinar or a tutorial with distinct sections: Splitting it into logical chapters can be a great move. If you go this route, make sure to pop them into a "Series" playlist. This links the videos together and gives viewers a clear path from one part to the next.
What's the Real Maximum File Size on YouTube?
For any verified account, the hard limit is 128 GB or 12 hours long, whichever you hit first. But just because you can upload a file that big doesn't mean you should. A file pushing that limit will take an eternity to upload and has a very high chance of failing partway through.
Honestly, most seasoned creators I know would never try it. It's much more reliable to compress your final video to a more reasonable size before uploading. A long 4K project, for instance, can often be squeezed down to a 20-50 GB file with no quality loss your audience will ever notice. Since YouTube is going to re-compress your video anyway, feeding it a well-compressed file just makes the whole process faster and smoother. It's a much smarter workflow.