Posting your YouTube videos to Instagram is a lot more than just a quick repost. It’s a smart, strategic way to get more eyes on the content you’ve already worked hard to create, all while engaging a totally different slice of your audience. The whole process is about taking that original YouTube video, giving it a quick makeover for Instagram's vertical world, and then optimizing it for formats like Reels or Stories to get the biggest bang for your buck.
Why Repurposing YouTube Videos for Instagram Is a Smart Move

Sharing your best work across different platforms is really the foundation of a solid social media game plan. Why start from scratch for Instagram when you already have high-quality, polished videos on YouTube? Adapting them saves a huge amount of time and effort. It’s not about being lazy; it’s about making your content work smarter, not harder. If you want to dig deeper into the core idea, it’s worth understanding what content repurposing is and just how powerful it can be.
This approach lets you meet your audience on a platform they’re already scrolling through every day, which helps keep your brand top of mind.
Reach Your Audience Where They Already Are
It might surprise you just how much your YouTube and Instagram audiences are one and the same. People don't just stick to one platform anymore. The data backs this up—a tiny 0.2% of Instagram users only use Instagram. On the flip side, a whopping 76.9% of them also use YouTube. This incredible overlap is your golden ticket. You're not just fishing for new followers; you're strengthening the relationship with the community you’ve already built.
This creates a fantastic opportunity to cross-promote. When you post a great clip on Instagram, you can:
- Naturally drive traffic back to your full-length YouTube video.
- Boost watch time and gain subscribers for your main channel.
- Build a stronger, more connected presence across the board.
Maximize Impact with Minimal Effort
Let’s think about a real-world scenario. Imagine a tech reviewer who just dropped a detailed, 15-minute YouTube deep-dive on a new smartphone. That’s perfect for their dedicated YouTube subscribers, but it's way too long for the quick-hit, scroll-happy world of Instagram.
By pulling out the most exciting 60-second snippet—say, a stunning camera test or a demo of a cool new feature—and turning it into an Instagram Reel, they can grab instant attention. That one repurposed clip can lead to a surge in DMs and clicks, all from content they'd already created.
Getting Your YouTube Video Ready for Instagram
Before you even think about hitting 'post,' you need to give your YouTube video a bit of a makeover. Instagram is a completely different world—it’s fast, vertical, and all about grabbing attention in an instant. You can't just upload your widescreen video and hope for the best; you have to adapt it to feel like it truly belongs there.
First things first, you need a high-quality copy of the video. If you still have the original project file on your computer, great. You're already a step ahead. If not, you'll have to download it from your YouTube channel. Just make sure you use a solid method that preserves the video's quality. After all, you worked hard on it. If you need a more detailed breakdown, we’ve put together a guide on how to download and edit videos from YouTube that can get you started.
Navigating Content and Music Rights
Got the video file? Awesome. Now we hit the big one: copyright. This is a minefield, especially when it comes to music. That track you licensed for YouTube through their Audio Library or a service like Epidemic Sound? The rights almost never carry over to Instagram.
Instagram’s algorithm is notoriously good at sniffing out copyrighted audio. In fact, over 1.6 million pieces of content were removed from Instagram for copyright violations in just a six-month period. The last thing you want is for your video to be muted, removed, or to get a strike against your account for an unlicensed song.
Your safest bet is to strip the original YouTube audio out completely. From there, you can either add a trending sound right inside the Reels editor or choose a track from Instagram’s own approved music library to play it safe.
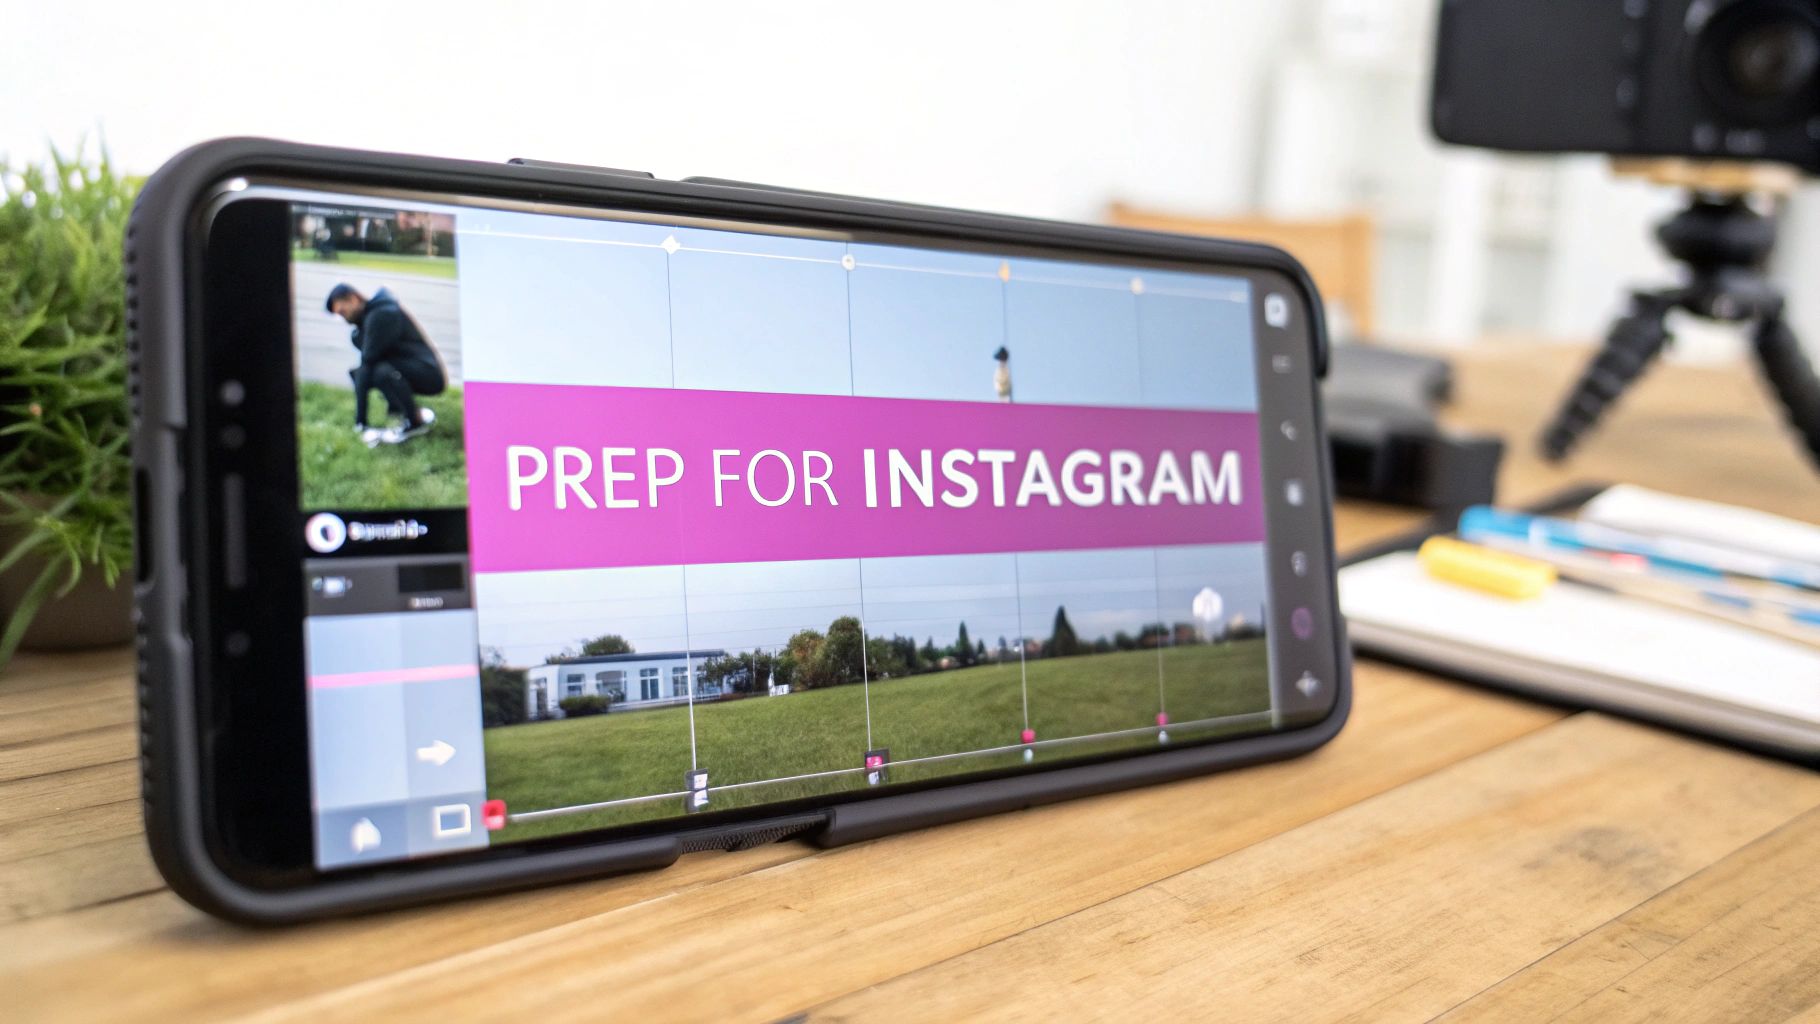
Reformatting for a Vertical World
YouTube was built for the 16:9 horizontal ratio—the standard for TVs and computer monitors. Instagram, on the other hand, is designed to be held in your hand. For Reels and Stories, you need to be thinking in 9:16, which is a complete vertical flip of your original video.
If you just post your horizontal video as-is, you'll get those clunky black bars on the top and bottom. It instantly screams "repost" and looks unprofessional. The goal is to reframe your content so it fills the screen naturally.
Here’s a practical example of how to reframe a two-person interview shot in 16:9:
- Find the Focal Point: Instead of showing both people side-by-side, crop in on the person speaking to fill the 9:16 frame. When the other person starts talking, cut to a new shot focused on them.
- Use the New Space: Place the speaker in the middle of the frame and add a dynamic text headline in the space above them, like "The #1 Mistake New Entrepreneurs Make."
- Check for Clarity: Ensure the speaker's face and expressions are clearly visible, even on a small phone screen. This makes the clip feel more personal and engaging.
Editing for a Mobile Audience
Let's be honest, attention spans on Instagram are short. Research shows you have about three seconds to hook someone before they swipe away forever. This means you need to get ruthless with your editing.
Let's Take a Cooking Tutorial, for Example:
Imagine you have a 10-minute YouTube video on making lasagna. For Instagram, you're not going to show every single step. Instead, you'll create a 45-second highlight reel of the absolute best moments.
- The Hook (0-3s): Don't waste time. Start immediately with the "money shot." Think a glorious, slow-motion cheese pull or a perfect slice being lifted from the pan.
- The Process (4-35s): Now, show the most satisfying parts in quick cuts. Layering the pasta, spreading the rich sauce, sprinkling the cheese. Speed up anything remotely boring.
- The Payoff & Call-to-Action (36-45s): End strong with the finished lasagna coming out of the oven, golden and bubbly. Then, add a text overlay: "Full recipe on my YouTube! Link in bio."
This kind of focused editing turns a long-form tutorial into a punchy, shareable clip that feels perfect for the platform while cleverly driving traffic back to your YouTube channel.
Choosing the Right Instagram Format for Your Video
So, you’ve clipped, edited, and perfectly formatted a piece of your YouTube video for a vertical screen. Now comes the big question: where exactly on Instagram should it go?
It’s tempting to think you can just post it anywhere, but that’s a rookie mistake. Each of Instagram’s video formats—Reels, Stories, and Feed posts—has its own unique audience, algorithm, and purpose. Choosing the right one is the difference between your video taking off or just getting lost in the noise.
Think about your goal. Are you chasing new followers? Nurturing your existing community? Or maybe you're trying to drive traffic to the full YouTube video? Your answer will immediately point you to the best format for the job.
Instagram Reels: Your Engine for Growth
If you want to get in front of people who have never heard of you, Reels are your number one tool. Plain and simple. The algorithm is built for discovery, pushing content to users based on what they like, not just who they follow. Reels now account for over 20% of the time people spend on Instagram.
Reels are perfect for those short, high-impact, attention-grabbing clips from your longer YouTube content. They’re like a movie trailer for your channel.
Use Reels for things like:
- The most visually stunning "aha!" moment from a tutorial.
- A powerful, thought-provoking quote from an expert interview.
- A fast-paced highlight reel from a product review or travel vlog.
The trick is to deliver value or entertainment in the first three seconds. That initial hook is everything. While Reels can be longer, the sweet spot is often on the shorter side. To really nail the timing, it helps to know the latest on how long Reels can be so you can edit your clips to fit perfectly.
Instagram Stories: For Real-Time Connection
Stories are raw, immediate, and they disappear after 24 hours. This creates a sense of urgency and intimacy that you just don't get with other formats. They feel less produced and more like a real, in-the-moment look behind the curtain.
This is the perfect spot to post a quick teaser from your latest YouTube video and, most importantly, add a "Link" sticker. This is your direct pipeline for sending engaged Instagram followers straight to your YouTube channel to watch the full thing. It’s one of the most effective tactics for converting Instagram views into YouTube subscribers.
Feed Posts: Building Your Content Library
Think of your main Instagram Feed as your permanent portfolio. Unlike the fleeting nature of Stories or the trend-driven Reels feed, a video on your profile grid is there for the long haul. People can find it, save it, and come back to it weeks or months later.
Feed videos are ideal for evergreen content—mini-tutorials, foundational tips, or important brand messages that you want to be a lasting part of your profile. A 4:5 vertical aspect ratio is king here, as it fills up more of the screen on the feed than a square post.
Getting the technical specs right is crucial. Always double-check the latest Instagram video size guidelines to make sure your repurposed YouTube content looks clean, professional, and plays smoothly everywhere.
Instagram Video Format Comparison
To help you decide at a glance, here’s a breakdown of where your video clip will have the most impact.
| Format | Best For | Aspect Ratio | Max Length | Key Feature |
|---|---|---|---|---|
| Reels | Reaching new audiences, going viral | 9:16 | 90 seconds | Algorithmic discovery and massive reach |
| Stories | Engaging current followers, driving traffic | 9:16 | 60 seconds per slide | Interactive stickers (links, polls, Q&As) |
| Feed | Evergreen content, building your profile library | 4:5 (recommended), 1:1, 16:9 | 60 minutes | Savable for long-term reference |
Ultimately, the best strategy often involves using all three formats in concert. A Reel can attract a new follower, your Feed post can educate them, and your Stories can build a deeper, more personal connection.
How to Craft a High-Performing Instagram Post
You've done the hard work of editing a perfect video clip. But a great video can still fall flat if it isn't packaged correctly. The next step is all about crafting the post itself—the caption, the hashtags, and the cover image that will make someone stop scrolling. This is where you transform that great video into a piece of content that actually performs.
Let's be honest, your video's success isn't just about what people see; it's also about what they read. A killer caption does so much more than describe the video. It can tell a story, add crucial context, or pose a question that gets people talking in the comments.
The real goal here is to stop the scroll and kickstart a conversation. The Instagram algorithm tends to reward posts that get a lot of engagement, especially comments and saves. In fact, there's good evidence that posts designed to be saved can seriously boost your visibility, making your content work a whole lot harder for you.
Writing Captions That Spark Conversation
Think of your caption as the first line in a chat. Instead of just announcing, "Here’s a clip from my new YouTube video," you need a better hook. Try pulling out a surprising statistic, a controversial take, or a super relatable problem from your video and lead with that.
Then, wrap up your caption with a clear call-to-action (CTA) that does more than just ask for a passive "like."
- Ask a direct question: "What's the one productivity hack you absolutely can't live without? Drop it in the comments."
- Prompt a story: "This was a huge mistake I made early on. What's a lesson you had to learn the hard way?"
- Encourage saves: "Save this post for the next time you need a quick 5-minute workout idea."
This small shift—from just describing to actively engaging—is what helps turn passive viewers into a real community.
A Data-Backed Hashtag Strategy
Hashtags are your secret weapon for organic reach, but the old method of slapping 30 random, popular tags on a post is dead. In fact, it can even signal to Instagram that your content is spammy. The smarter play is to use a balanced mix of different hashtag types to reach different pockets of your audience.
A winning hashtag formula usually looks something like this:
- Niche-Specific Tags (2-3): These are hyper-targeted to your exact topic (e.g.,
#retrogamingcommunity,#veganmealpreptips). The search volume is lower, but you're connecting with a passionate, highly relevant audience. - Broader Topic Tags (3-5): These connect to your general industry and are more widely used (e.g.,
#contentcreator,#healthyrecipes). - Community Tags (1-2): These are tags that identify you as part of a specific subculture or group (e.g.,
#podcastersofinstagram).
If you really want to go deep on this, our full guide on using hashtags for Instagram Reels breaks down more advanced strategies to get your videos seen.
Here’s a real-world example: A creator posted a video about a new software feature. The first time, they used a simple caption and generic tags like
#techand#software, and it got 150 likes. They reposted it later with a story-driven caption about how the feature saved them an hour of work, and used niche tags like#uidesigntoolsand#nocodedevelopment. The revised post more than doubled its engagement, hitting over 300 likes and a dozen saves.
Designing a Scroll-Stopping Cover Image
Finally, don't sleep on the power of a custom cover image. When you upload a video, Instagram will just grab a random frame to use as the cover, and it's almost never the most flattering or interesting one. A custom cover image acts like a tiny movie poster for your video, giving people a reason to hit play.
Your cover should be visually bold, feature a punchy headline that teases the video's value, and stick to your brand's colors and fonts. It's a small detail, but it makes your profile grid look incredibly polished and is often the one thing that decides whether someone watches your repurposed video or just keeps scrolling.
Streamlining Your YouTube to Instagram Workflow
If you've ever tried to manually turn a single YouTube video into a bunch of Instagram clips, you know the pain. It's a one-way ticket to burnout, especially if you’re juggling more than one channel. To stay consistent without losing your mind, you need a repeatable system. A solid process can shrink what feels like a multi-hour chore into a predictable, manageable part of your content strategy.
The first mental shift is to stop thinking one clip at a time. Think more like a content assembly line. Instead of downloading, editing, captioning, and scheduling clips individually, start batching your work. Block out some dedicated time to process an entire YouTube video at once, turning it into all the Instagram content you need for the week. It’s just a smarter way to work, letting you stay in a creative flow instead of constantly switching gears.
Automating the Repurposing Pipeline
For those operating at a larger scale—or anyone who just wants to get their time back—automation is the answer. Setting up an automated pipeline can completely transform your content output. This means using tools that can hook into your YouTube channel, grab new videos the moment they go live, and start prepping them for Instagram without you lifting a finger.
Think about what that could look like. A new YouTube video publishes, and a workflow kicks off automatically:
- The full-length video is pulled into the system.
- An AI scans it and pinpoints the most engaging, viral-worthy segments.
- Multiple vertical clips are instantly generated, complete with animated, on-brand captions.
- These finished clips land in your content scheduler, ready for a final review.
A setup like this takes a tedious, manual process and turns it into a smooth, hands-off content engine.
The real win from a streamlined workflow isn't just saving a few hours. It’s about clearing up your mental bandwidth so you can focus on strategy and creativity. When the robots handle the repetitive stuff, you can get back to what you do best: making great content and connecting with your audience.
The image below breaks down the final creative touches you'll need to add before your post is ready for the world.

It’s a great reminder that an amazing video is only half the battle. A killer caption, the right hashtags, and a thumb-stopping cover image are what will truly make it perform. This is how you build a content strategy that scales without burning you out.
A Few Lingering Questions Answered
Even with the best plan, a few questions always pop up when you start repurposing YouTube videos for Instagram. Let's clear up some of the most common hang-ups so you can move forward with confidence.
Can I Get Away with Using Copyrighted Music?
This is a big one, and I'll be blunt: it's a terrible idea. The license you have for that track on YouTube almost certainly does not cover you on Instagram.
Instagram's system is incredibly good at flagging copyrighted audio. The result? Your video could get muted, taken down entirely, or you could even get a strike against your account. It's just not worth the risk.
The only safe bet is to strip out the original YouTube audio. Your best move is to replace it with a trending sound from Instagram's own music library or use a royalty-free track you know you have the right license for.
What’s the Perfect Length for a Repurposed Reel?
Instagram Reels can technically be up to 90 seconds long, but when you're pulling a clip from a longer YouTube video, shorter is almost always better. I’ve found the sweet spot is usually between 15 and 60 seconds.
Remember, the goal isn't to retell the entire story. You just need to deliver one powerful, attention-grabbing moment that makes people stop scrolling.
Here’s a pro tip: Dive into your YouTube analytics. Look for the parts of your video with the highest audience retention. Those are your gold mines—they're already proven to keep people hooked.
Will Posting a Full YouTube Video to My Feed Kill My Engagement?
Yes, almost certainly. Dropping a long, horizontal (16:9) video onto your Instagram Feed is a recipe for a bad user experience. It shows up as a tiny video sandwiched between huge black bars, which is a major turn-off for a mobile audience that expects quick, vertical content.
Instead of just dumping the whole video, try one of these approaches:
- Cut a punchy 1-minute trailer in the vertical 4:5 format. This looks great on the Feed.
- Pull out a really captivating clip to act as a teaser.
- Always, always include a clear call-to-action telling people where to find the full thing, like "Full video is live on YouTube now—link in bio!"
How Do I Add Captions for Instagram?
You absolutely have to add captions. Research suggests that up to 85% of social media videos are watched with the sound off, and you'll lose that audience instantly if they can't follow along.
A great starting point is to download the auto-generated transcript directly from YouTube. Then, you can use a video editing app like CapCut or InShot to burn those captions right into your video file. These apps have surprisingly good auto-captioning tools and let you customize the look to match your brand. It’s a small step that makes a massive difference in accessibility and engagement.
Ready to stop wasting time on manual editing? Our AI platform transforms your long-form videos into dozens of engaging, shareable social clips in minutes. Start creating content 10x faster today.