There are a few solid ways to cut videos into smaller pieces: you can get surgical with desktop software, use an online tool for a quick turnaround, or even let AI platforms automate the whole process. The right choice really hinges on what you’re trying to accomplish. Are you making a handful of social media clips, editing a long-form podcast, or chopping up a webinar? Each goal calls for a different balance of control, speed, and scale.
Why Cutting Videos Is an Essential Content Strategy
Knowing how to split a video into parts isn't just a basic editing task anymore—it's a core strategy for modern content creators. Let’s face it, audiences are hooked on short, punchy videos on platforms like TikTok, Instagram Reels, and YouTube Shorts. If you want to stay relevant and get seen, you absolutely have to be able to turn your longer content into bite-sized gold.
This shift to snackable content isn't just a passing phase; it’s how people consume media now. Thinking this way lets you do a few key things really well:
- Maximize Content Value: That one-hour podcast or webinar you recorded? It’s not just one piece of content. It can be transformed into dozens of shareable clips, giving you enough material to fill your content calendar for weeks.
- Reach Diverse Audiences: Not everyone will connect with the same part of your video. Splitting it up allows you to target different messages to different people on different platforms.
- Maintain Consistency: Social media algorithms love a steady stream of content. Pushing out short clips regularly keeps your brand in front of people and boosts your engagement.
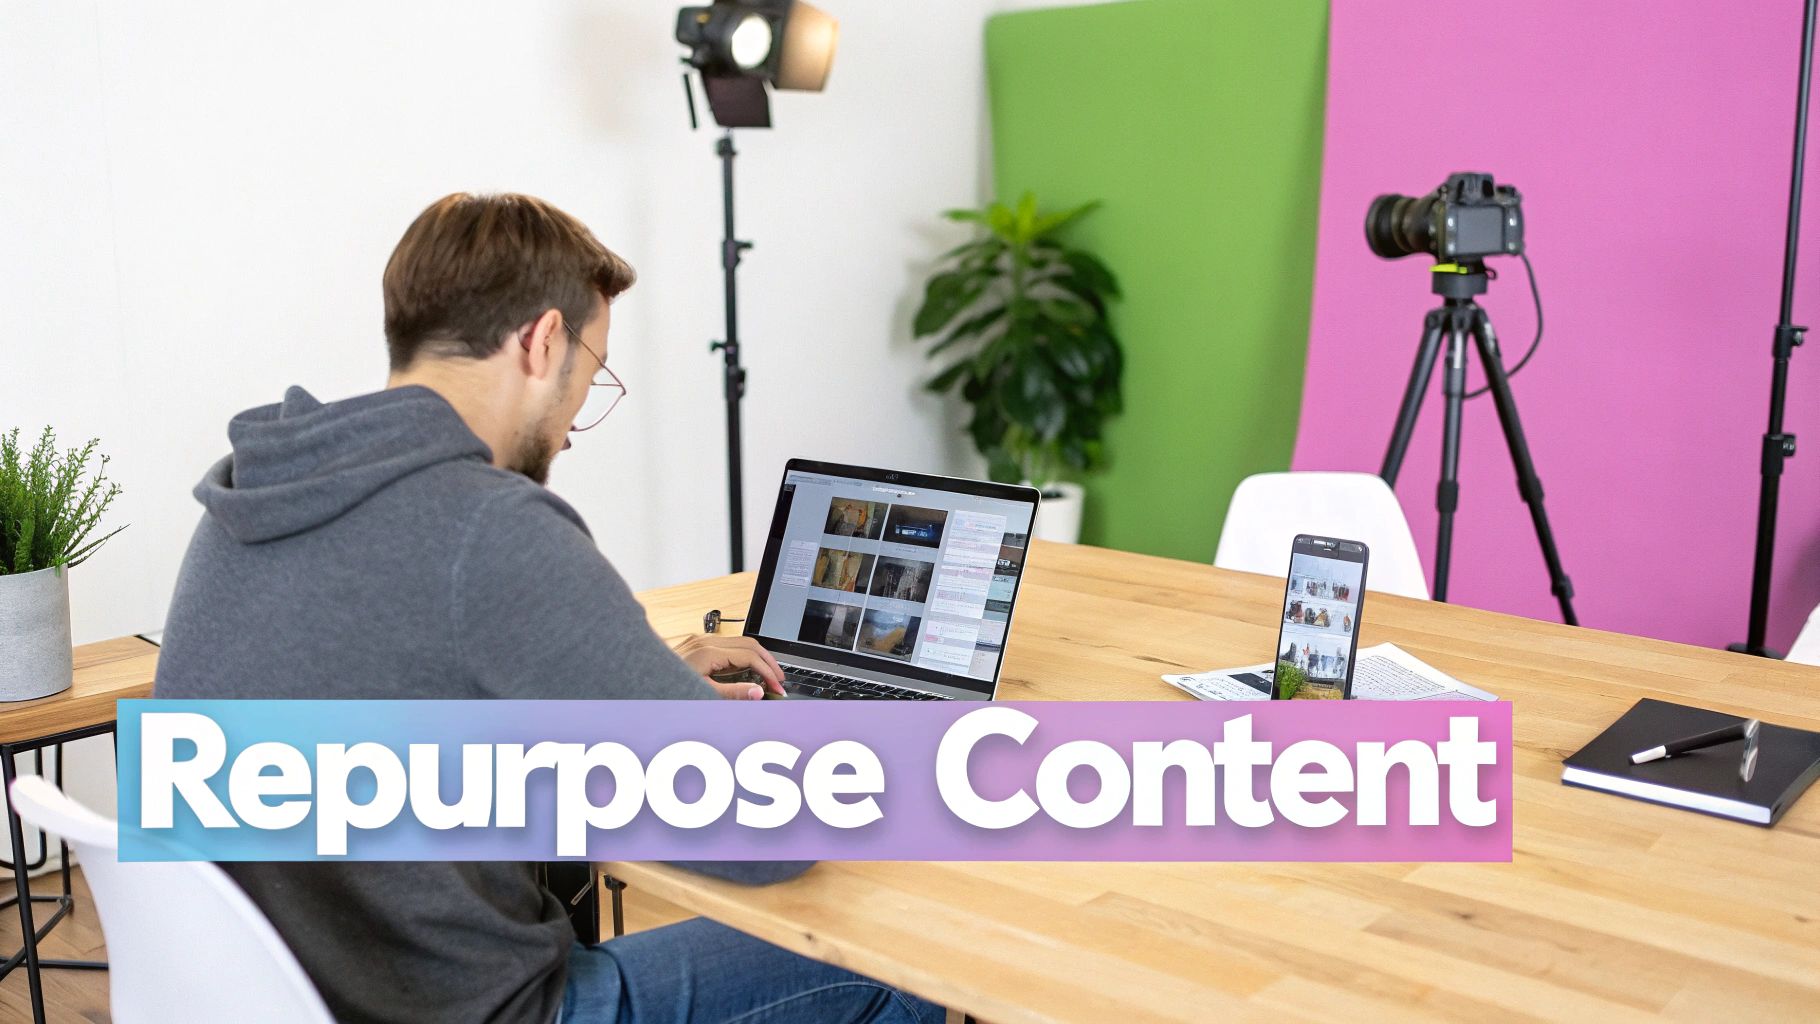
The Growing Demand for Repurposed Content
You can see this strategy playing out across the market. The global video editing industry—which includes all the tools we use to chop up our videos—is booming. Research from Grand View Research shows the market size was valued at USD 2.21 billion in 2023 and is projected to grow at a compound annual growth rate (CAGR) of 6.1% from 2024 to 2030. What's driving this? The insatiable demand for short-form video.
Start seeing your long-form videos as a goldmine of smaller stories. When you do that, you unlock an incredible amount of marketing potential. The idea isn't just to make things shorter; it's to make every single second count.
This changes everything. Splitting a video goes from being a simple editing chore to a powerful way to grow your audience. Once you get the strategic value of segmenting video, you can dive into specifics like how to clip YouTube video content for the best possible return. It's a non-negotiable part of any solid video content marketing strategy.
In the sections ahead, we’ll get into the practical, hands-on methods you need to master this crucial skill.
Mastering Manual Edits with Desktop Software
When you need absolute creative control down to the very last frame, nothing beats traditional desktop editing software. This is the path you take for precision work—the kind of surgical accuracy needed for a high-stakes ad campaign or a detailed product tutorial.
Practical Example: A marketing manager needs to create five unique ad variations from a single long-form customer testimonial video. Each ad must target a different customer pain point discussed in the testimonial. Manual desktop software is the perfect choice, as it allows the editor to precisely cut segments, adjust the timing to emphasize specific emotional reactions, and fine-tune audio to ensure each message lands with maximum impact.
The Tools of the Trade
For the pros, industry workhorses like Adobe Premiere Pro and Apple's Final Cut Pro are the go-to choices. They’re packed with robust toolkits designed for complex projects, offering multi-track timelines, advanced color grading, and audio mixing that go way beyond just cutting a clip in half.
Here’s a glimpse at the Adobe Premiere Pro interface, a familiar sight for professional editors.
That complex timeline with all its layers is exactly why people choose this route. It shows just how much control you have to fine-tune every single detail. If you're just starting out or working with a smaller budget, DaVinci Resolve is a fantastic option. It offers a seriously powerful free version with professional-grade editing, color correction, and even visual effects.
Beyond the Blade Tool
Getting good with desktop software is about more than just knowing where the "cut" or "blade" tool is. The real magic happens when you master the workflow that seasoned editors use every day. Keyboard shortcuts, for instance, are a total game-changer. In Premiere Pro, just tapping 'C' for the Razor tool and 'V' for the Selection tool can save you hours over the course of a big project.
A clean, well-organized timeline is another sign of an experienced editor. Here are a few habits I've picked up that keep projects from turning into a mess:
- Dedicated Tracks: Give different media types their own home. I always put my main footage on V1 (Video Track 1), B-roll on V2, and any graphics or text overlays on V3.
- Labeling and Coloring: Use labels and colors to identify clip types instantly. You could make all your interview clips blue and all B-roll clips green, which makes the timeline easy to read at a glance.
- Lean on Markers: Drop markers on your timeline to flag key moments, potential cut points, or sections you need to come back to. They’re like digital sticky notes for your edit.
The real power of manual editing is its intentionality. Every single cut is a deliberate choice you make, not one an algorithm makes for you. This hands-on process ensures the final clips match your creative vision perfectly, which is something automated tools can't always promise.
This level of detail is precisely why so many creators stick with desktop solutions. Sure, there's a steeper learning curve, but the payoff is total control. If you’re making content specifically for social platforms, it’s worth checking out our guide on the best video editing software for social media to find a tool that fits your workflow. At the end of the day, knowing how to precisely cut videos into parts is the bedrock of great editing.
Sometimes you just need to get the job done fast. When you're out in the field or away from your main editing rig, online video splitters and mobile apps are an absolute lifesaver. These tools let you cut videos into smaller pieces right from your browser or phone—no powerful desktop needed.
Practical Example: A social media manager is covering a live conference. They capture a 2-minute video of a keynote speaker's most impactful statement on their phone. Using a mobile editing app like CapCut, they can immediately trim the clip down to the key 30 seconds, add an auto-caption overlay, and upload it to Instagram Stories—all before the speaker has even left the stage. This capitalizes on the event's real-time buzz.
The Shift to Mobile-First Editing
The freedom to edit from anywhere has completely changed how many creators work. It's no surprise the video editing apps market, valued at USD 1,304.37 million in 2024, is expected to climb to USD 1,760.86 million by 2033. This growth points to a massive preference for mobile and cloud-based editing over clunky, traditional software. You can dig deeper into these trends with this detailed industry analysis.
This flowchart helps visualize when to pick a desktop editor versus a more nimble mobile tool.
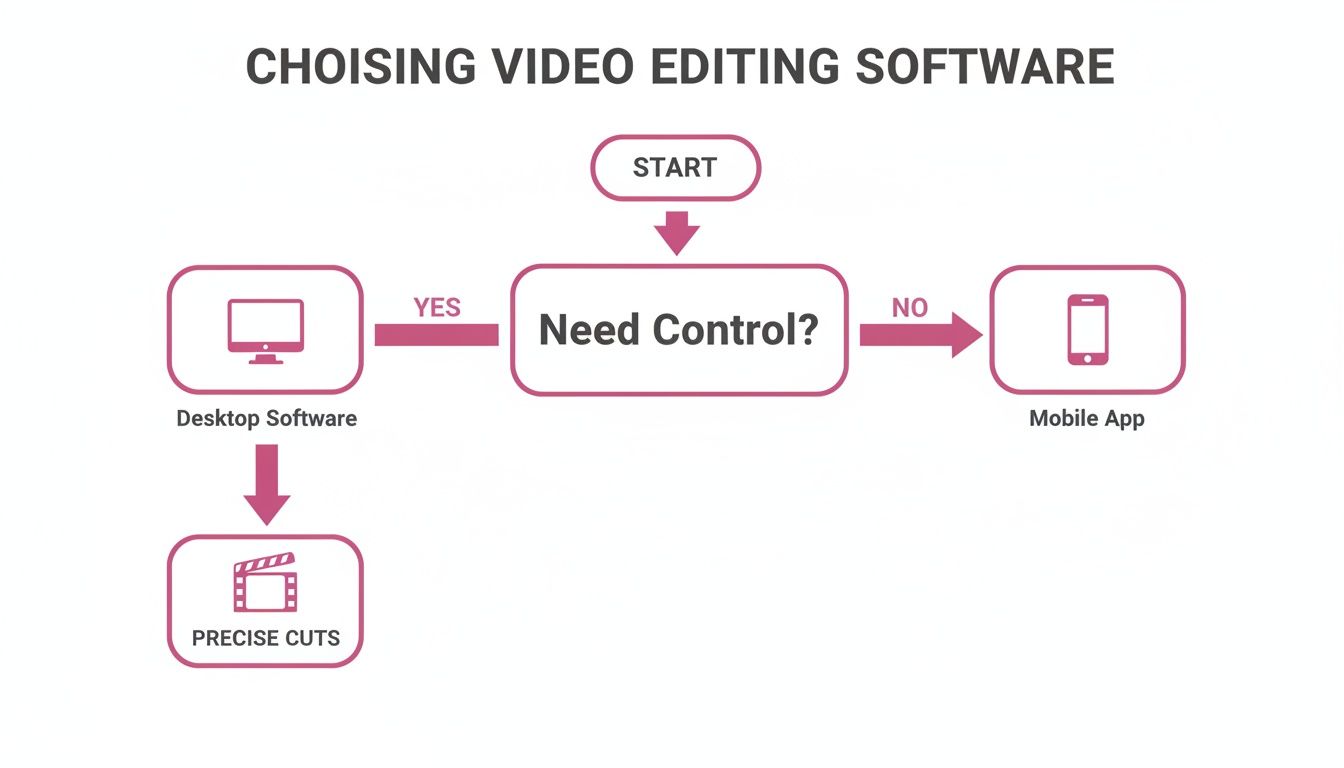
The takeaway is simple: if you need pixel-perfect control and all the bells and whistles, stick with desktop software. But when speed and simplicity are what matter most, mobile and online tools win every time.
Choosing the right tool depends entirely on your project's needs. The table below breaks down the most common methods for splitting videos, helping you decide which approach fits your situation best.
Choosing Your Video Cutting Method
| Method | Best For | Key Advantage | Potential Drawback |
|---|---|---|---|
| Desktop Editors | Professional projects, long-form content, and high-quality exports. | Unmatched precision, extensive features, and format control. | Steep learning curve; requires a powerful computer. |
| Online & Mobile Apps | Quick edits, social media content, and on-the-go workflows. | Extreme convenience and speed; accessible from anywhere. | Freemium models often include watermarks and quality limits. |
| Command-Line (FFmpeg) | Programmers and technical users needing automated, scripted edits. | Unbeatable speed, lossless cuts, and full automation potential. | No visual interface; requires command-line knowledge. |
| Video Editing APIs | Developers building automated video workflows into their applications. | Scalable, programmatic control for batch processing at scale. | Requires software development and integration expertise. |
Ultimately, the best method is the one that gets your video from raw footage to its final destination with the right balance of quality, speed, and effort for your specific goal.
What to Expect: The Practical Trade-Offs
While these tools are incredibly handy, it’s important to go in with realistic expectations, especially with the free versions. Most online platforms and mobile apps run on a freemium model.
Here’s what that usually means for you:
- Watermarks: A free plan will almost always slap a company logo on your exported video. That might be a deal-breaker for professional content.
- Lower Quality: To keep their servers from melting, free tools often cap exports at 720p or 1080p. Forget about 4K.
- Locked Features: Want to use custom fonts, cool transitions, or AI-powered magic? You’ll probably have to open your wallet for a paid subscription.
For a quick trim or a casual social media post, these trade-offs are usually fine. The goal isn't cinematic perfection—it's getting content out there, fast. The power to create and post from anywhere is what makes these tools so valuable.
Practical Example: The Fitness Instructor
Think about a fitness instructor who films a 30-minute workout on their phone. With a mobile app, they can quickly chop that long video into a series of one-minute clips, each showing a single exercise. They can add a text overlay, drop in some background music, and schedule them to post all week.
This entire process can happen on their phone during their commute home. One long recording effortlessly becomes a full week of engaging social media content. That’s the power of mobile editing.
Letting AI Do the Heavy Lifting: Automated Content Repurposing
What if you could take a one-hour webinar and, with minimal effort, get a dozen perfect social media clips from it? That’s not a futuristic dream—it’s what AI-driven video editing tools are doing right now. They're built to handle the tedious work, freeing you up to focus on strategy instead of spending hours staring at a timeline.
Instead of you having to manually scrub through footage, these smart platforms analyze your video's content on their own. They can identify different speakers, find key topics, and even automatically snip out all the "ums" and "ahs." This kind of automated workflow is a massive win for anyone who needs to cut videos into parts quickly and consistently.
How to Effortlessly Scale Your Content Creation
The real magic here is scalability. According to a report by Precedence Research, the AI video generation market is projected to reach USD 2.98 billion by 2033, growing at a CAGR of 19.83%. This surge is driven by the need for scalable content creation for marketing and social media.
Practical Example: A B2B company hosts a 60-minute webinar with an industry expert. Using an AI tool, they upload the recording. The AI transcribes the entire session, identifies key topics like "Q4 Trends" and "New Technology," and automatically generates 15 high-potential clips, each 30-60 seconds long. The platform's virality score helps the marketing team prioritize which clips to post first, maximizing engagement with minimal manual effort.
This is what a typical AI workflow looks like—long-form content is automatically broken down into dozens of suggested, ready-to-use clips.
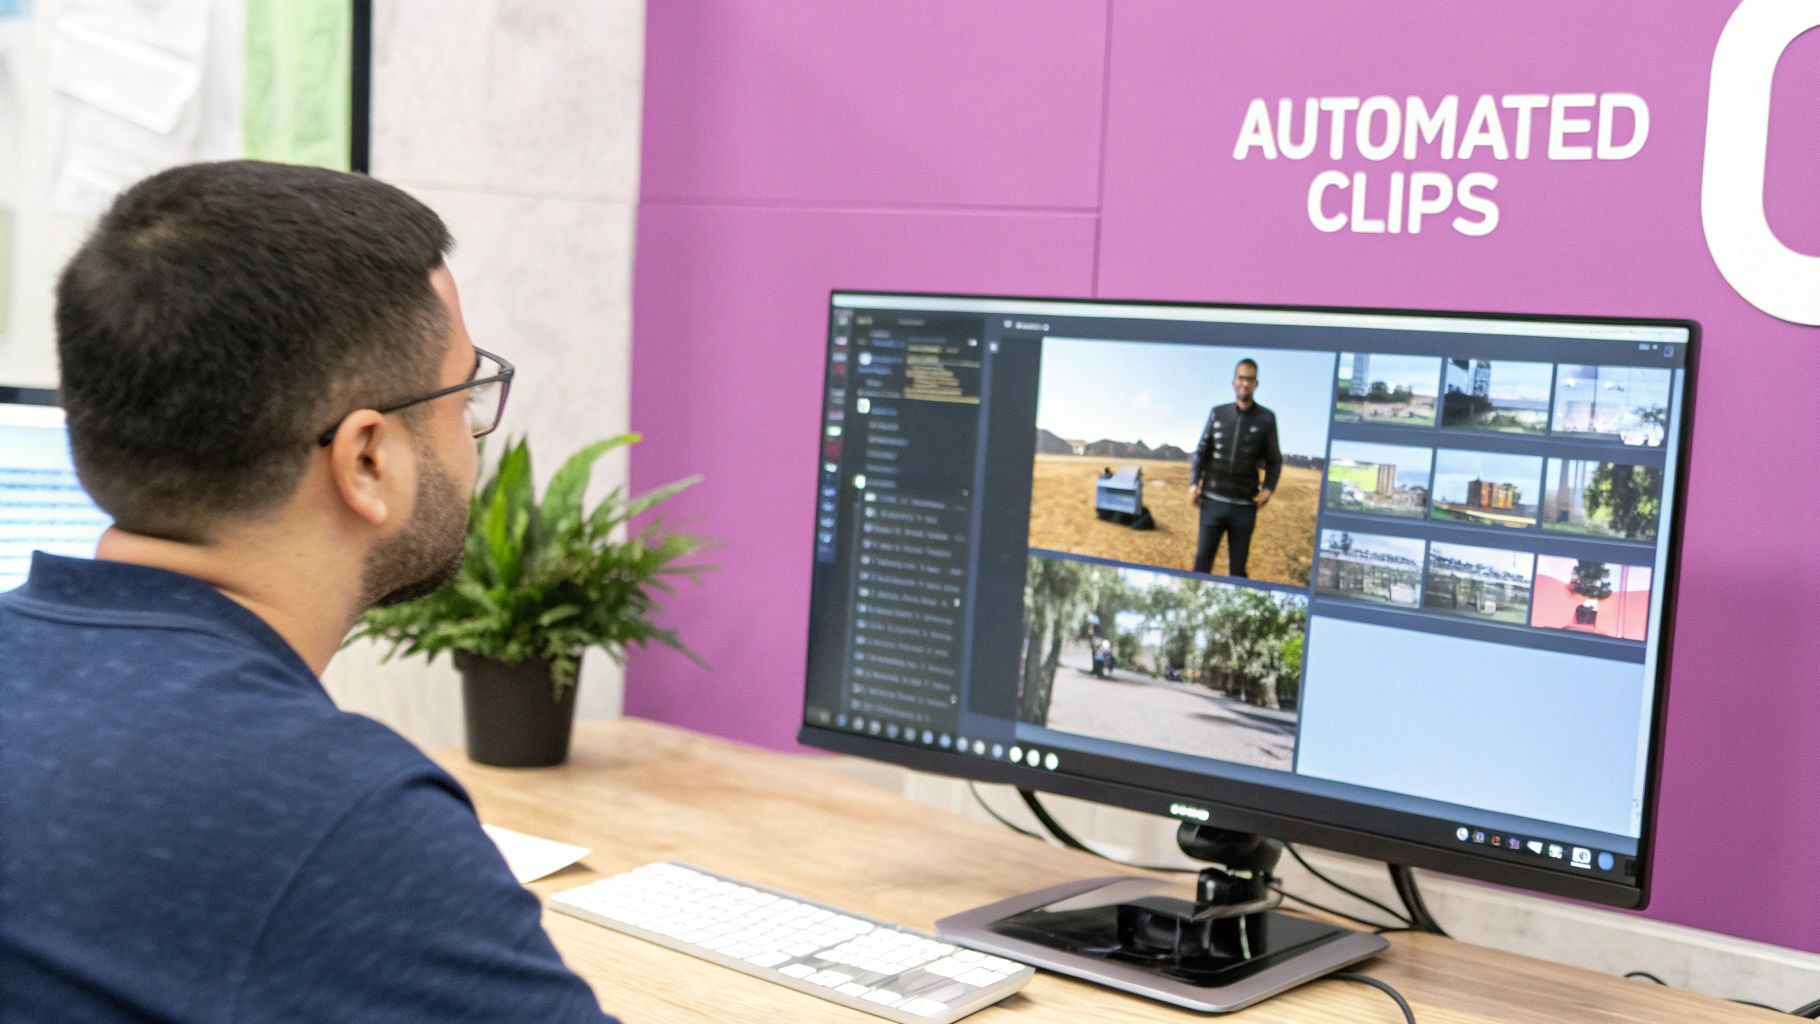
A good dashboard gives you a clean overview of all the clips, complete with transcripts and timestamps, so you can review and export them in minutes.
The Advanced Features That Really Matter
It's not just about simple splitting anymore. The best AI platforms offer some seriously powerful features that make a tangible difference in quality and efficiency. Many now support multiple languages, which is huge for creators looking to reach a global audience. Others can generate dynamic, animated captions that are perfectly timed and styled for your brand.
Here are a few game-changing capabilities to look for:
- Active Speaker Detection: The AI automatically figures out who is talking and smartly frames the shot on them, making interview and podcast clips feel much more engaging.
- Virality Scoring: Some tools can analyze a clip and give it a score based on its potential to perform well on social media. This helps you pick the winners without guessing.
- Filler Word Removal: This one is a lifesaver. The AI detects and removes hesitations and filler words, instantly making the audio sound cleaner and more professional. If you want to see how this works, our guide shows how to auto-trim clips and remove silences.
AI doesn't just speed up the editing process; it makes it smarter. It takes care of the repetitive, time-consuming tasks so you can focus on the creative side of things. For any serious creator or marketer today, it’s an indispensable partner.
If you’re ready to dive in, exploring various AI video clipping tools like OpusClip alternatives is a great next step. Finding the right tool can dramatically improve how efficiently you turn your long videos into an arsenal of short, impactful clips.
For Developers and Power Users: The Technical Toolkit
If you're comfortable in a terminal window or building software, you can achieve a level of precision and scale that graphical editors just can't touch. These methods are the go-to for automating repetitive video tasks and building custom workflows that need to cut videos into parts on the fly.
The undisputed king in this arena is FFmpeg, a powerhouse open-source project for all things multimedia. It’s the engine humming quietly behind the scenes of countless video apps you already use. Forget clicking and dragging on a timeline; with FFmpeg, you use simple text commands to pull off complex operations with surgical precision and speed.
Slicing Video with FFmpeg
One of FFmpeg's killer features is its ability to split video at exact timestamps without re-encoding. This means the process is nearly instant and perfectly preserves the original quality. It’s a massive advantage over many desktop editors that have to re-render the entire file, which takes time and can introduce quality loss.
Practical Example: You have a one-hour webinar recording, webinar.mp4, and you need to pull out a 30-second highlight starting at the 15-minute mark.
Here’s the command you’d run in your terminal:
ffmpeg -i webinar.mp4 -ss 00:15:00 -t 00:00:30 -c copy highlight_clip.mp4
Let's quickly break that down:
-i webinar.mp4: This is your input file.-ss 00:15:00: The-ssflag seeks to a specific start time (15 minutes in).-t 00:00:30: The-tflag sets the clip's duration (30 seconds).-c copy: This is the magic ingredient. It tells FFmpeg to copy the video and audio streams directly, which is why it's so fast and lossless.
Scaling Up: From Command Line to API
FFmpeg is a beast for individual tasks or small-scale scripts, but what happens when you need to process hundreds or thousands of videos? That's when you graduate to a video editing API.
An API (Application Programming Interface) is essentially a service that lets your application talk to another one.
A video editing API gives you access to a powerful, scalable video processing engine without having to build one from scratch. You can send a video to the API with instructions and get perfectly processed clips back, ready to use.
Imagine a media company that wants to auto-generate social media highlights from every new long-form video they produce. A developer could write a script that does the following:
- Watches a folder for new video uploads.
- Sends each new video to an API.
- Receives multiple, perfectly formatted short clips back.
- Pushes those clips directly to a social media scheduler.
This kind of automation handles a volume of content that would be completely unsustainable for a team of human editors. While some processes rely on manual editing, creating a handful of clips each day, an API-driven workflow can churn out hundreds, creating a huge advantage in content velocity and market presence.
Organizing and Exporting Your Clips for Social Media
Once you've sliced your masterpiece into shareable clips, the job isn't quite done. The final steps—organizing and exporting—are what separate a polished, professional workflow from a chaotic hard drive filled with randomly named files. This isn't just about clicking "save"; it's about setting your content up for success on every platform and keeping your own workflow sane.
Let's start with organization. As your library of clips grows from a handful to hundreds, a lack of a system will grind your production to a halt. Trust me, a messy folder is where good ideas and great clips go to die.
A simple, consistent naming convention is your best defense against this digital mess. It makes clips searchable and ensures anyone on your team can find what they need without sending you a message.
A Practical File Naming Structure
Over the years, I've landed on a structure that's incredibly effective for keeping track of a massive clip library. It’s descriptive enough to be searchable and logical enough to be quickly understood.
Structure: [ProjectName]_[Source]_[Clip##]_[Topic].mp4
Practical Example: PodcastEp24_GuestJaneDoe_Clip03_AI-Future.mp4
With this system, you know everything at a glance: the source episode, the speaker, its sequence number, and the core subject. This little bit of discipline pays off big time as you start producing more content.
Export Settings for Peak Performance
Now for exporting. Every social platform has its own "preferred" video specs, and giving them what they want ensures your content looks its best. Getting this wrong is a surefire way to get pixelated, blurry videos that just kill the impact of your hard work.
For short-form vertical video on platforms like TikTok, Instagram Reels, and YouTube Shorts, these settings are a solid, reliable starting point:
- Format: MP4 is the universal language of web video. It offers a great balance of high quality and reasonable file size.
- Codec: H.264 (sometimes labeled AVC) is the gold standard, supported by virtually every device and platform.
- Resolution: 1080×1920 (vertical Full HD) is the sweet spot for crisp playback on mobile screens.
- Frame Rate: 30 frames per second (fps) delivers smooth motion without bloating your file size.
Think of your export settings as the final quality check before your content goes public. Taking an extra minute to get these details right preserves the visual integrity of your clips and respects your audience's viewing experience.
Nailing these final steps—both organization and exporting—is what turns a folder of raw footage into a powerful, sustainable content engine.
Ready to automate the entire process from cutting to captioning? With an AI-powered tool, you can turn long videos into dozens of social-ready clips in minutes, complete with animated captions and smart framing. See how much faster you can create content by visiting https://swiftia.io and starting your free trial.