You can't just drop a YouTube link on Instagram and call it a day. To do this right, you need to download the source video, reformat it for a vertical screen (think 9:16), and then upload it as a native Reel, Story, or Feed post. This is the key to making your content look and feel like it belongs on Instagram, which is exactly what you need to stop people from scrolling past.
Why Repurposing Your YouTube Content on Instagram Works
Here's the thing: slapping a YouTube link in your Story is lazy and ineffective. The real magic happens when you transform your long-form videos into punchy, bite-sized clips that are perfect for Instagram’s fast-paced environment. This isn't just about cross-posting; it's about translating your message for a completely different viewing experience.
Instagram’s algorithm, especially for Reels, is built for discovery. It can be an incredible tool for getting your content in front of fresh eyes—people who might never have stumbled upon your YouTube channel. You're basically building a bridge between YouTube’s audience, who are there for a deep dive, and Instagram's audience, who are there for a quick hit of entertainment or information.
Before we get into the "how," it's crucial to understand the fundamental differences in how people use these platforms. One is a search engine for video; the other is a discovery engine for visual content. This table breaks it down.
YouTube vs Instagram Video At a Glance
| Platform | Primary Content Format | Audience Intent | Optimal Video Length |
|---|---|---|---|
| YouTube | Horizontal (16:9) | Search, Learn, Entertain | 2-15+ minutes |
| Vertical (9:16) | Discover, Browse, Connect | 15-90 seconds |
Thinking about these differences is the first step. You're not just chopping up a video; you're creating a new piece of content that honors the platform it's on.
Maximize Your Reach and Effort
Let's be real—making a good YouTube video takes a ton of work. Repurposing lets you squeeze every last drop of value from that effort. Instead of starting from scratch for Instagram, you can pull a week's worth of killer clips from just one long-form video.
This strategy gets your brand in front of more people, more often. And the audiences on these two platforms overlap more than you might think. Projections show that by 2025, a staggering 76.9% of Instagram users will also be on YouTube. Posting on both platforms reinforces your message and makes your brand that much more memorable.
By repurposing, you're not just saving time; you're building a cohesive brand story that unfolds across platforms, strengthening your connection with your community wherever they choose to engage.
Drive Traffic Back to Your Main Channel
While the immediate win is great content for your Instagram feed, the long-term play is to funnel viewers back to your YouTube channel. A sharp, compelling Reel acts as the perfect trailer, getting people hooked and making them want the full story.
Practical Example: Imagine you've posted a 30-second clip from a detailed product review. You can end it with a strong call-to-action like, "See the full breakdown and durability test—link in bio!" Suddenly, Instagram becomes a powerful discovery engine for your main content hub.
This is how you build a content ecosystem where each platform feeds the other, creating a cycle of growth. If you want to dive deeper, you can learn more about how to repurpose long videos into engaging short clips with AI and make this whole process even faster.
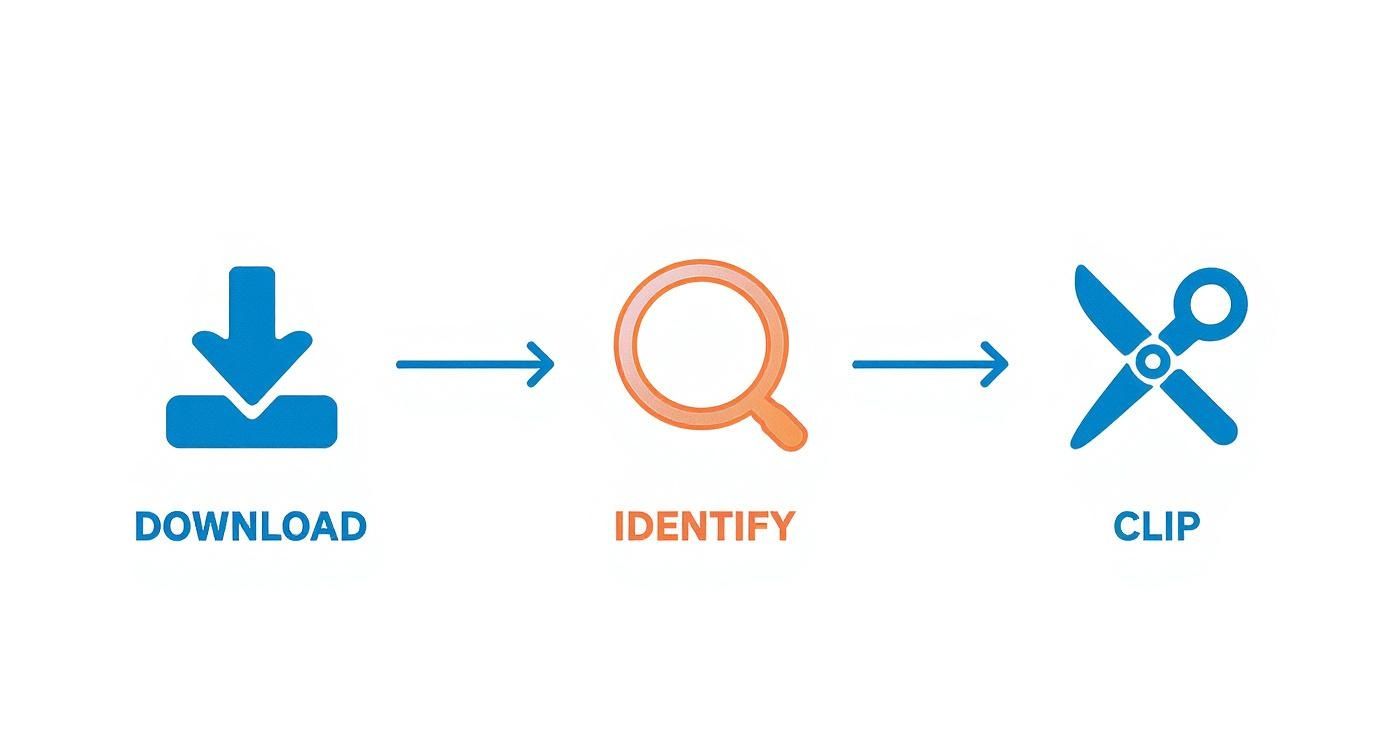
Finding the Perfect Clip in Your YouTube Video
Alright, so you have a great YouTube video. The first step in getting it onto Instagram isn't about software or aspect ratios—it's about finding the right raw material. You're looking for that one killer, standalone moment in your long-form video that can grab someone's attention in 90 seconds or less.
The goal here isn't just to slice out a random segment. You need to identify a "micro-story" that hooks viewers from the very first frame.
Think of your YouTube video as a gold mine. You're not trying to move the whole mountain; you're just looking for a few valuable nuggets. This means you have to re-watch your own content with a fresh set of eyes, specifically listening for moments of high emotion, a surprising reveal, or a game-changing takeaway. Remember, a staggering 85% of videos on social media are watched with the sound off, so moments with strong visual cues are just as crucial.
What Makes a Clip "Instagram-Worthy"?
Let’s be honest: not every part of your YouTube video is going to work on Instagram. That slow, methodical intro that sets the scene perfectly on YouTube? It’s a scroll-stopper (and not in a good way) on Reels. You need a clip that’s totally self-contained and either delivers value or sparks curiosity immediately.
Scan your video for moments that fit one of these molds:
- The "Aha!" Moment: A single, powerful tip, a surprising statistic, or a clear conclusion that gives the viewer an instant win.
- The Punchline: A funny outtake, a witty comment, or a genuinely shocking reaction that gets an emotional response.
- The Visual Hook: A slick time-lapse, a dramatic before-and-after shot, or something oddly satisfying to watch (like icing a cake perfectly).
- The Bold Claim: A controversial opinion or a strong statement that practically begs people to jump into the comments.
The best clips don't need the context of the full video to make sense. They stand strong on their own and make the viewer feel like they learned something or were entertained in just a few seconds.
A Practical Example in Action
Let's say you run a tech review channel and just posted a 15-minute deep dive on a new smartphone. Instead of just grabbing the unboxing sequence, you scrub through the video looking for that "Instagram-worthy" nugget.
Bingo. You find a 45-second clip where you perform a durability test. The phone unexpectedly survives a drop that its biggest competitor completely failed. That's your clip.
It’s got suspense, a clear visual outcome, and a surprising result. That single moment is way more compelling than a boring summary of specs. You can easily turn it into a Reel with a caption like, "I did NOT expect this… full drop test on our channel now!" This is a classic example of video clipping—isolating the most impactful part of a longer video. If you want to get into the weeds on editing lingo, our guide explains the nuances between video clipping, cutting, and splitting.
This strategic thinking turns a simple repost into a powerful promotional tool. Now that you've identified your golden clip, it's time to get the actual video file ready for editing.
How to Edit Your YouTube Clip for Maximum Instagram Impact
Alright, you’ve picked out the perfect golden nugget from your YouTube video. Now comes the fun part: turning that horizontal clip into a vertical masterpiece that stops the scroll on Instagram.
Here’s the thing: just slapping a 16:9 video into a 9:16 frame with big black bars is a dead giveaway. It practically screams "I didn't make this for you," and viewers will swipe away in a heartbeat. The real goal is to make your clip feel like it was born and raised on Instagram, not just visiting from another platform.
This is all about respecting the viewer's experience. You want your content to blend in seamlessly with the native Reels and Stories they’re already watching.
Starting with these first steps ensures you're not trying to polish a low-quality file or an uninteresting segment. You've got to have a solid foundation before you start building.
To help you keep track of the different formats, here's a quick reference table for Instagram's video specs.
Instagram Video Format Specifications
This table breaks down the essential technical details you'll need for each video placement on Instagram. Getting these right is the first step to making your content look professional and platform-native.
| Placement | Aspect Ratio | Max Length | Key Features |
|---|---|---|---|
| Reels | 9:16 (vertical) | 90 seconds | Full-screen, immersive, designed for discovery. |
| Stories | 9:16 (vertical) | 60 seconds per slide | Disappears in 24 hours, highly interactive. |
| Feed | 4:5 (portrait) | 60 minutes | Appears in the main feed, more permanent. |
While you can technically post a 1:1 square video to the feed, the 4:5 ratio is my go-to because it simply takes up more screen real estate, giving you a better chance to grab attention.
Reframing for Vertical Screens
The single most critical edit you'll make is changing the aspect ratio. Instagram is a vertical-first universe, and your horizontal YouTube clip needs to be thoughtfully adapted.
When you crop to 9:16 for Reels or 4:5 for a feed post, your main subject might get awkwardly chopped out of the frame. Don't just drag the crop box to the center and call it a day.
You have to actively reframe the shot. This is where your editor's eye comes in. If you're on camera, make sure your face stays centered and well-composed in the new vertical frame. If you're showing off a product, that product needs to be the star. Sometimes, this means you’ll need to animate the frame’s position to follow the action, keeping the focus exactly where you want it.
Adding Captions and Native Elements
Let's be real: a huge percentage of people watch videos with the sound off. This makes burned-in captions an absolute necessity. They're your secret weapon for hooking someone in those crucial first three seconds.
Bold, dynamic captions that appear word-by-word are more than just text. They create a visual rhythm that pulls the viewer through the video, keeping their eyes glued to the screen even in complete silence.
This is your chance to make that YouTube clip feel like a premium Instagram Reel. Don't settle for boring, default subtitles. Use an editing tool that lets you customize the font, animate the text, and use brand colors. We go deep on this topic in our guide on the best ways to add subtitles to short videos.
To really sell the "native" feel, sprinkle in a few other elements:
- A Progress Bar: A simple, thin line that moves across the bottom or top can subconsciously encourage people to stick around until the end.
- A Punchy Headline: Add a text overlay at the top with a hook like, "My Biggest Marketing Mistake Ever."
- Emojis or Stickers: Use them wisely to add a dash of personality or emphasize a key point.
These little touches transform your video from a simple repost into something that feels intentionally crafted for Instagram.
Practical Example:
Say you’ve clipped a 60-second chat from a two-person podcast on YouTube. The original shot is wide, showing both speakers.
To make it shine on Reels, you could:
- First, set your project to a 9:16 aspect ratio.
- Instead of just cropping in, create a vertical split-screen layout, placing one speaker above the other.
- Add big, animated captions at the bottom that highlight the dialogue as it happens.
- Throw a catchy headline at the top: "The #1 Myth About Starting a Business."
Suddenly, a static conversation becomes a dynamic, engaging video perfectly suited for the platform. You haven’t just reposted; you’ve truly repurposed.
How to Publish Your Video for the Best Results
https://www.youtube.com/embed/rGJGmTIS5L0
You’ve got the perfect clip edited and ready to go. Don't fall at the final hurdle. The way you actually publish your video on Instagram is just as important as the editing itself.
A brilliant video with a lazy caption and no strategy is doomed to fail. On the other hand, a thoughtful publishing plan can make a good clip go viral. Think of your video as the hook; the caption and hashtags are what reel your audience in. It’s time to stop just uploading and start publishing with a purpose.
Write a Caption That Sparks Conversation
Your caption is your one-on-one conversation with the viewer, so don't throw it away with a generic line like, "New video clip!" This is your chance to add context, pose a compelling question, or tell a tiny story that the video only teases.
The first line is everything. It's what people see before they decide whether to tap "more." Make it irresistible by opening with a bold claim or a question that makes them stop scrolling.
A great caption doesn't just describe the video; it starts the conversation the video is meant to inspire. Your call-to-action is the final step, guiding that conversation toward a specific business goal.
Let's say your clip is a 30-second highlight from a YouTube tutorial on baking sourdough. A killer caption would look something like this:
Practical Example: Compelling Caption and CTA
"Is your sourdough starter always failing? Here’s the one mistake almost everyone makes. 🥖 After you watch this, tell me in the comments what your biggest baking struggle is! The full, in-depth tutorial is live on my YouTube channel now—hit the link in bio to master your loaf."
This caption nails it for three reasons:
- It grabs attention by touching on a common pain point.
- It directly asks for engagement with a question.
- It gives a crystal-clear call-to-action (CTA) that drives traffic back to your YouTube channel.
Develop a Smart Hashtag Strategy
Hashtags are how new people find your content. But just slapping #video or #youtube on your post is a wasted opportunity. The key is to use a strategic blend of hashtag types to cast a wide but targeted net.
I like to think of it as a pyramid:
- Broad/Popular (1-2): These are the high-traffic tags like
#bakingor#contentcreator. They give you an initial, quick burst of visibility. - Niche-Specific (3-5): Get more targeted with tags like
#sourdoughbakingor#videomarketingtips. This is how you connect with a dedicated, highly-interested audience. - Branded (1-2): Create a unique tag for your brand, like
#YourBrandBakes. This helps build a community and makes it easy to find user-generated content later.
This balanced approach helps you reach a broad audience while ensuring you’re also getting in front of the right people—the ones most likely to become loyal followers.
The data absolutely supports focusing on short-form video. According to recent studies, Instagram Reels from influencers get an average engagement rate of 2.08%. That completely eclipses traditional video posts, which are stuck down at just 0.42%. It’s clear that repurposing YouTube content into dynamic Reels is the best way to win on the platform. You can discover more insights about Instagram engagement on Sprout Social.
Navigating Copyright and Platform Rules
This is the part so many people skip, and it's a huge mistake. Getting this wrong can lead to muted videos, copyright strikes, and in the worst-case scenario, a suspended account.
The rules around content, especially music, aren't the same everywhere. A song that’s perfectly fine on your YouTube video might not be cleared for use on Instagram. The licenses simply don't transfer between platforms.
That popular song you licensed for your YouTube upload? It will almost certainly get your Reel flagged or muted. Meta has different agreements with music labels, and repurposed videos are constantly flagged for these audio violations. It’s a frustrating problem, but thankfully, it's an easy one to avoid.
The Smartest Audio Strategy
Your safest bet is to completely remove the original licensed music from your YouTube clip before you do anything else. Export a clean version that only has your voice, dialogue, or any natural sound effects from the shoot.
Then, when you upload that silent clip to Instagram, you can add new music directly from Instagram's own library. This move is brilliant for two reasons:
- You're 100% compliant with the rules. There’s zero risk of a copyright strike when you use audio that Instagram provides you.
- You can tap into trending sounds. Using a popular audio track is one of the best ways to get your Reel in front of a new audience and signal to the algorithm that your content is relevant.
Think of it this way: your visuals are what make the content valuable, but the audio is what helps it get discovered. Swapping in a trending sound gives your high-quality YouTube clip a fighting chance to pop off in a completely new ecosystem.
A Quick Word on Fair Use
"Fair use" is a term I hear thrown around a lot, often incorrectly. Many creators assume it’s a free pass to use any content as long as they aren't directly selling something. That’s a dangerous and costly misconception.
Fair use is an incredibly nuanced legal concept, not a simple rule. For most of us who are just clipping and reposting our own content, a fair use defense is nearly impossible to prove if challenged. It typically requires significant transformation, like commentary, criticism, or parody.
The simplest path is always the safest: only use content and audio you have the explicit right to use. Stick to your original footage, your own voice, and music you source directly from Instagram's library. This protects your account and makes sure all the effort you put into your video doesn't get wasted over an audio track.
Common Questions About Posting YouTube Videos to Instagram
Even with the best strategy, a few nagging questions always pop up when you start turning a YouTube video into Instagram content. Let's walk through some of the most common snags I've seen creators hit and how to get past them. Getting these details right from the start saves a ton of frustration later on.
One of the first things people ask is about taking the easy way out. Can you just slap a YouTube link in an Instagram Story and be done with it?
Can I Just Share a YouTube Link to My Instagram Story?
Technically, yes, you can use the "Link" sticker. But let me be blunt: it’s probably the worst way to get people to actually watch your video.
Think about it from a user's perspective. They’re happily scrolling through Stories, and suddenly they see a static, boring link preview. There’s zero incentive for them to stop what they're doing, leave the app, and go somewhere else. It just doesn't work.
A much, much better way to do it is to hook them first. Create a compelling 15-60 second vertical clip from your YouTube video—the juiciest, most exciting part—and upload that to your Story. Then, you can place the YouTube link sticker on top of that video. Now you're giving them a real taste of the content, making them genuinely want to click and see the rest.
What Is the Best Instagram Format for a YouTube Clip?
When it comes to pure reach and getting in front of new eyeballs, Instagram Reels are king. There's no contest. The algorithm absolutely loves them, and the full-screen, 9:16 vertical format is tailor-made for repurposing video highlights. We've seen engagement rates for Reels hit around 2.08%, which consistently outperforms other post types.
But don't ignore the other formats. A multi-slide carousel post can be a powerhouse, especially for things like tutorials or podcast clips. You can string together up to 10 minutes of video in a single feed post, which is perfect when you need a bit more time to deliver real value without sending people off-platform.
How Do I Stop My Video from Looking Blurry on Instagram?
Ah, the dreaded blurry video. This is a super common problem, but the fix is usually pretty simple. It almost always boils down to one of two things: your export settings are wrong, or the file got compressed to death when you sent it to your phone.
Here’s how to avoid it for good:
-
Export in High Quality: Always, and I mean always, export your final video in 1080p resolution. For a vertical video, that’s 1080×1920 pixels. This hits the sweet spot between crisp quality and a manageable file size.
-
Transfer Your Files the Right Way: Do not send your video file to your phone using a messaging app like WhatsApp or Messenger. They will aggressively compress it to save data, and your video quality will be destroyed in the process. Use a service like Google Drive, Dropbox, or AirDrop if you're on Apple devices. This preserves every last pixel.
Ready to turn your long-form videos into engaging social clips without all the manual editing? Swiftia uses AI to automatically find the best moments, add eye-catching animated captions, and reformat your content for Instagram. It can help you create more content up to 10x faster. Start creating with Swiftia today.