To perfectly sync audio and video, you need to align the separate tracks on your editing timeline. The classic way to do this is by matching a sharp visual cue, like a hand clap or a slate, with its corresponding spike in the audio waveform.
Why Flawless Audio Sync Is Crucial for Viewer Trust
Have you ever watched a video where the speaker's lips move just a split second before you hear their words? It’s incredibly distracting. That tiny delay, known as latency, doesn't just look sloppy—it actively chips away at viewer trust and makes your content feel amateurish.
Your audience might not consciously register a few milliseconds of drift, but their brain definitely does. It creates a subtle, jarring disconnect that can be the very reason they decide to click away.
This isn't a new problem; it’s as old as sound in cinema. Back in the mid-1920s, over 90% of major cinemas relied on live musicians whose performance was only loosely connected to the action on screen. The industry completely changed with the arrival of "talkies," which introduced standardized sound-on-film systems that locked the audio directly to specific frames. Today, that same principle is more critical than ever. Research has shown that a video-to-audio lag of just 157 milliseconds is enough for viewers to notice and become distracted.
The Psychology of Misaligned Audio
Think about a real-world example, like an expert interview you've filmed. If the audio lags behind the video, the speaker can come across as disjointed or even less credible. Our brains are hardwired to process visual and auditory information together, and when those signals don't align, it creates cognitive dissonance.
This forces the viewer's brain to work harder just to process the message, which quickly leads to mental fatigue and disengagement.
Poor audio sync sends a clear message to your audience: you didn't pay attention to the details. If you missed something this fundamental, what other corners did you cut?
Core Concepts You Need to Know
Learning how to sync audio and video properly is a non-negotiable skill for any serious creator. It really comes down to understanding a few technical concepts that are almost always the root cause of sync problems.
- Frame Rates: This is simply the speed at which video frames are displayed per second (fps). If your camera is shooting at 24 fps but your audio was recorded for a 30 fps project, they will inevitably drift apart over time.
- Audio Drift: This is that gradual, sneaky separation of audio and video tracks that happens over a long recording. It’s often caused by tiny differences in the internal clocks of your separate recording devices.
Getting your audio perfectly synced isn't just a technical checkbox; it's fundamental to creating a seamless viewing experience that keeps people watching. For a deeper dive into the nuts and bolts, you can explore a detailed guide on how to sync audio with video. And once your audio is locked in, consider checking out the best ways to add subtitles to your short videos to boost engagement even further.
Getting Hands-On: Manual Syncing with Waveforms and Slates
If you’re serious about video, getting comfortable with manually syncing your audio and video is a non-negotiable skill. It’s the bedrock of post-production and gives you absolute control over the final product. The old-school, tried-and-true method relies on a sharp, clear cue—think of a classic clapboard slate or even just a loud hand clap on camera.
That single, sharp sound is your golden ticket. On your video track, you can pinpoint the exact frame where the slate claps shut or your hands meet. At the same time, your audio waveform will show a huge, distinct spike. The whole game is just lining those two moments up perfectly on your editing timeline. It's that simple, yet that critical.
When it's off, even by a little, viewers notice. It creates a disconnect that can completely derail their experience and make your work feel amateurish.
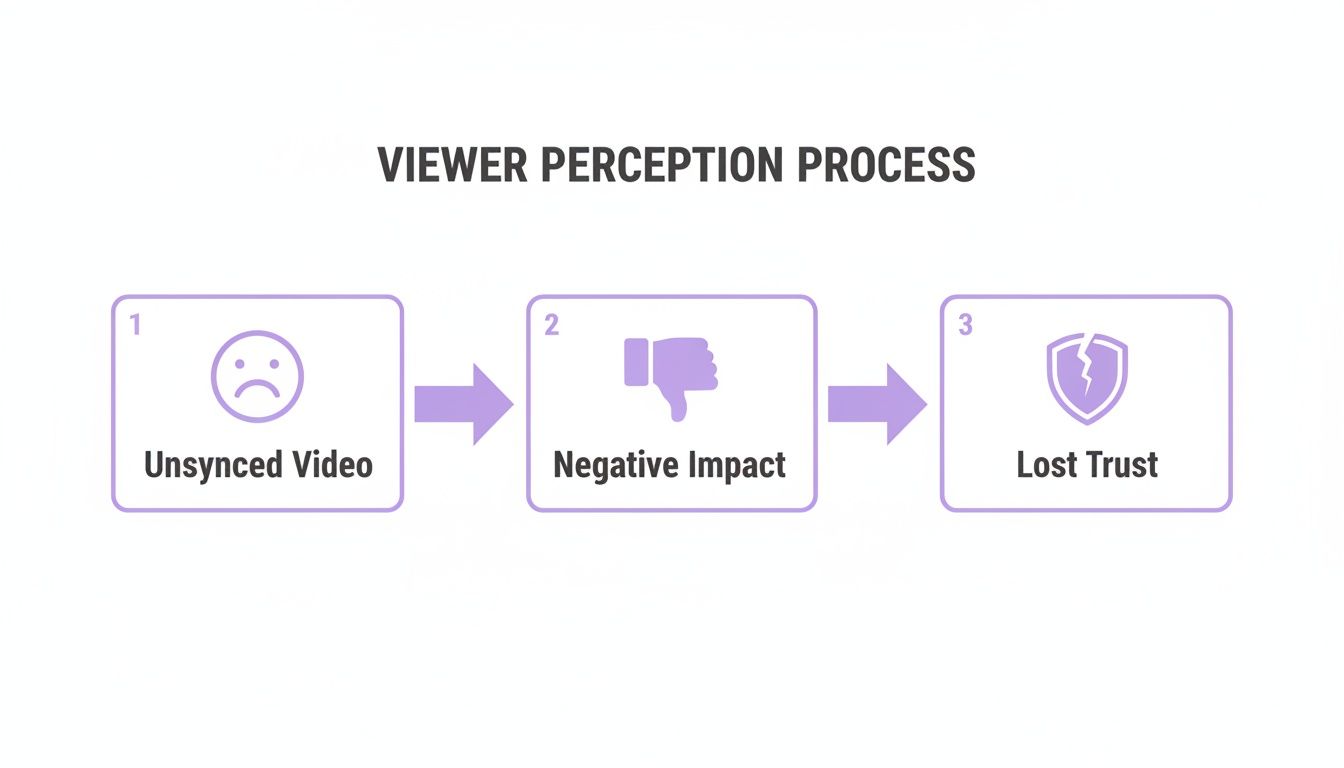
As you can see, what starts as a small technical glitch can quickly erode viewer trust and make them click away. It’s a subtle thing, but the subconscious impact is massive.
What if You Forgot the Slate?
We’ve all been there. You hit record, the interview is gold, and then you realize you completely forgot to slate the take. Don't panic. You can still get a perfect sync by matching the audio waveforms directly. This is my go-to method for interviews or podcasts where pulling out a slate would just feel awkward and disruptive.
Instead of a clap, you’re just hunting for other distinct sounds that were picked up by both your on-camera mic and your high-quality external recorder.
Look for sounds like these to act as your anchor:
- Hard Consonants: A crisp "p" or "t" at the start of a sentence often creates a nice, clear peak.
- Plosives: Those little pops of air that hit the mic (like on a "b" or "p" sound) are fantastic for syncing because they create a very sharp, visible spike.
- Accidental Noises: A cough, a laugh, someone setting a mug down—anything sharp and unexpected can be your sync point.
The trick is to zoom way, way in on your timeline. I’m talking about getting down to the individual frame level. Once you’re zoomed in, you can see the intricate shape of the sound waves. From there, just nudge your primary audio clip left or right, one frame at a time, until the peaks and valleys on both tracks are perfectly aligned.
Once they match, you can confidently mute or delete the scratchy camera audio, leaving only the rich, clean sound from your dedicated mic.
Pro Tip: Ditch the mouse for this. Learn the keyboard shortcuts in your editor to nudge clips frame-by-frame (it's often the arrow or comma/period keys). It’s infinitely more precise and will save you a ton of time.
Why Bother with Manual Sync?
It might feel a bit tedious at first, but the quality boost you get from manual syncing is huge. Viewers are incredibly sensitive to audio-visual mismatches, even if they can't quite put their finger on what's wrong. One study on video call latency found that delays as tiny as 120 milliseconds were enough to create a negative impression. Nailing a frame-perfect sync is what separates polished, professional content from the rest.
Of course, once you've mastered the manual method, you can explore tools that make life easier. For anyone focused on dialogue-heavy content, choosing from the best podcast editing software can be a game-changer, as many have features designed to simplify audio management. But at the end of the day, knowing how to do it yourself gives you the power to tackle any sync problem that comes your way, ensuring your final cut is as clean and engaging as possible.
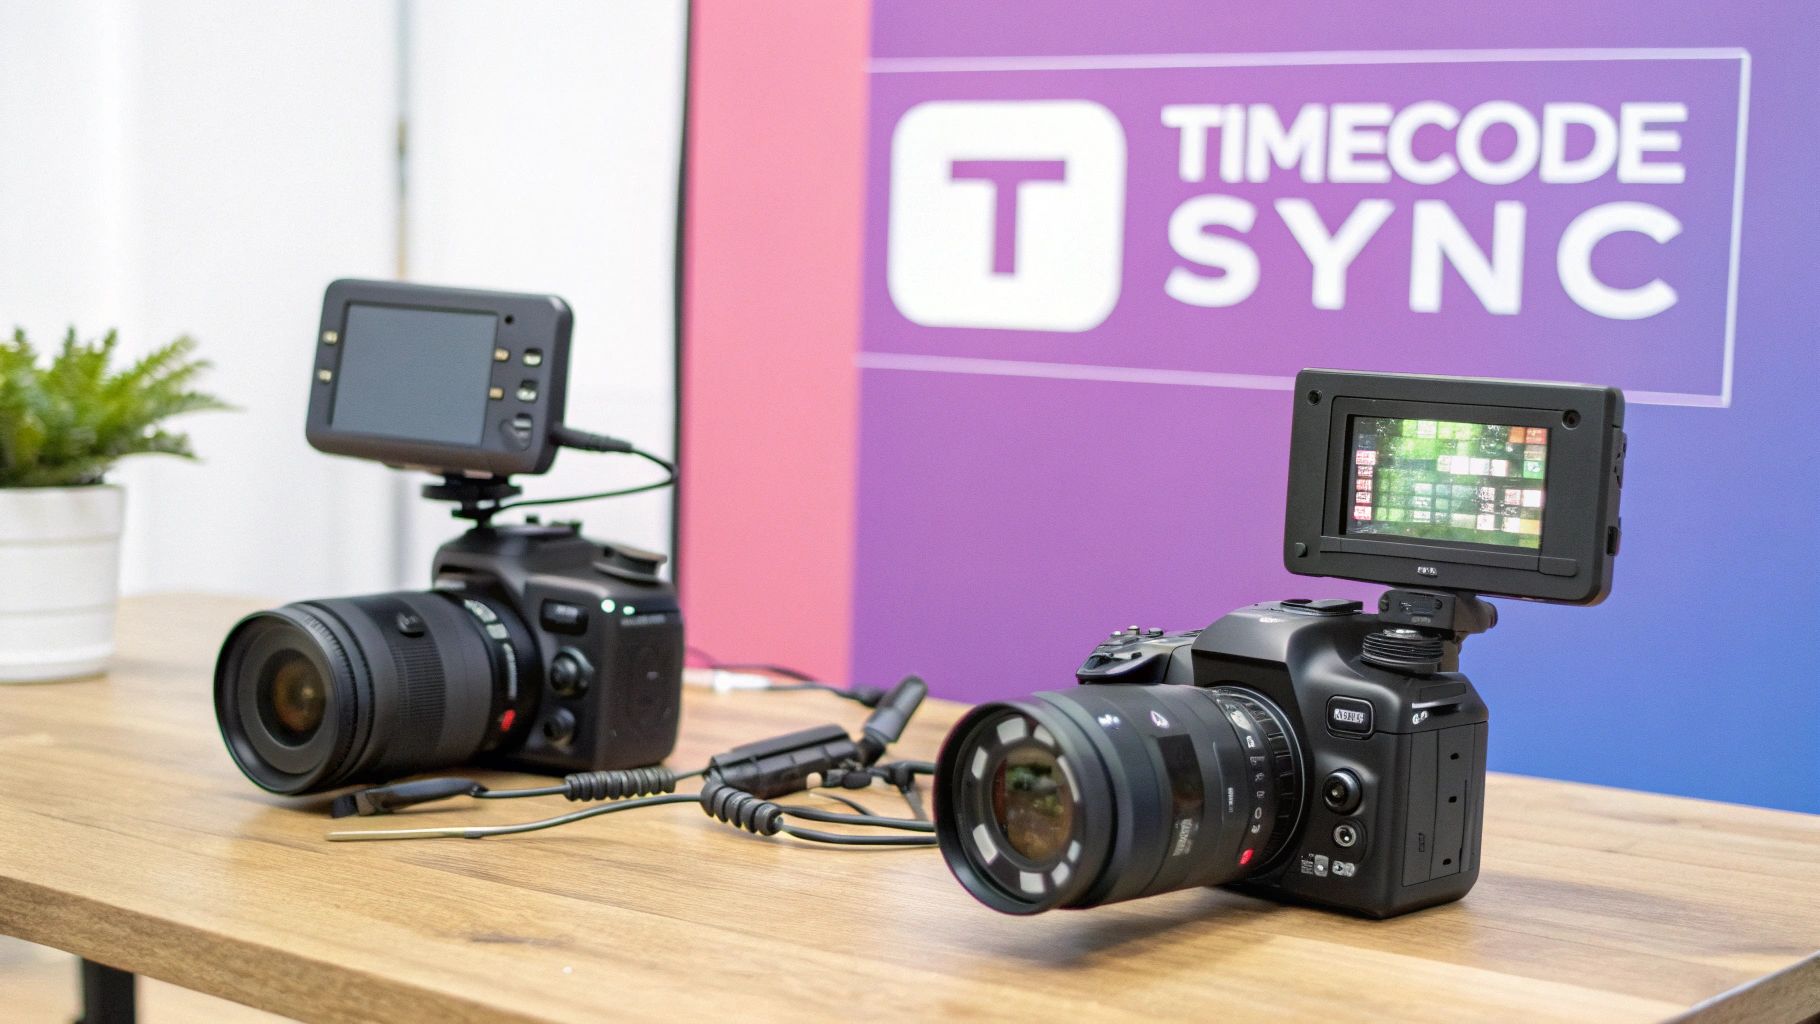
Using Timecode for Rock-Solid Synchronization
If you’re tired of lining up waveforms by hand, it’s time to talk about timecode. This is the professional’s go-to for getting a perfect sync, every single time. Think of it as a precise digital address—like a timestamp—burned into every frame of video and every fraction of a second of audio. When all your gear is running on the same clock, syncing becomes a one-click affair.
This method is a lifesaver on shoots with multiple cameras and separate audio recorders. Instead of hunting for a slate clap or a visual cue, you're simply telling your editing software to match the identical "addresses" from each device. The result? A flawless, frame-accurate sync that can save you hours in post-production.
And this isn't some new-fangled trick. The core idea of locking audio and picture has been around for decades. Back in the 1960s and '70s, film crews used pilot tones to sync separate audio tapes to film. By the 1980s, digital timecode was becoming the standard, allowing complex productions to lock multiple machines together with incredible precision. If you're curious about the old-school methods, you can explore the history of digital film sound to see how far we've come.
Pre-Production is Everything
The secret to a smooth timecode workflow is all in the setup. Getting it right happens long before you even think about hitting the record button. A few minutes of prep on set will literally save you hours of pulling your hair out in the edit suite.
Your mission is simple: achieve absolute consistency across every single device. Your A-cam, B-cam, and audio recorder must all be set to the exact same frame rate and audio sample rate. Even a tiny mismatch—say, one camera at 23.976 fps and another at a true 24 fps—is a recipe for disaster. It will cause your clips to slowly but surely drift out of sync.
A Practical Timecode Setup
So, how does this work on a real shoot? Let's imagine a classic two-camera interview with a dedicated audio person running a separate sound recorder. You'll need a timecode generator, often called a "sync box."
Here’s the basic workflow:
- Establish the Master Clock: Power on your timecode generator. You can set it to "Time of Day," which uses the actual time as the code, or "Free Run," which starts from zero and just keeps counting.
- Jam Sync All Devices: Connect the generator to your first camera to "jam sync" it. This essentially sets the camera's internal clock to match the generator's. Once it's locked, you unplug the box and do the same for the second camera, and then for the audio recorder.
- Confirm and Shoot: Now all your devices are running on their own, perfectly matched internal clocks. As long as they don't lose power, they'll stay in sync for hours.
Back in the editing room, the magic happens. You just highlight all your footage and audio from the shoot, right-click, and find the option to "Synchronize by Timecode." Your NLE will instantly line everything up on the timeline. It's that simple.
Putting in the work upfront completely changes the game. That tedious task of manually syncing clips is gone, replaced by an automated process that takes seconds. It's easy to see why timecode is the non-negotiable standard for professional productions.
Troubleshooting and Fixing Audio Drift
There’s almost nothing more maddening in the edit bay than realizing the audio that was perfectly in sync at the start of a clip is now noticeably off by the end. This slow, creeping separation is known as audio drift, and it's a common headache for editors, especially when dealing with footage from certain cameras.
The usual suspect is a Variable Frame Rate (VFR). Your smartphone, for example, almost certainly records in VFR. To save processing power, it adjusts the frame rate on the fly—speeding up for action and slowing down for static shots. While it’s a clever bit of engineering for the device, it creates absolute chaos for editing software that expects a stable, predictable timeline. The result? A gradual, frustrating misalignment when you try to sync up your audio and video.
The Pre-Edit Fix: Taming Variable Frame Rates
The most effective way to beat VFR-induced drift is to deal with it before you even import your clips. The entire goal here is to convert that unpredictable VFR video into a solid Constant Frame Rate (CFR) file. This gives your editing software a stable foundation to build on.
Let's imagine you just wrapped a 45-minute podcast interview recorded on your iPhone. At the five-minute mark, everything is spot on. But by minute 40, you notice the guest’s words are landing a full half-second after their lips move. It’s a classic case of drift.
Before you even think about starting your edit, run that footage through a tool like HandBrake. It's free, powerful, and a lifesaver for this exact problem. Just load your video file, head to the "Video" tab, and make sure the "Constant Framerate" option is selected. The software re-encodes the video, forcing every second to have the exact same number of frames. This one step can save you hours of headaches down the line.
A study on video call perception found that audio-video delays as small as 120 milliseconds were enough to create a negative impression. By the end of a long VFR recording, drift can easily blow past that number. A pre-emptive fix isn't just a preference; it's essential for professional quality.
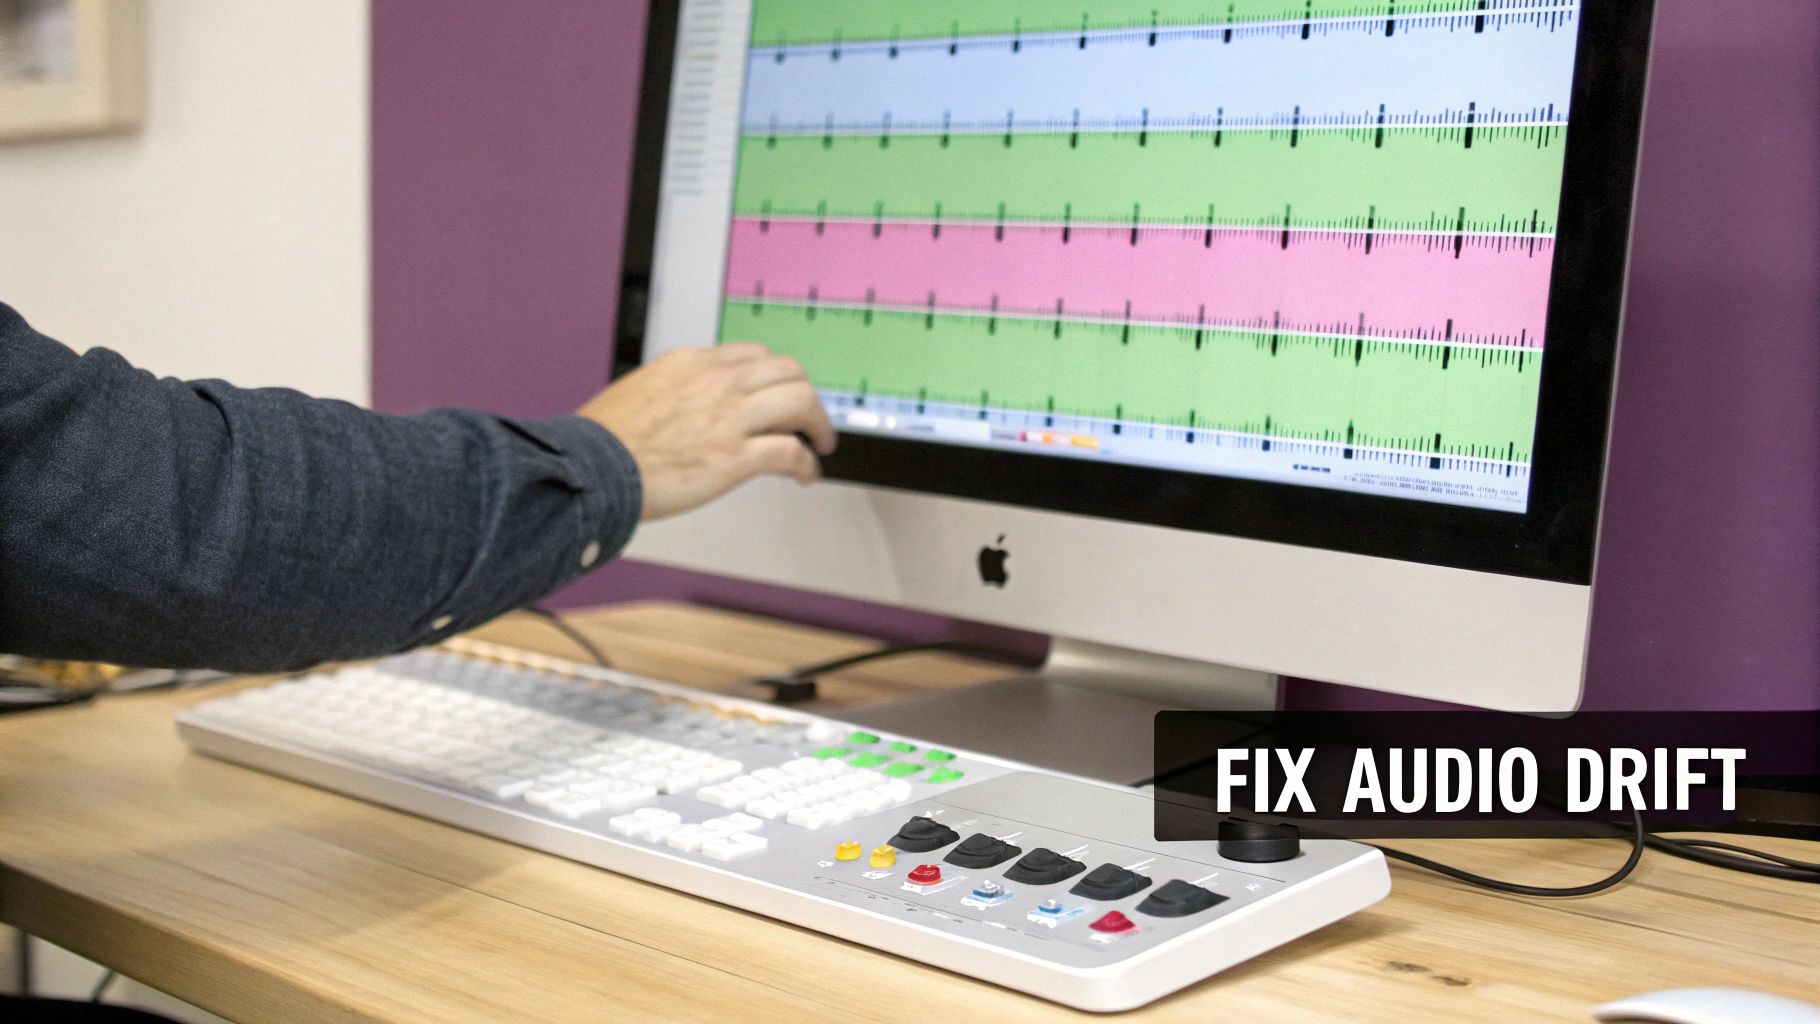
In-Editor Solutions for Minor Drift
Sometimes, drift isn't so dramatic. It can be caused by tiny clocking differences between two separate devices, like a professional camera and an external audio recorder. Even if both are set to the same frame rate, their internal timers might be off by a minuscule amount, leading to a few frames of drift over a long recording.
In this scenario, your NLE’s rate stretch tool is your best friend.
Here’s how you can use it to fix slightly drifted clips:
- Sync the Start: First, get the beginning of your video and external audio clips perfectly aligned. A slate clap or a clear waveform peak works great.
- Find the End Point: Now, jump to the very end of your clips. You’ll probably see that the audio waveform from your external recorder is now slightly longer or shorter than the camera’s audio waveform.
- Stretch to Fit: Grab the rate stretch tool (the 'R' key in Adobe Premiere Pro) and simply drag the end of the longer audio clip to match the end of the shorter one. This subtly speeds up or slows down the audio—often by a tiny fraction, like 99.8%—without messing with the pitch.
This small adjustment essentially recalibrates the audio's timing to match the video's exact length, completely eliminating the drift across the entire clip.
Common Audio Sync Issues and Solutions
When you run into a sync problem, it almost always falls into one of a few categories. This quick reference table can help you diagnose what's going on and figure out the fastest way to fix it.
| Problem | Common Cause | Recommended Solution |
|---|---|---|
| Gradual Drift | Variable Frame Rate (VFR) from phones/screen recordings. | Convert video to Constant Frame Rate (CFR) using a tool like HandBrake before editing. |
| Abrupt Sync Loss | Dropped frames during recording. | Manually cut and nudge the out-of-sync section back into place. |
| Slight End-of-Clip Drift | Minor clock differences between separate devices. | Use your editor’s Rate Stretch tool to subtly adjust the audio clip's speed to match the video. |
Ultimately, whether you fix it in pre-production with a conversion or in the edit with a tool, understanding why your audio is drifting is the key to solving it efficiently and maintaining a professional-looking final product.
Using Automated Tools to Speed Up Your Workflow
Knowing how to sync audio by hand is a fundamental editing skill, no question. But in the real world, with tight deadlines and mountains of footage, manual syncing can become a serious bottleneck. When you're facing hours of material, automation stops being a luxury and becomes an absolute necessity. For most of us, that journey starts right inside our editing software.
Modern NLEs (non-linear editors) like Adobe Premiere Pro and Apple's Final Cut Pro have pretty powerful, built-in sync functions. In just a couple of clicks, these tools analyze the audio waveforms from your camera and external recorder, hunt for matching patterns, and snap the clips together on your timeline. It's a lifesaver, turning what used to be a tedious, minute-by-minute chore into a task that's over in seconds.
Moving Beyond Basic Sync
The real game-changer in how we sync audio video files is happening with specialized AI-powered platforms. These aren't just one-trick ponies. They take that basic sync function and bake it into a much smarter, more complete post-production workflow.
Picture this: a content team just wrapped up a long, multi-camera podcast recording. The old way involved manually sorting, syncing, and then scrubbing through hours of footage. Now, they can just upload all the raw video and audio files to an AI platform. From there, the system kicks into high gear, handling several jobs at once:
- Batch Synchronization: It intelligently matches and syncs every video angle with the high-quality audio track, juggling tons of files simultaneously.
- Instant Transcription: At the same time it’s syncing, the AI generates a full, time-stamped transcript of the entire conversation.
- Key Moment Identification: By analyzing the transcript, the platform can flag interesting quotes, important questions, or topic shifts, basically handing you a highlight reel on a silver platter.
This is where the real advantage becomes obvious. Your NLE syncs the files and then its job is done. A true AI platform uses that sync as the launchpad for a full content repurposing system. The synced transcript becomes a searchable, interactive document. You no longer have to scrub through footage to find a specific moment—you just search for it. This is a massive time-saver; some studies show editors can spend up to 50% of their time just organizing media. Automation crushes that number.
It's about shifting from a single-task tool to an end-to-end solution. Instead of just fixing the sync problem, these platforms solve the entire post-production problem, from media management all the way to creating final clips.
A Real-World AI Workflow
Let's say a marketing agency needs to pull ten short-form videos from a one-hour client webinar. The traditional way would mean an editor has to manually sync the files, watch the whole thing back to find good moments, and then start cutting. That's easily a full day's work.
With an AI platform, the whole process is different. The editor uploads the webinar video and its separate audio file. Within minutes, they get back a perfectly synced video married to a complete transcript. Now, they can just search the text for keywords like "new feature" or "key takeaway" to instantly jump to those exact spots and start making clips.
This capability isn't just for new content, either. With tools that can convert a YouTube video to text, you can breathe new life into your entire back catalog. What once took a day now takes an hour. That's a huge return on your time and effort.
Common Audio Sync Questions, Answered
Even with the best prep, you're bound to run into questions when you're deep in an edit, trying to get your audio and video files to play nice. Getting the right answers quickly can be the difference between a smooth workflow and a day lost to frustration. Here are some of the most common issues that trip people up.
It’s a surprisingly common problem: you line up your audio and video, and it looks perfect at the start, but slowly drifts apart over the length of the clip. It might not seem like a big deal, but research shows that even a tiny delay of 120 milliseconds is enough to sour a viewer's experience. Nailing the sync isn't just a technical detail; it's crucial for keeping your audience engaged.
What’s the Best Frame Rate to Use?
For most content you see online, sticking to a standard constant frame rate (CFR) is the way to go. Your safest bets are usually 23.976, 29.97, or 59.94 fps.
The most important thing, though, isn't which one you pick—it's that you pick the same one for everything. Before you even think about hitting record, double-check that every camera and audio recorder is locked to the exact same frame rate. Mismatched settings are the number one cause of that dreaded audio drift.
I Forgot to Slate! Can I Still Sync My Audio?
Absolutely. Don't panic. This is where waveform syncing comes to the rescue.
Inside your editing software, you’ll need to visually line up the audio waveforms from your camera and your separate audio recorder. You're looking for a sharp, loud sound that's easy to spot in both files. It doesn't have to be a clapboard; it could be a hard consonant like a 'p' or 't' sound from someone talking, a cough, or even a door slamming shut.
For example, I often sync interviews by finding a plosive sound, like the "p" in "podcast." You just have to zoom way in on your timeline and slide the clips until the sharp peaks of that soundwave are perfectly aligned. It takes a bit more patience than using a slate, but it works every time.
How Can I Fix a Video That’s Already Out of Sync?
If you've downloaded a video file and the audio is already baked in but out of sync, the culprit is almost always a variable frame rate (VFR). This is incredibly common with footage from smartphones or screen recordings.
Your best fix is to run the video through a free tool like HandBrake. You can use it to convert the file to a constant frame rate (CFR). This process basically rewrites the video's timing information, making it stable. Once you bring that newly converted file back into your editor, the drift is usually gone.
I've seen reports that some editors spend up to 50% of their time just on tedious tasks like media management and organization. Automated syncing is a huge part of cutting that time down.
Is Automated Syncing Actually Worth It?
Yes, it’s a game-changer. Most modern video editors like Premiere Pro and DaVinci Resolve have built-in features that can automatically analyze and sync your audio waveforms, saving you from having to do it all by hand.
Newer AI platforms take it a step further. The AI can sync your files, but it can also transcribe the audio and use that text data to help you find specific moments and edit your content much faster. It turns a manual chore into a seamless part of the creative process.
For a really deep look at all the different ways to get your audio and video in harmony, from manual tricks to automated tools, check out a comprehensive guide to syncing audio with video.
Ready to stop wasting time on manual editing and start creating content at scale? Swiftia uses AI to transform your long-form videos into dozens of high-impact, ready-to-post short clips in minutes. Discover how Swiftia can revolutionize your workflow.